-
Notifications
You must be signed in to change notification settings - Fork 73
Studio Tutorial: Artifact Detection
ERPLAB provides multiple ways of dealing with artifacts such as eyeblinks. First, you can use EEGLAB’s independent component analysis procedures to subtract out an estimate of the artifactual activity from the EEG (ICA-based artifact correction). Second, you can “mark” epochs that contain artifacts (artifact detection) and exclude those artifacts at the time of averaging (artifact rejection). Note that we do not ordinarily “delete” epochs with artifacts; we simply “mark” them and later exclude them.
A third option is to actually delete segments of continuous EEG containing artifacts (using the Reject Artifactual Time Segments panel). However, we do not recommend using this panel for ordinary artifacts (because it is too crude). As will be described in our ICA Tutorial, this panel is instead used to delete “crazy” idiosyncratic artifacts as a part of the artifact correction process.
The present page describes the process of marking epochs with artifacts (artifact detection). You will see how to exclude the marked epochs in the Tutorial page on averaging. We also have a brief tutorial on ICA-based artifact correction. See Chapters 8 and 9 of Applied ERP Data Analysis for a more detailed description of how to implement artifact detection and correction.
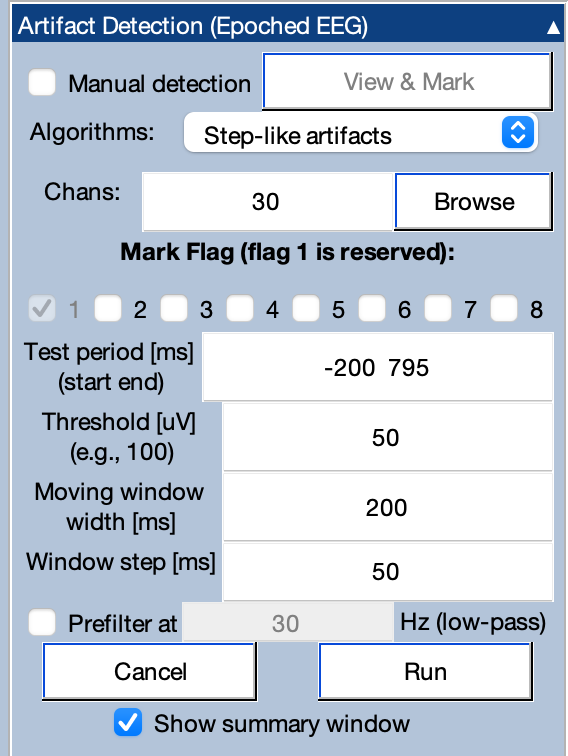
Here we are going to detect epochs with blinks in the VEOG channel (channel 30). Make sure that 6_N400_filt_elist_bins_be is selected in the EEGsets panel, and then go to the Artifact Detection panel (see screenshot). Set the Algorithm to Step-like artifacts. Click the Browse button to find the VEOG channel and select it so that 30 appears in the Chans field. Note that you can scan multiple channels for an artifact simultaneously by putting multiple channel numbers in this field.

The Moving window width should be set to 200 ms, with a Window step of 50 ms. The Threshold should be set to 50.
This algorithm will scan the selected channel(s) in each epoch, sliding a moving window across the epoch. For each window position, it will calculate the difference in mean voltage between the first half and the second half of the moving window. If this difference exceeds the threshold, the epoch will be marked. See the manual page on artifact detection for more details.
Click Run, and you will then see the standard window for naming the EEGset that will be created by this operation. Click Okay to confirm the name of the new EEGset, which adds _ar to the end of the previous EEGset name.
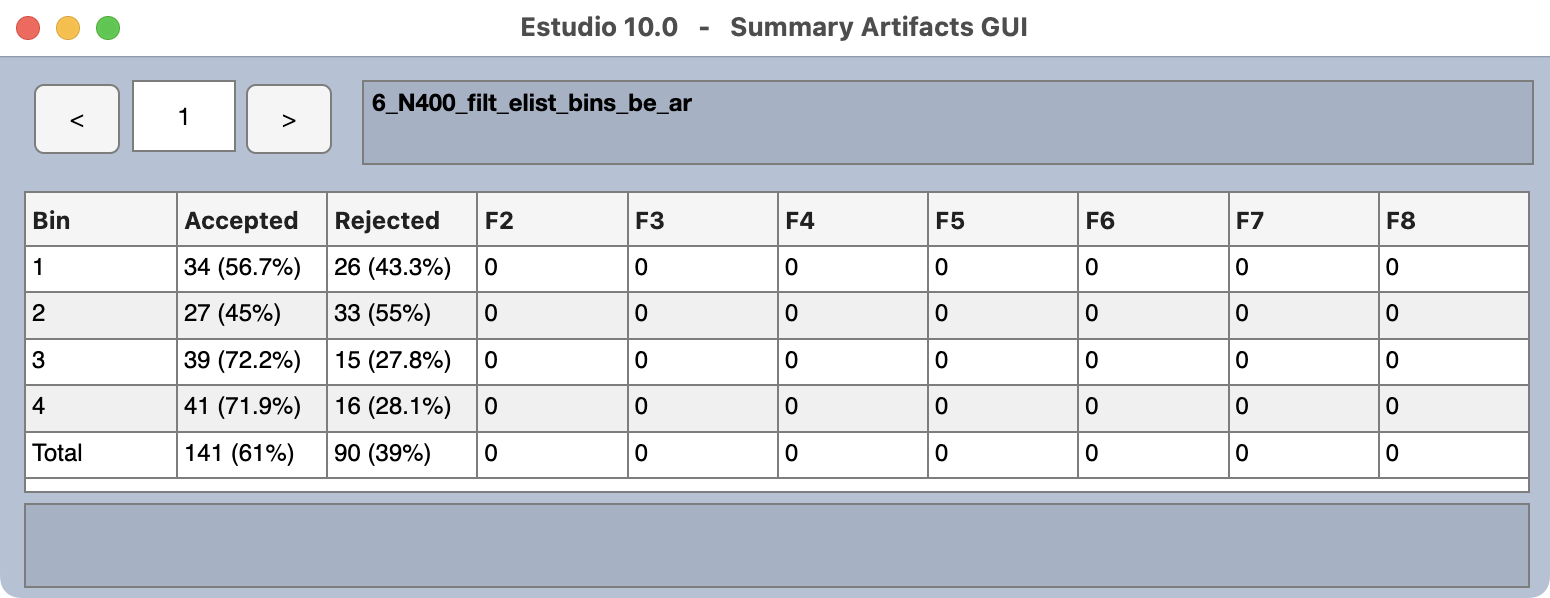
The artifact detection routine will then run, and when it finishes you will see a window with a summary of the number and percentage of epochs that were marked. For example, you can see that Bin 1 had 26 trials marked for rejection (43.3% of the epochs for that bin). If you scroll to the bottom of the table, you’ll see that a total of 39% of trials were marked for rejection across the four bins.

You can now close the window with the artifact summary. If you want to see this summary again later, you can select the EEGset in the EEGsets panel and click the Artifact Summary button in the Artifact Info & Tools panel. This panel also allows you to clear the artifact marks.
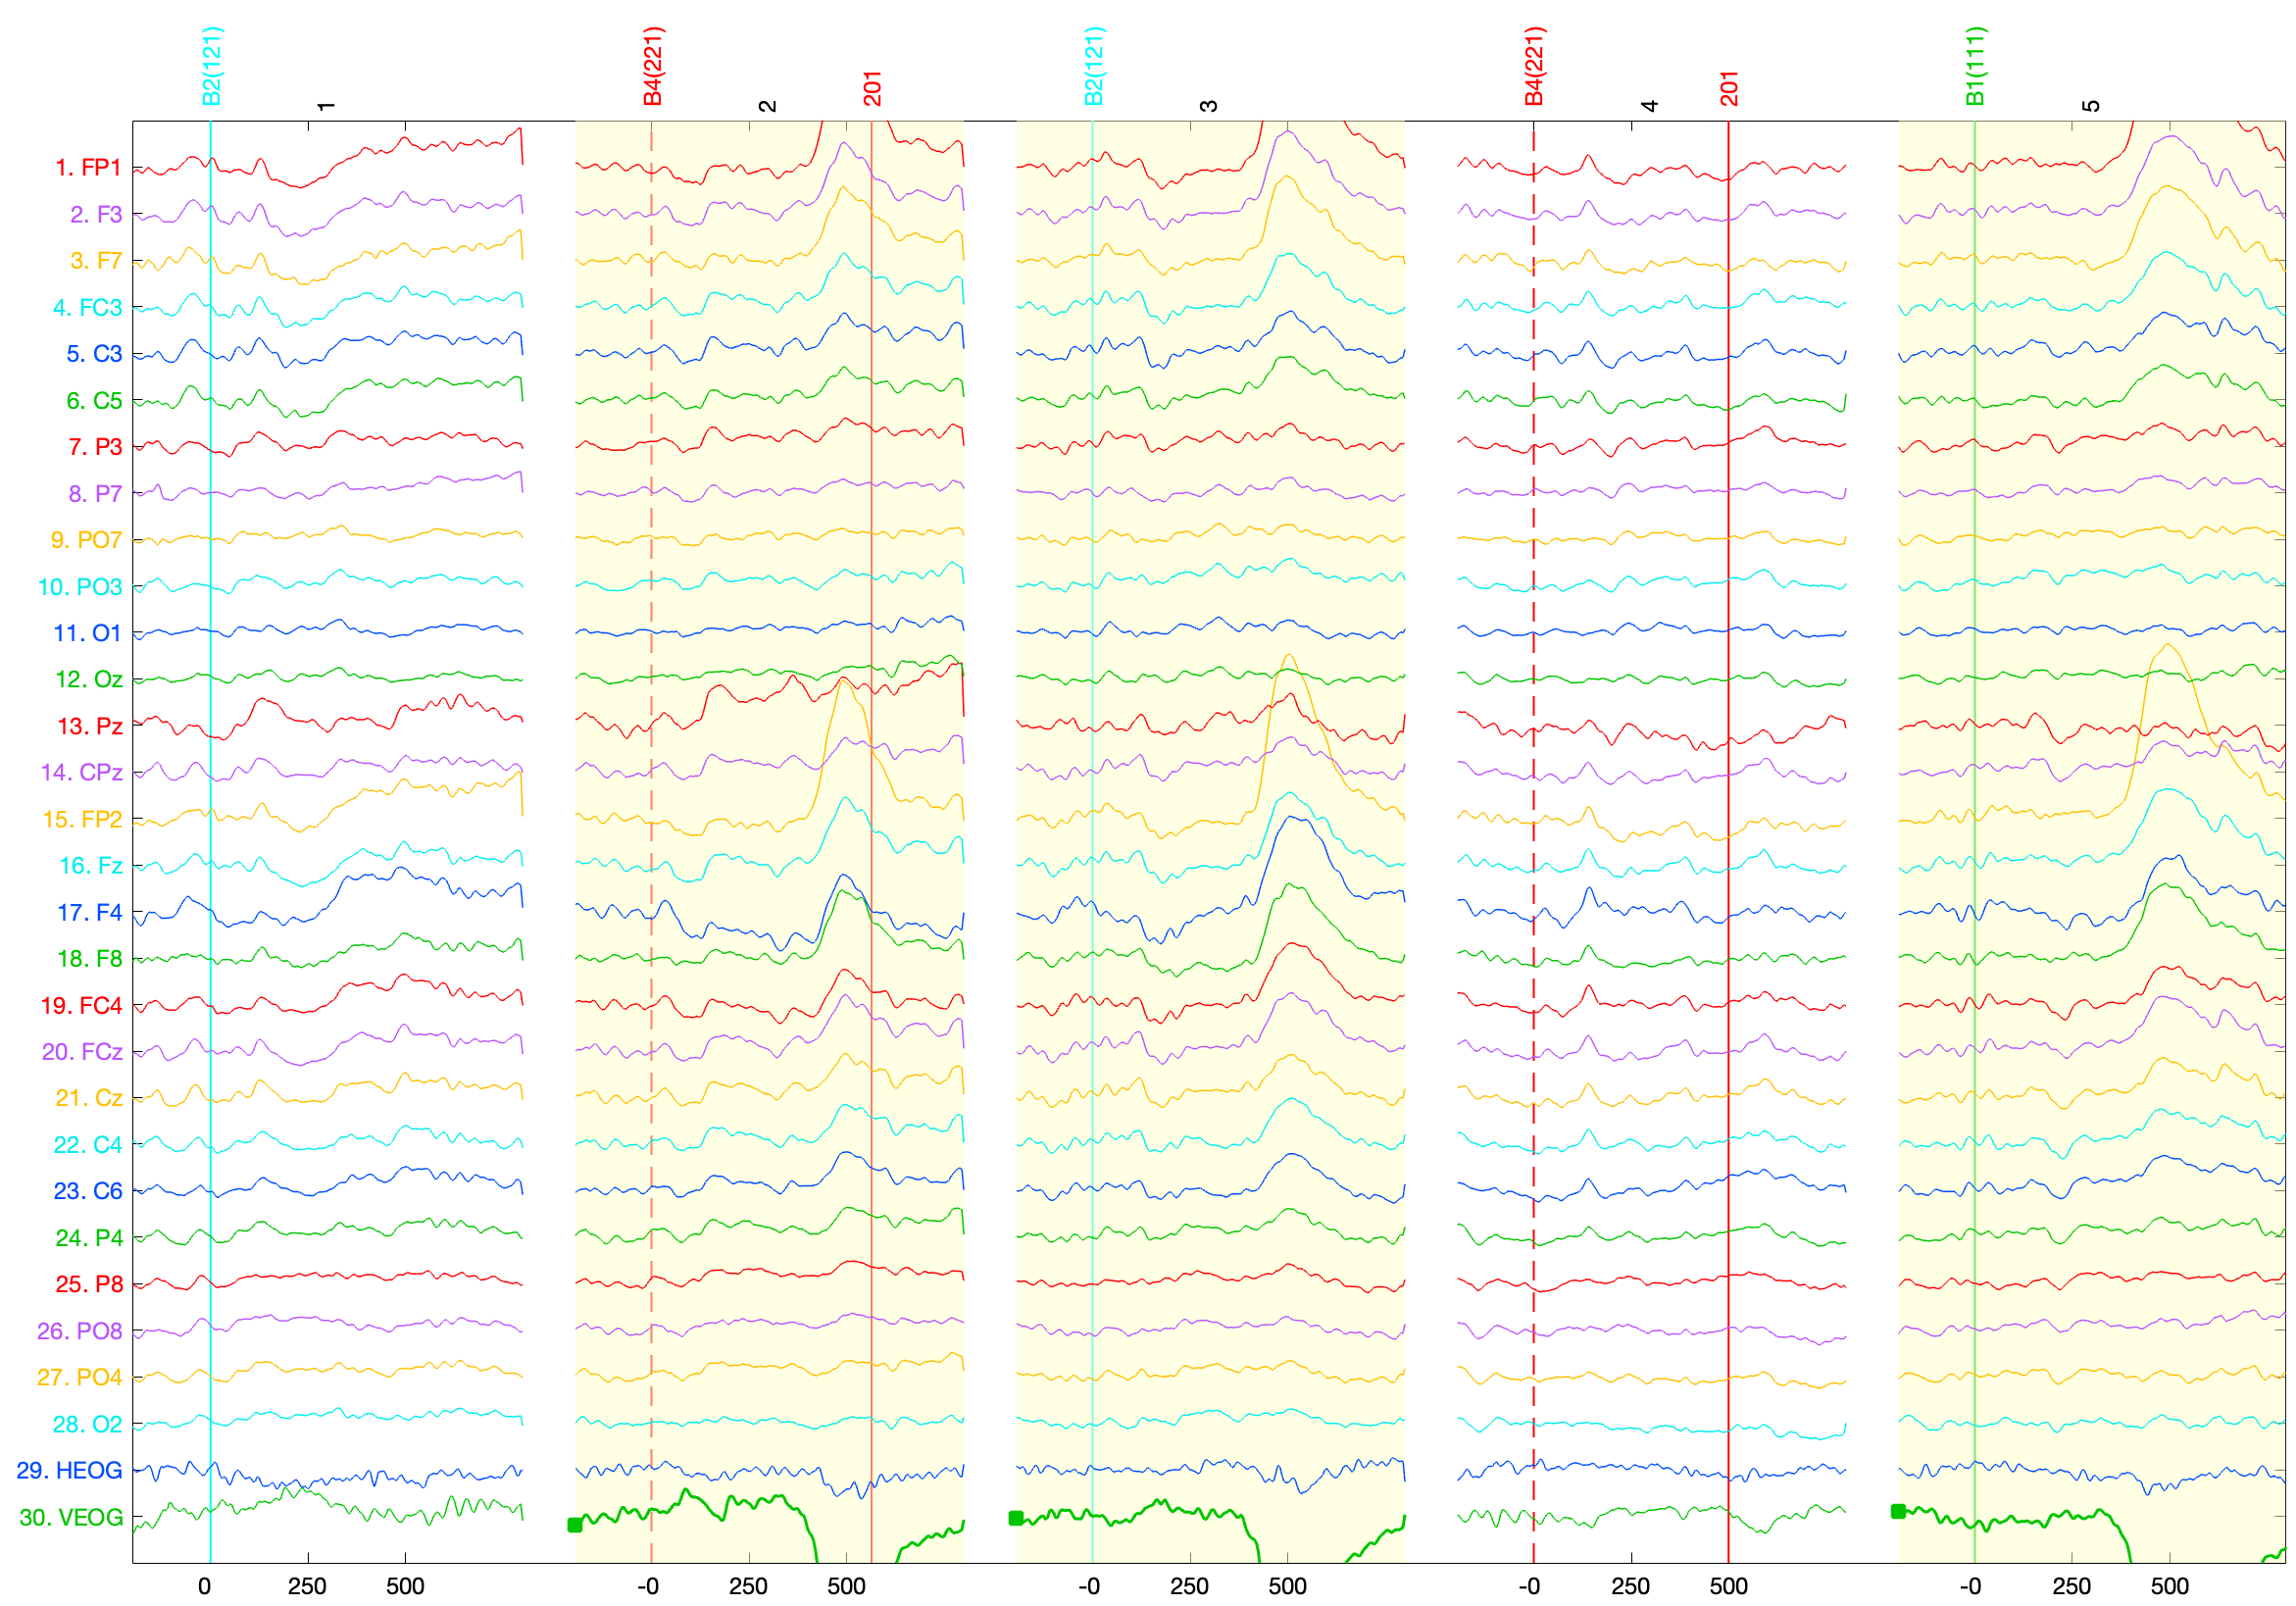
The new EEGset (6_N400_filt_elist_bins_be_ar) will now be visible in the EEGsets menu, and the data will be plotted in the plot region. Epochs 2, 3, and 5 have a light yellow background, which indicates that these epochs have been marked for rejection (see screenshot). In addition, the VEOG waveform is drawn with a thicker line in these epochs (with a dot at the beginning of the epoch), which indicates that this channel was responsible for the artifact mark.

If you keep scrolling through the data, you’ll see that many other epochs have also been marked.
The marks are stored in the “a_flags” field in the EventList. You can see which events are marked in the EventList by going to the EventList panel and clicking the View button. As shown in the screenshot below, events with non-zero values in the a_flags field are marked in yellow. Note that the first event marked with an artifact is item 4, bepoch 2. The item number indicates the position of the event code in the original set of events, whereas the bepoch number indicates the epoch number. Epoch #2 is the first epoch marked with an artifact, but this was the fourth event code in the original continuous data.

| Previous Page | Next Page | 🏠 |
|---|---|---|
|
Averaging (ERPs) |
Home |