-
Notifications
You must be signed in to change notification settings - Fork 22
Deploying on Slack
This article details how to deploy a Xatkit bot on a Slack workspace using the GreetingsBot as an example.
Objectives
- Create a Slack app for your bot
- Learn how to configure Xatkit to receive and send messages from Slack
Requirements
- A Slack account with administrative rights on the workspace where the bot is deployed
- A local Xatkit installation
The GreetingsBot we defined in the previous parts of the tutorial relies on the ChatPlatform to receive user messages and send replies. In the previous examples we did not configure the ChatPlatform, and the bot was deployed by default in a web-based interface that can be accessed at http://localhost:5000.
In this article, we will see how we can benefit from the abstraction layer provided by the ChatPlatform to automatically deploy the GreetingsBot on another messaging platform: Slack. This tutorial does not require any coding beyond the definition of some properties in the Xatkit configuration file!
Xatkit Tips: ChatPlatform implementations
The ChatPlatform is implemented by several concrete messaging platforms such as Slack, Discord, or our React-based web component. You can check the implementation list on the ChatPlatform documentation.
Our bot needs to access the Slack API to receive user messages and post answers. Slack provides a way to do it through Slack Apps, which are third-party applications that can be added to Slack workspaces.
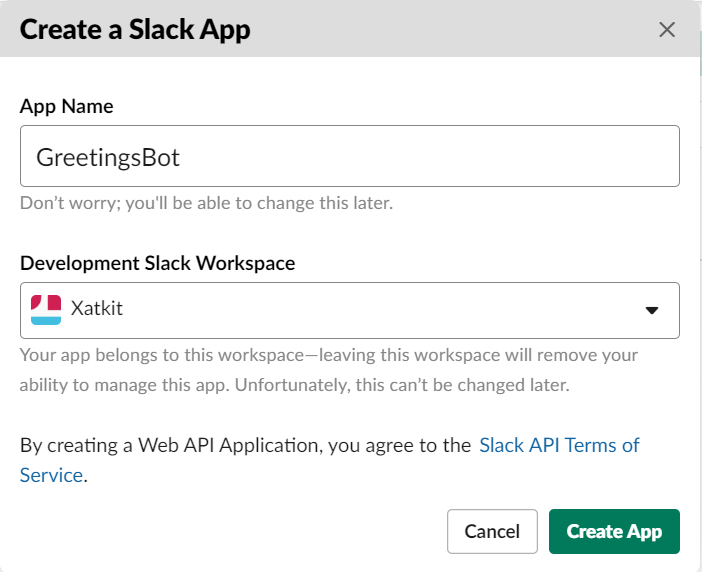
Navigate to your Slack App dashboard and click on Create New App. Slack will then ask you the name of the app and the development workspace you want to use for it.
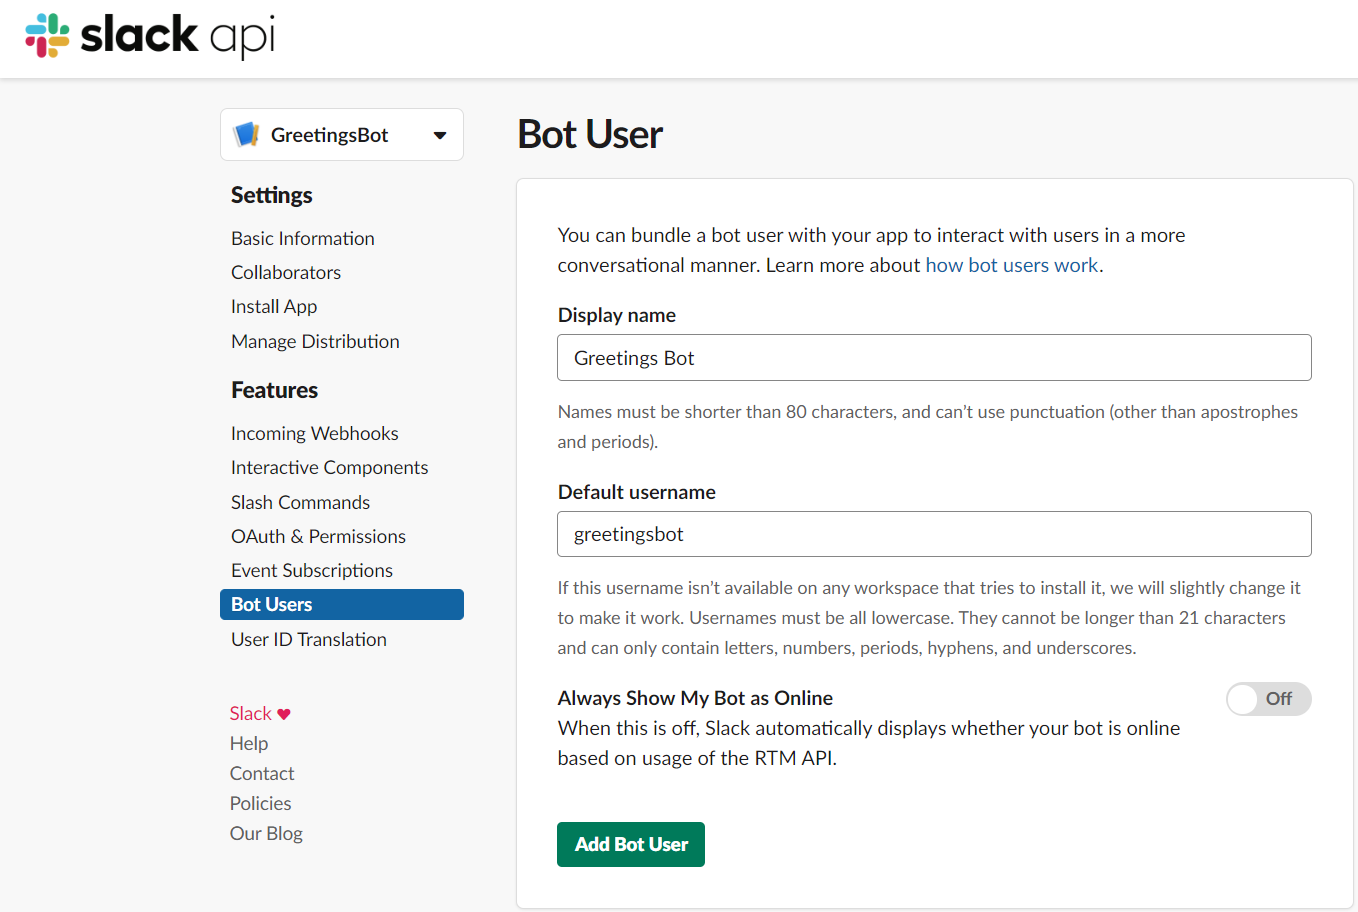
Navigate to the Bot Users tab, and press Add a Bot User. Bots are special users in Slack that have a dedicated set of permissions and scopes (you can learn more on bot users in the Slack documentation).
Edit the Display name of your application (this is the name that will be printed to users interacting with your app). You can also specify if the bot should be always shown as online, or if its status is automatically updated based on its usage of the Slack API. Press Add Bot User once your are done.
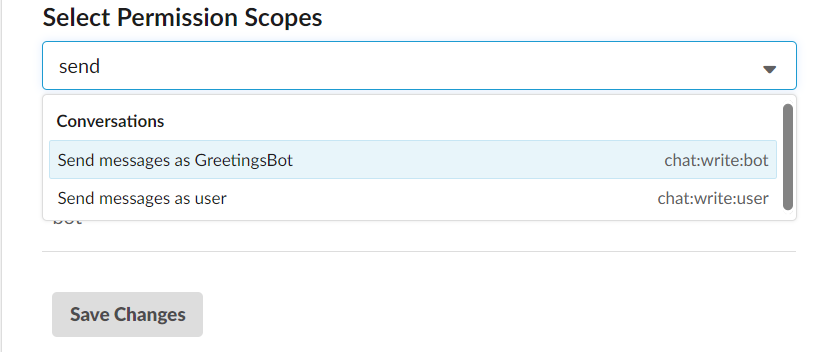
We now need to setup the permissions of our app, to do so navigate to the OAuth & Permission tab, and select Send messages as GreetingsBot in the Select Permission Scopes dropdown menu, then press Save Changes. This is required to grand your application the right to post its own messages in Slack channels. Note that advanced bots may require additional permissions to perform advanced Slack actions. You can check the SlackPlatform documentation for more information.
Finally, press Install App to Workspace at the top of the page, and select the workspace where you want to install your app. Note that you need to have permission to install new apps in this workspace.

Your app is now installed in your workspace!
The last step to do in order to deploy the GreetingsBot example on Slack is to update the configuration file to tell the Xatkit Runtime component to use Slack as a target for the ChatPlatform and provide the required credentials.
Navigate to the OAuth & Permissions tab of your Slack app, and copy the content of the Bot User OAuth Access Token. This is the access token Xatkit will use to receive and post messages.
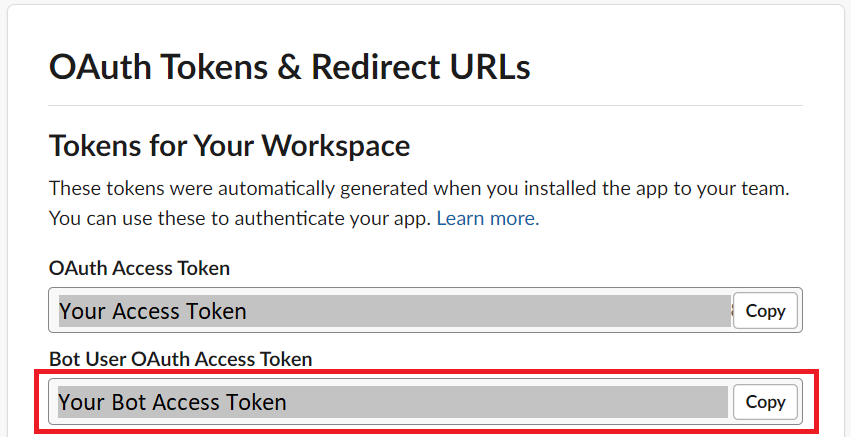
You can now open your GreetingsBot.properties file (or directly modify the Configuration object for the bot) and add the following properties to it:
xatkit.slack.token = <Your Slack Token>
xatkit.platforms.abstract.ChatPlatform = com.xatkit.plugins.slack.platform.SlackPlatform
Don't forget to delete or comment any existing ChatPlatform binding to ensure the Xatkit Runtime component uses the specified platform:
# Comment the previous ChatPlatform binding
#xatkit.platforms.abstract.ChatPlatform = com.xatkit.plugins.react.platform.ReactPlatform
The first property provides the credential token used by Xatkit to interact with the Slack API. The second property tells the runtime component to use the SlackPlatform to handle incoming inputs and post message actions instead of the abstract ChatPlatform.
Xatkit Tip: configure your SlackPlatform
The SlackPlatform documentation contains a set of options that can be used to tune the behavior of your bot (for example by only considering explicit mentions to the bot in group conversations).
We now have configured our GreetingsBot example to deploy it on Slack instead of the default web-based chat box. To test the new version of the bot just run the bto, open your Slack workspace, and start a direct message conversation with your bot.
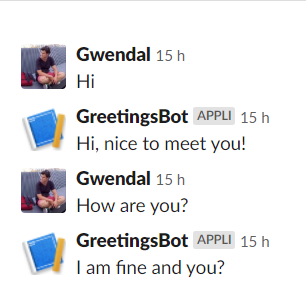
Congratulations, your bot is now deployed on Slack!
- You need to create a Slack App to deploy your bot in Slack, and update the Xatkit configuration to provide the corresponding credentials.
-
You don't have to update your bot definition: in this article we didn't change the
.javafile thanks to the abstract ChatPlatform. The same definition is used for the web-based and Slack GreetingsBot, this means that you can easily switch from one messaging platform to another, or deploy your bot to multiple platforms! (Note that you can also switch between intent recognition engines as explained in this article)
- Getting Started
- Configuring your bot
- Integrating an Intent Recognition Provider
- Adding a bot to your website
- Deploying on Slack
- Basic concepts
- Intents and Entities
- States, Transitions, and Context
- Default and Local Fallbacks
- Core Library