Snyk: the platform developers choose to build cloud native applications securely, providing a range of developer-first security products.
This quickstart allows you deploy Snyk Monitor on an existent OKE Cluster. It optionally allows you to create a new OKE Kubernetes Cluster.
If you do not have any app to monitor and want to test, you can also deploy Snyk's goof test app.
- An Oracle Cloud Account.
- A Snyk Business or Enterprise plan.
- If the Sysdig integration is enabled, you need the Sysdig agent configured and running on the same cluster.
You can deploy directly to your Oracle Cloud tenancy using this button: follow the wizard, include your Snyk integration ID and apply.
- Locate your Snyk Integration ID from the Snyk Integrations page (navigate to https://app.snyk.io/org/YOUR-ORGANIZATION-NAME/manage/integrations/kubernetes) and copy it. The Snyk Integration ID is a UUID and looks similar to the following:
abcd1234-abcd-1234-abcd-1234abcd1234 - Optionally enter the Container Private Registry credentials if you plan to use it and scan the container images
You can also enable the Sysdig Integration. The Sysdig agent must be installed and running on the same cluster. The scripts will clone the Sysdig secret to the Snyk namespace. If the secret has a different name from default or the Sysdig is in a different namespace, enter the new name.
Remember to select "Run Apply" when creating the stack. You can also do this later by clicking the button "apply" on the stack details.
You can use Terraform scripts to apply. If you are using Terraform (locally or via CloudShell), you need to copy the file terraform.tfvars.example to terraform.tfvars and populate the necessary variables.
Now that we have some workloads running on our OKE cluster and deployed Snyk, we can analyze these for insights into:
- Issues in open source libraries.
- Base image upgrade recommendations.
- Application misconfigurations.
As well as other features critical to running a secure environment available with Snyk Container.
Login to Snyk and navigate to the Integrations menu where you will click on the Kubernetes section. Select our cluster and desired namespace (in this case these are both named goof) then click the Add selected workloads button as shown below:
Detailed instructions on adding Kubernetes workloads are available in our Documentation Pages.
Once selected, you will be redirected to the main projects page where you will find a summary of the findings grouped by project as shown below:
From this view, you can drill into each category and examine the findings. Let's start with misconfigurations of our cluster.
Here we see that our application was deployed with various settings that were either not defined or incorrectly defined. For example, whether any containers in the workload have container.securityContext.runAsNonRoot set to false, or unset. These can be resolved by updating the Kubernetes manifest files for the deployment and can be resolved proactively with one of the many Snyk Source Code Management (SCM) integrations.
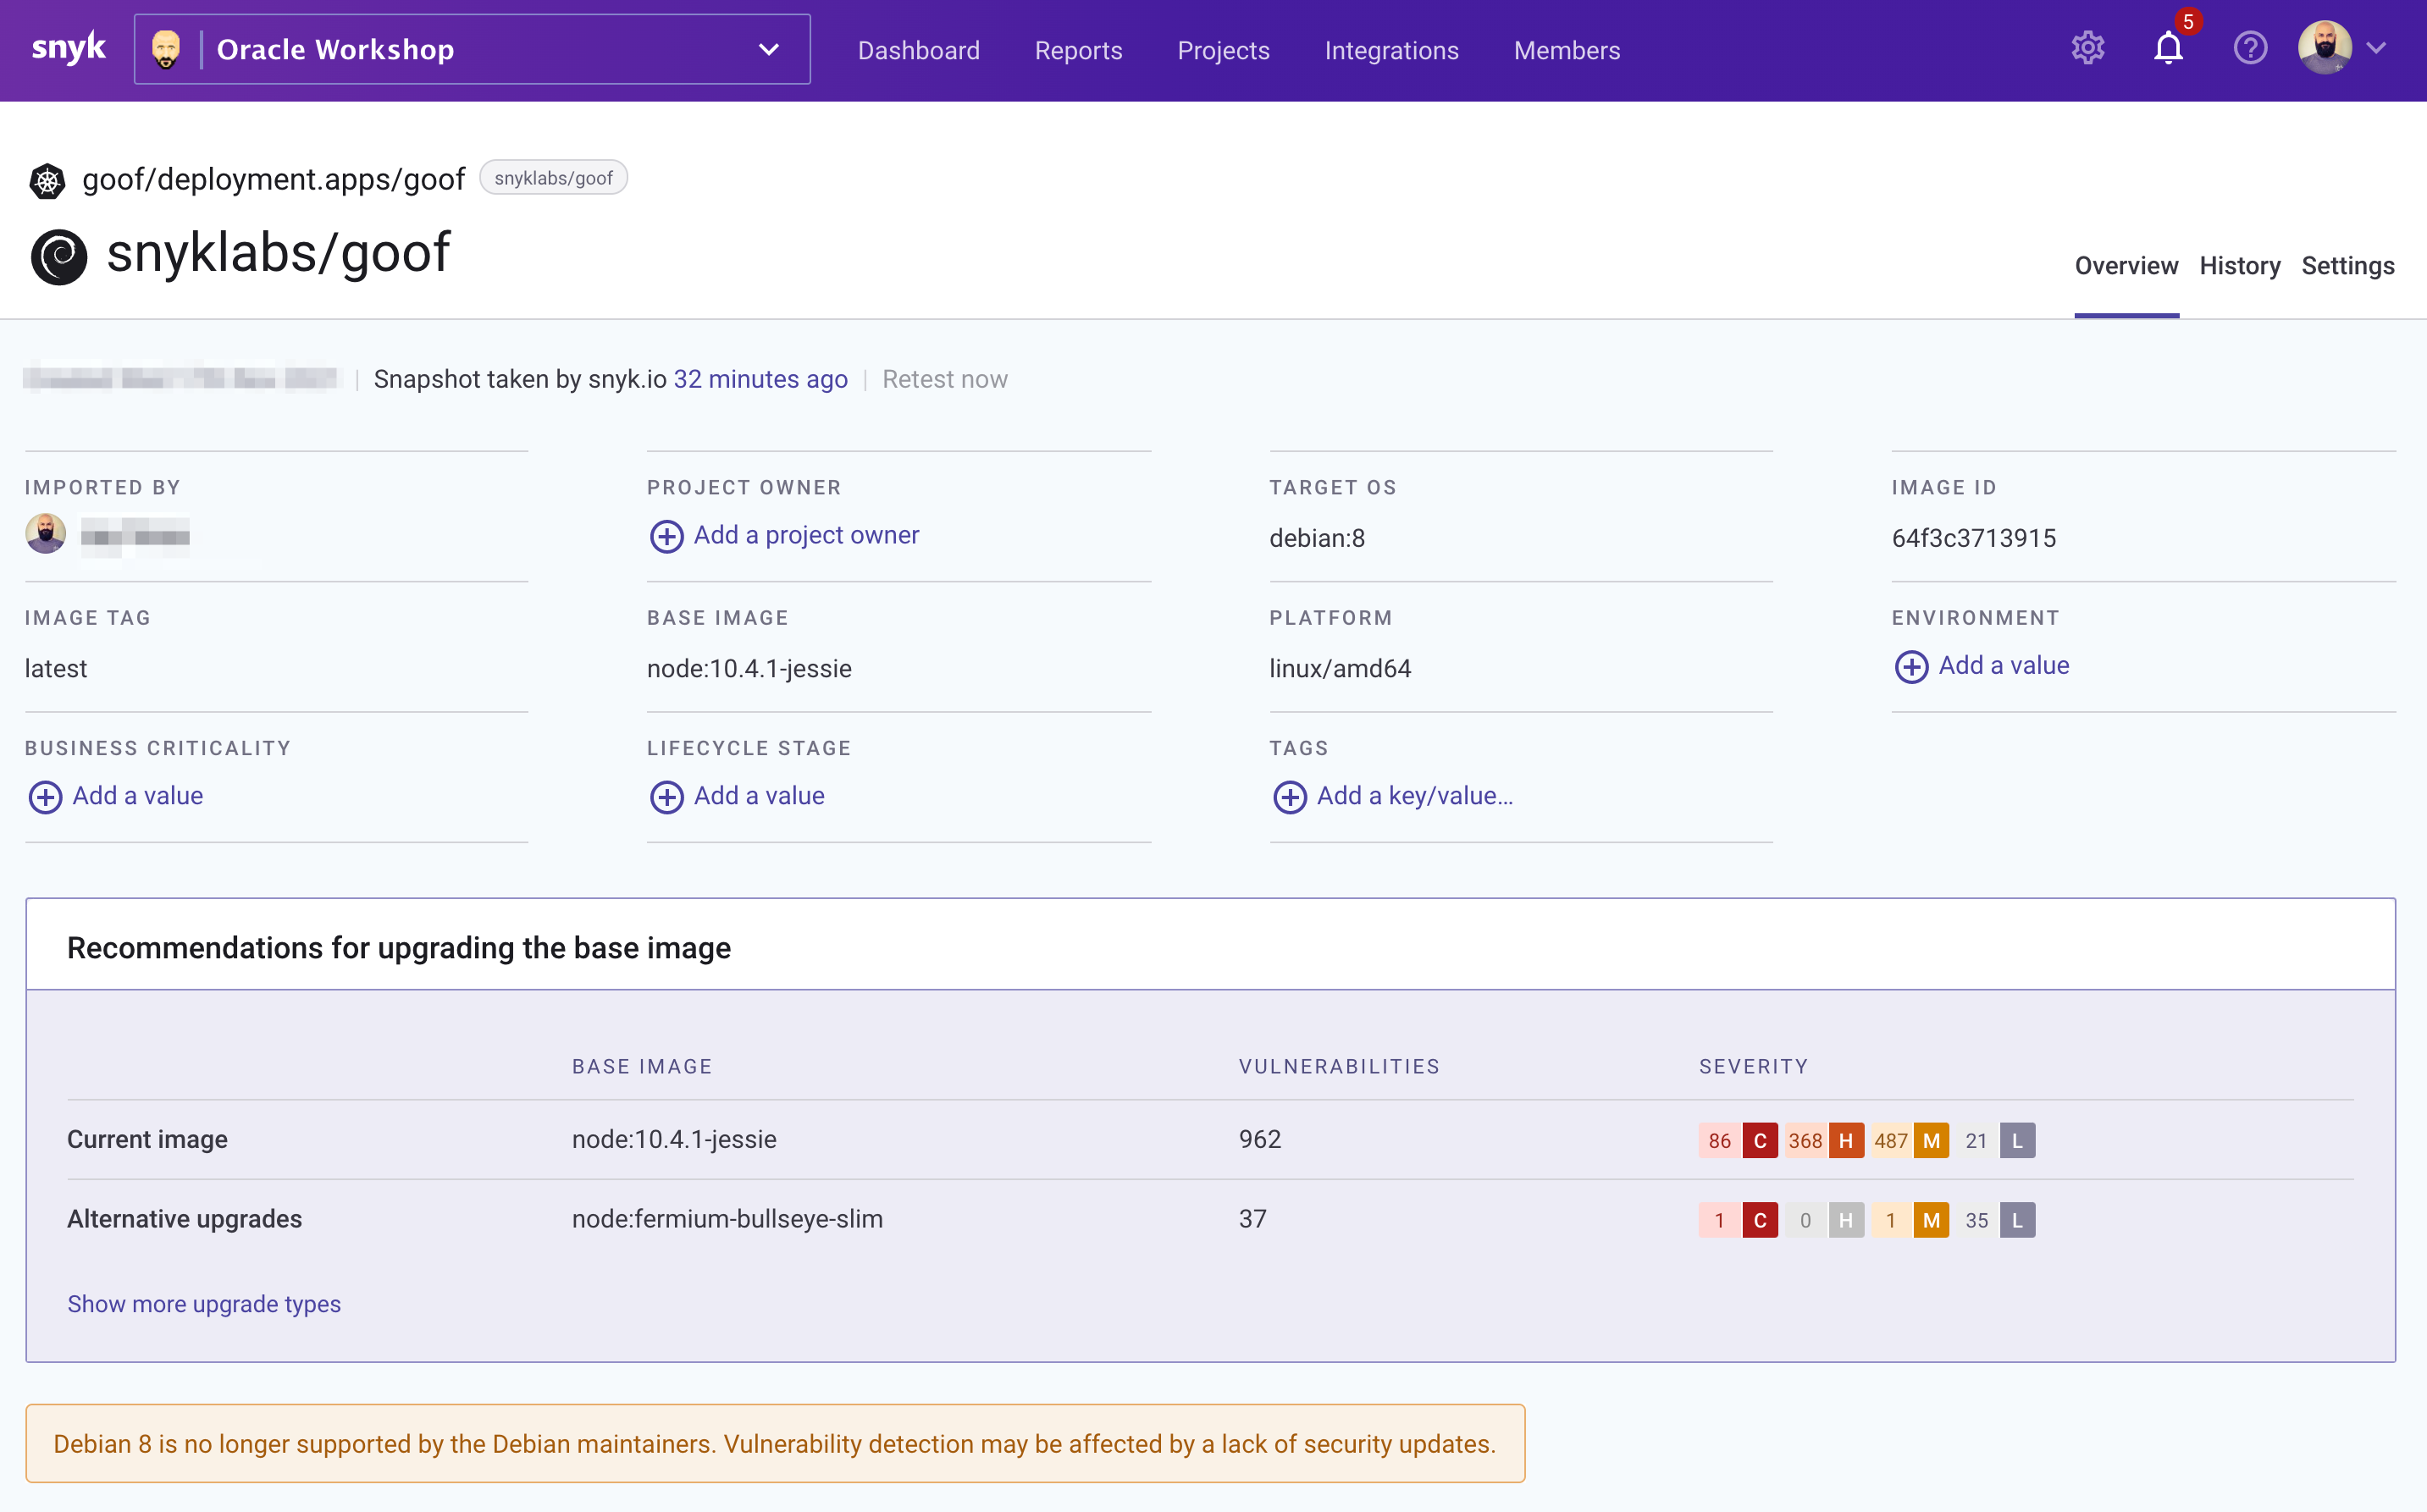
Next, let's examine our container image.
Here we are provided with a base image upgrade recommendation that takes into account which image is compatible with our application and reduces the number of vulnerabilities to improve our security posture.
Finally, let's examine our open source dependencies and found vulnerabilities.
In this view, we get detailed contextual data on found vulnerabilities along with Snyk's Priority Score which helps to drastically simplify one of the biggest challenges in using open source securely: working out which vulnerabilities to tackle first.
If you have an issue or a question, please open an issue.


