-
-
Notifications
You must be signed in to change notification settings - Fork 29
About Service Principals
A service principal is a Azure AD entry that can be used for unattended access to Azure resources. You can consider it service account. You need a service principal with Access to your Resource Group(s) in order for the Let's Encrypt site extension to renew your certificate without manual involvement once they expire. The service principal is also used to install the certificate the first time, in order to validate that it is setup correctly.
You can create a service principal in many different ways, we will just show how to do it manually through the portal.
You need to have enough privileges in your Azure AAD to be able to succesfully create a Service Principal.
You can create one with the following command via Azure CLI. You can execute the command from any PC with the Azure CLI installed or from the Azure Shell
az ad sp create-for-rbac
If you want to do it with PowerShell I recommend this article and their script: http://blogs.msdn.com/b/visualstudioalm/archive/2015/10/04/automating-azure-resource-group-deployment-using-a-service-principal-in-visual-studio-online-build-release-management.aspx
-
Login to your Azure Account through the current portal.
-
Select Active Directory from the left pane.
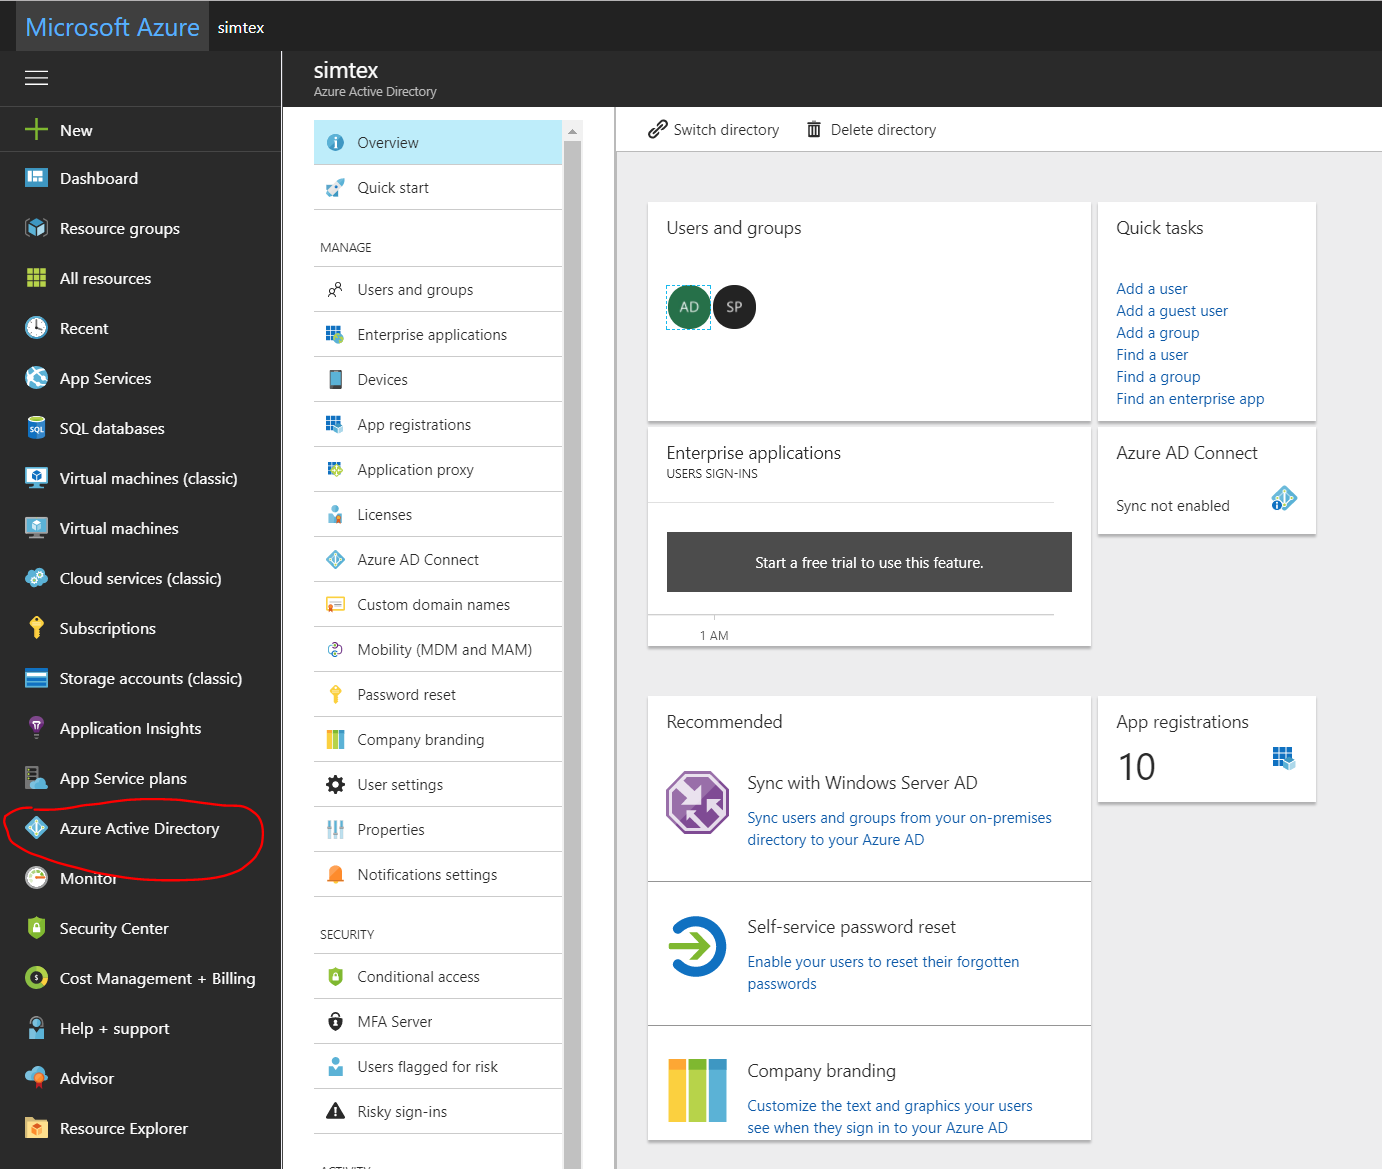
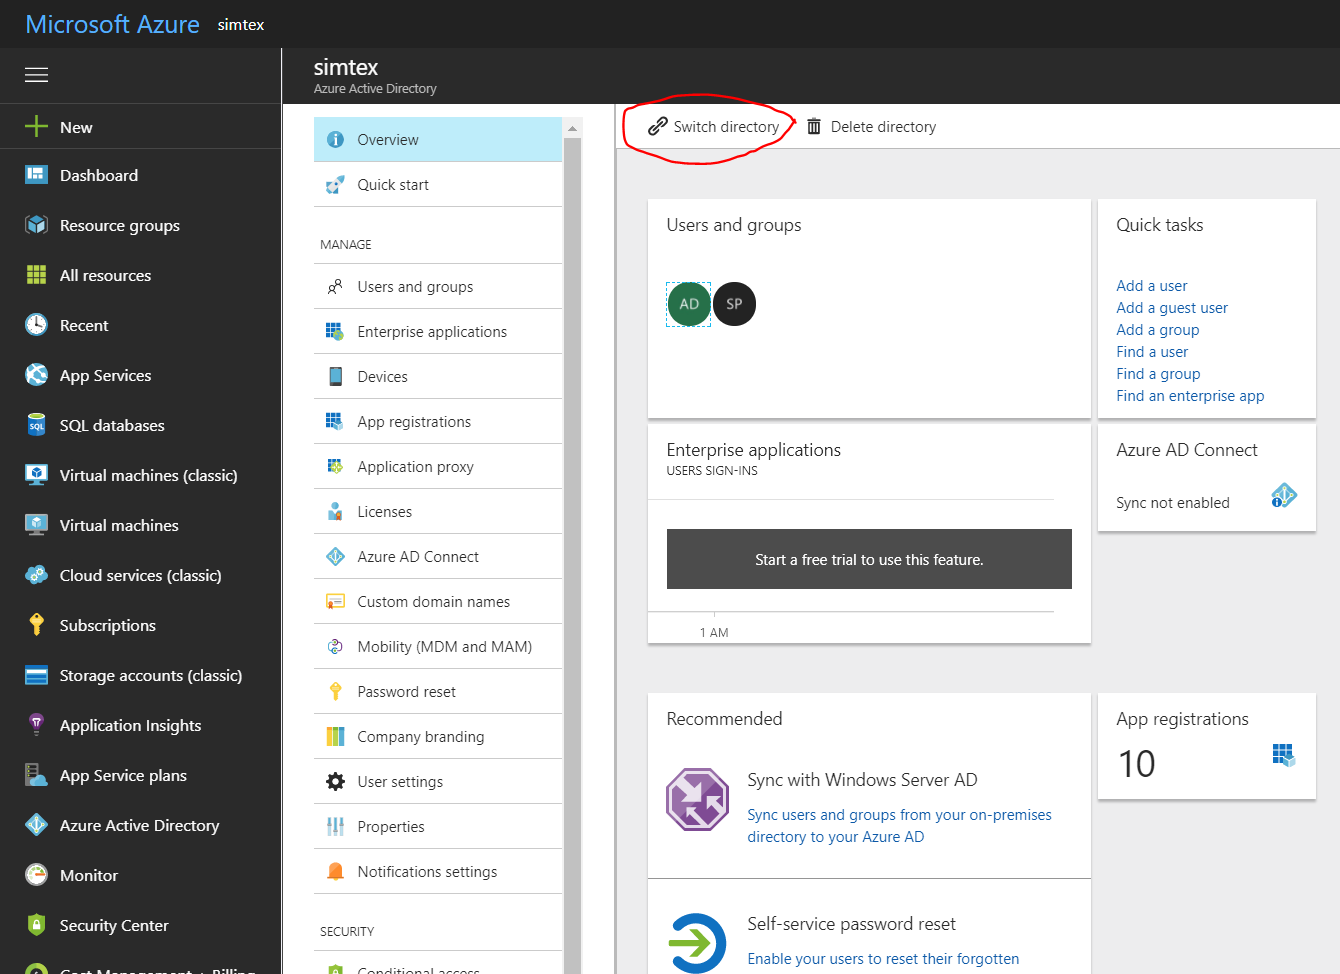
- Select the directory that you want to use for creating the new application.
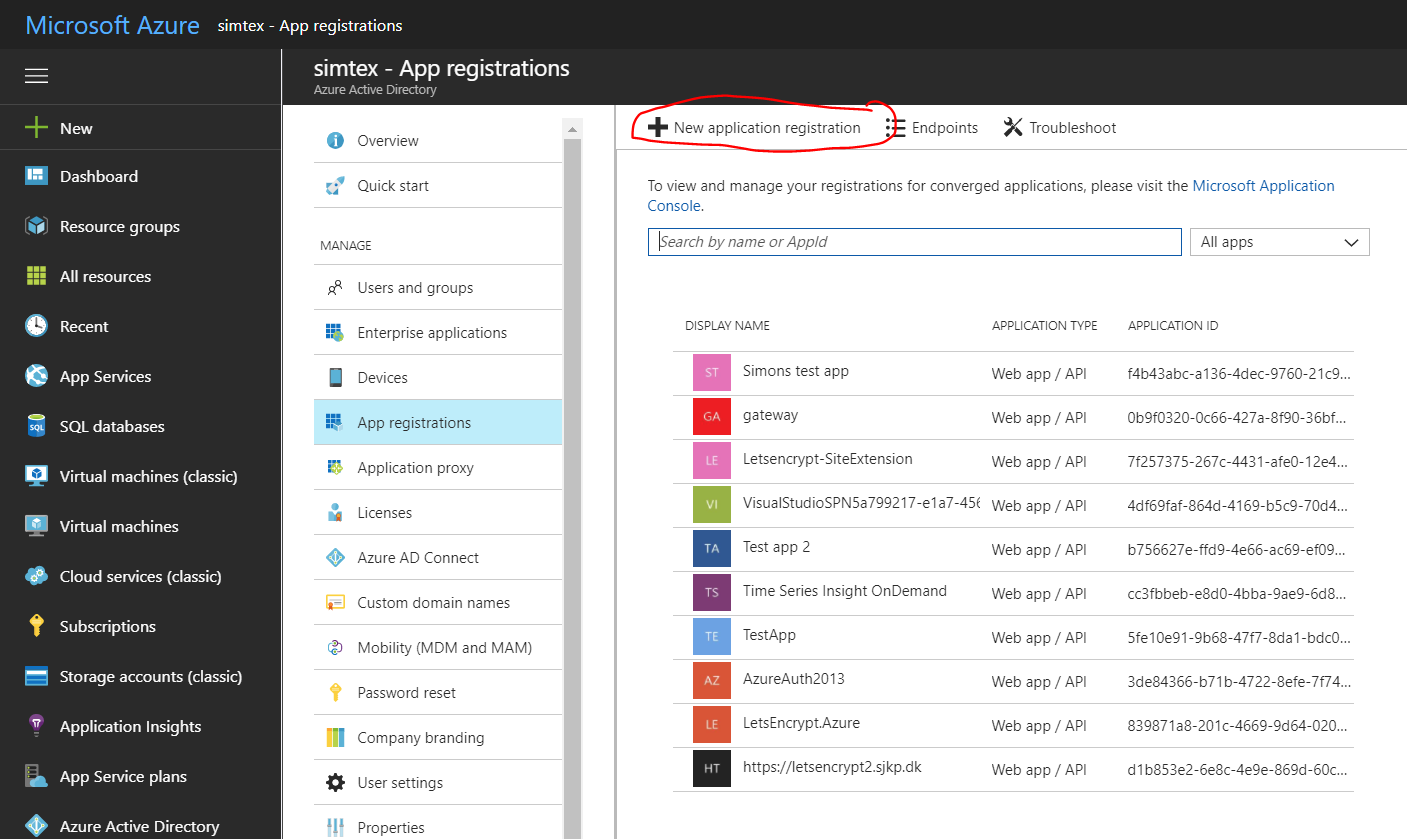
- To view the applications in your directory, click on App Registrations.
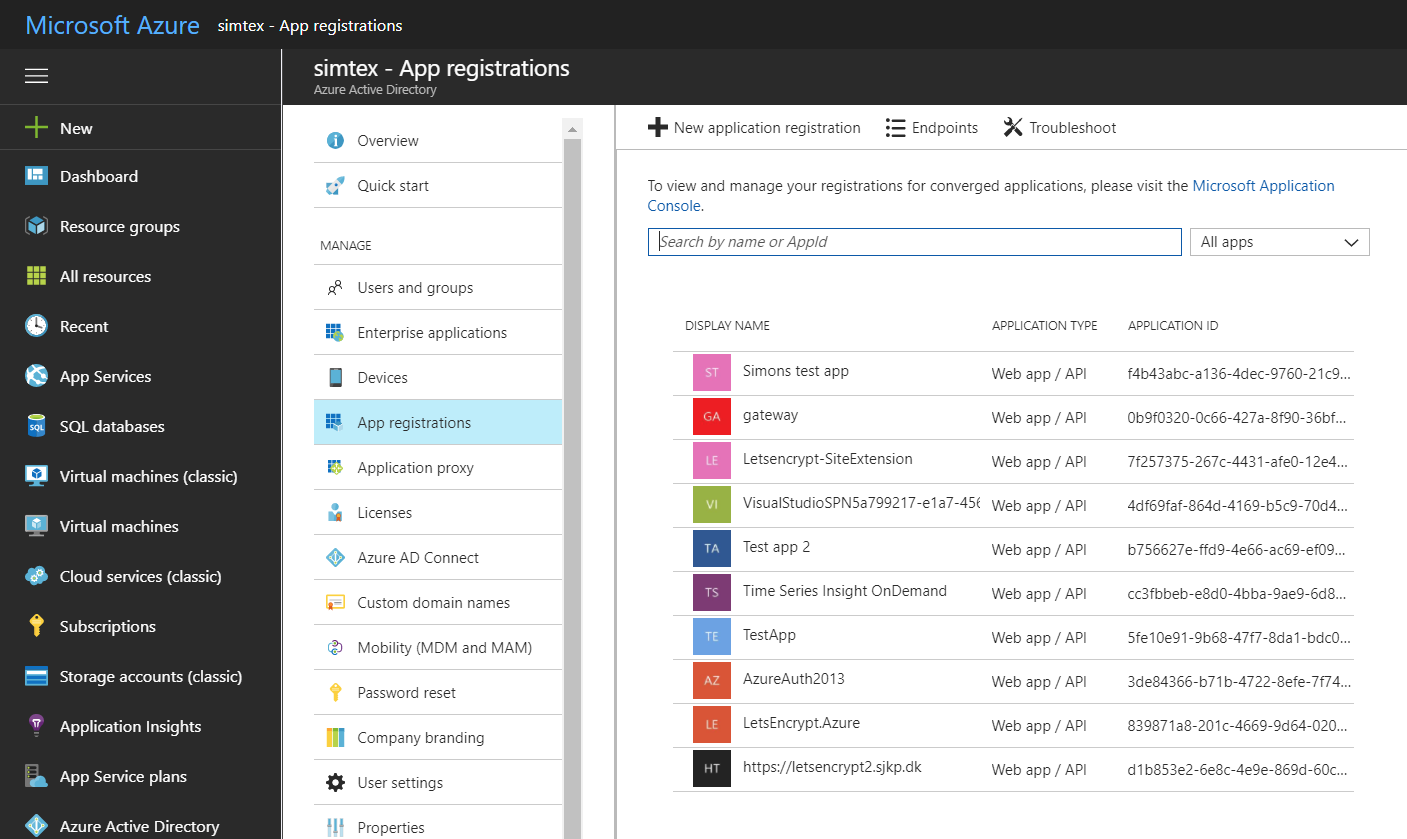
- If you haven't created an application in that directory before you should see something similar to following image. Click on ADD
-
Fill in name of the application, this will also become the name of the service principal, and select WEB APP/API and click the next button. For SIGN-ON URL, provide the URI to a web-site that describes your application. The existence of the web-site is not validated. You can use the url to the web app you want SSL on. Click Create
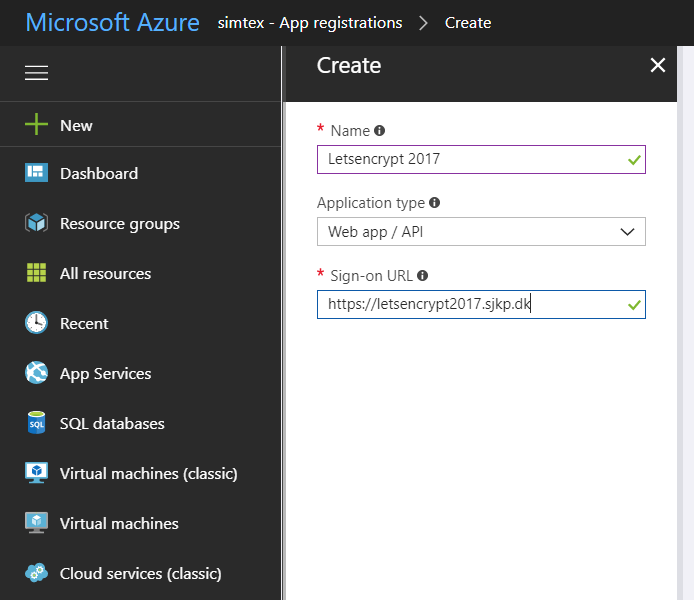
You have created your application which also creates a service principal for you.
The service principal is uniquely identified by its client id/application id to get that, select the newly created application
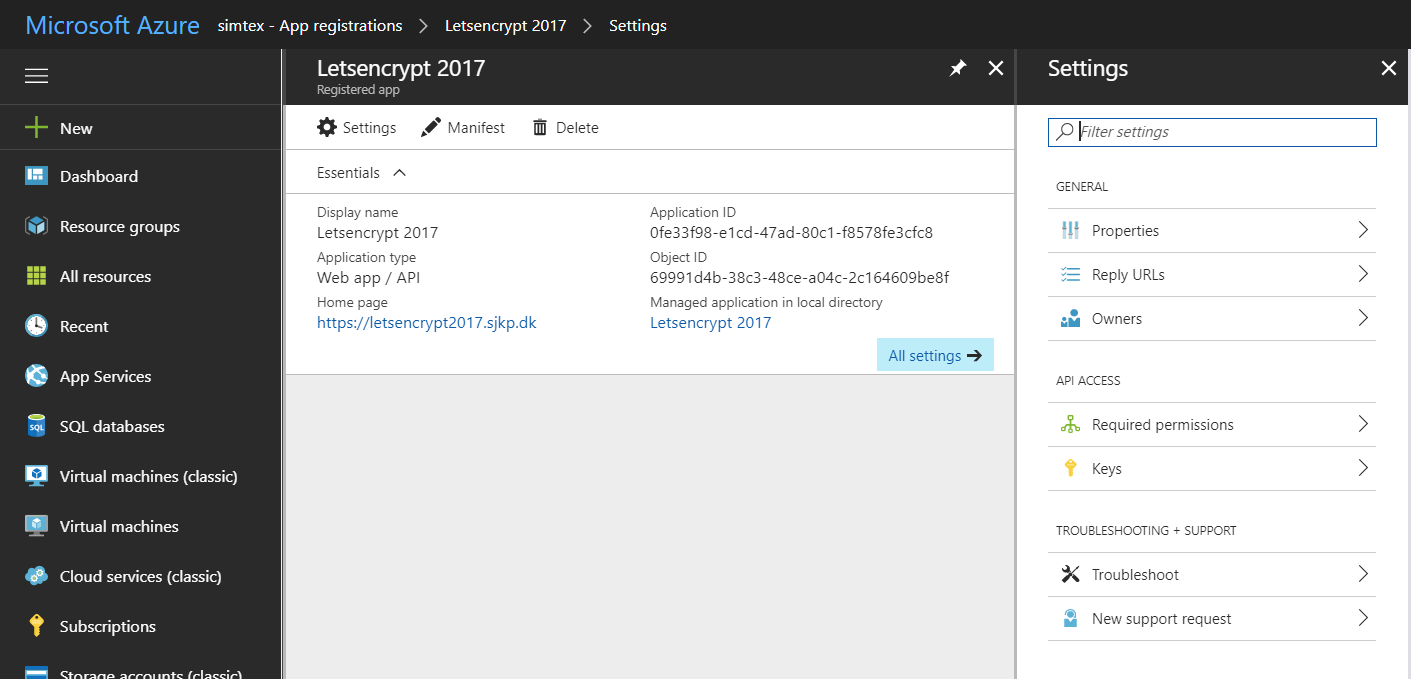
To setup the credentials for the service principal we must create a key for the application.
-
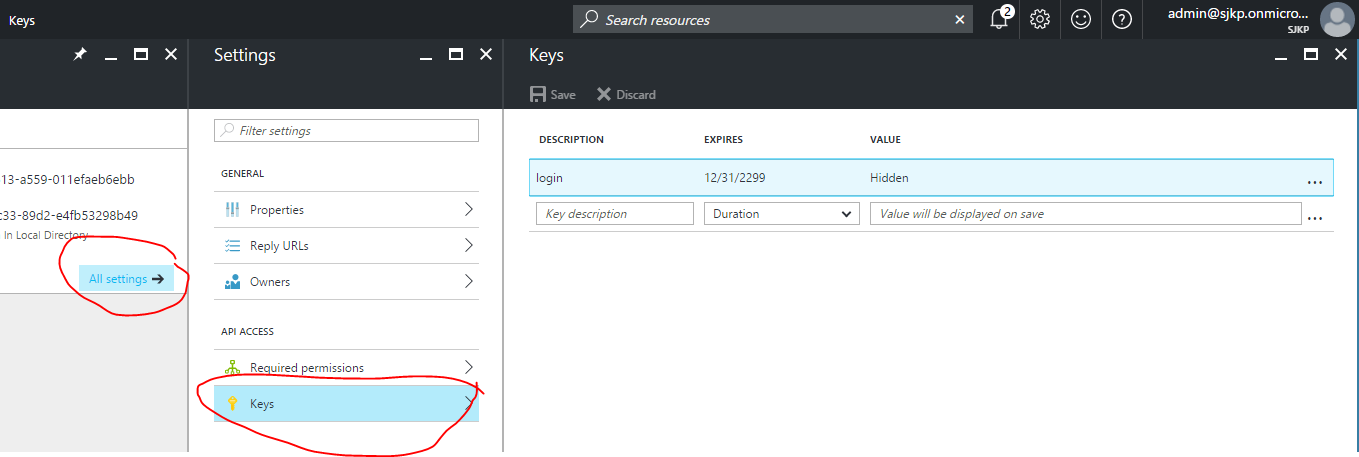
Click on the All settings and click Keys to setup a new key for your application (the service principal password).
-
Give the new key a description, select a duration and hit Save, after saving the client secret will show up in the value column. Save that for later, You will not be able to retrieve the key later so you will want to copy it now.
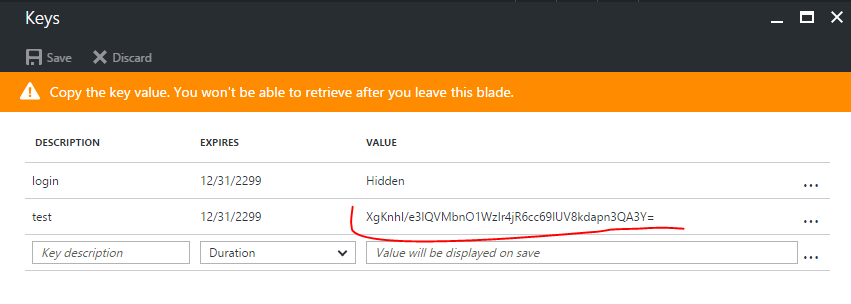
Your application is now ready and the service principal created on your tenant. When signing in as a service principal be sure to use:
- Application ID/CLIENT ID - as your user name (note: This is the Id of the Azure Application you created, not the descriptive name of the key, that name is only for information).
- KEY - as your client secret/password.
Once the service principal has been created it needs "Contribute" Access to the resource group(s) that contains the App Service Plan and the App Service. If they are in separate resource groups it is important to grant access to both.
NOTE You must grant access at the resource group or subscription level, if you just grant access to the app service the extension will not be able to install the certificate and it will fail
You can use the new azure portal to grant access to the service principal.
-
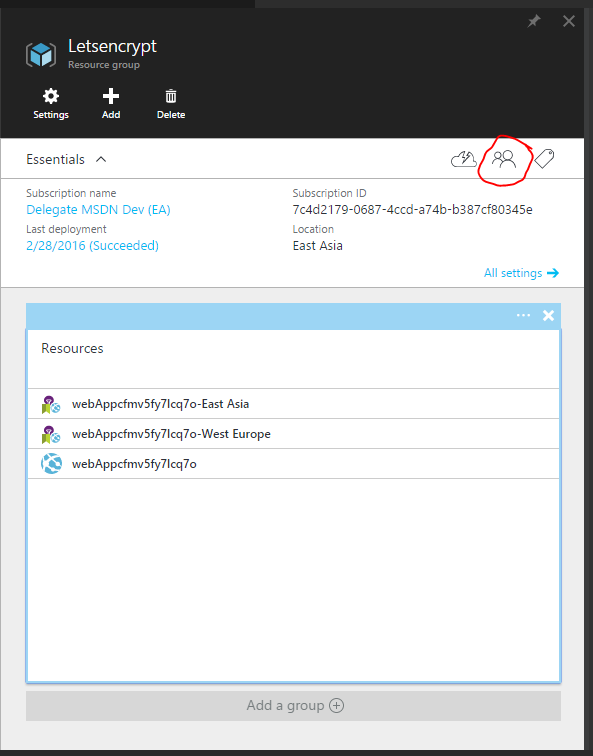
In the portal find the resource group for you App Service and App Service Plan, click the Access button
-
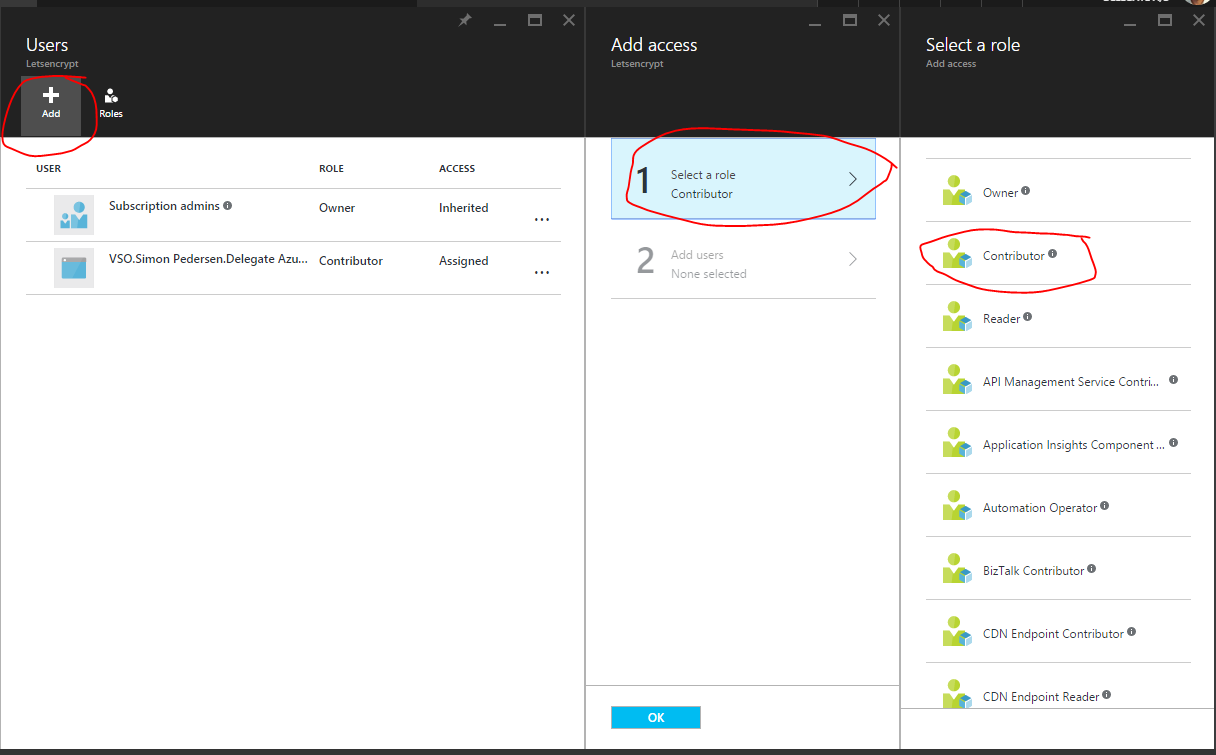
Click Add, and select the Role Contributor
-
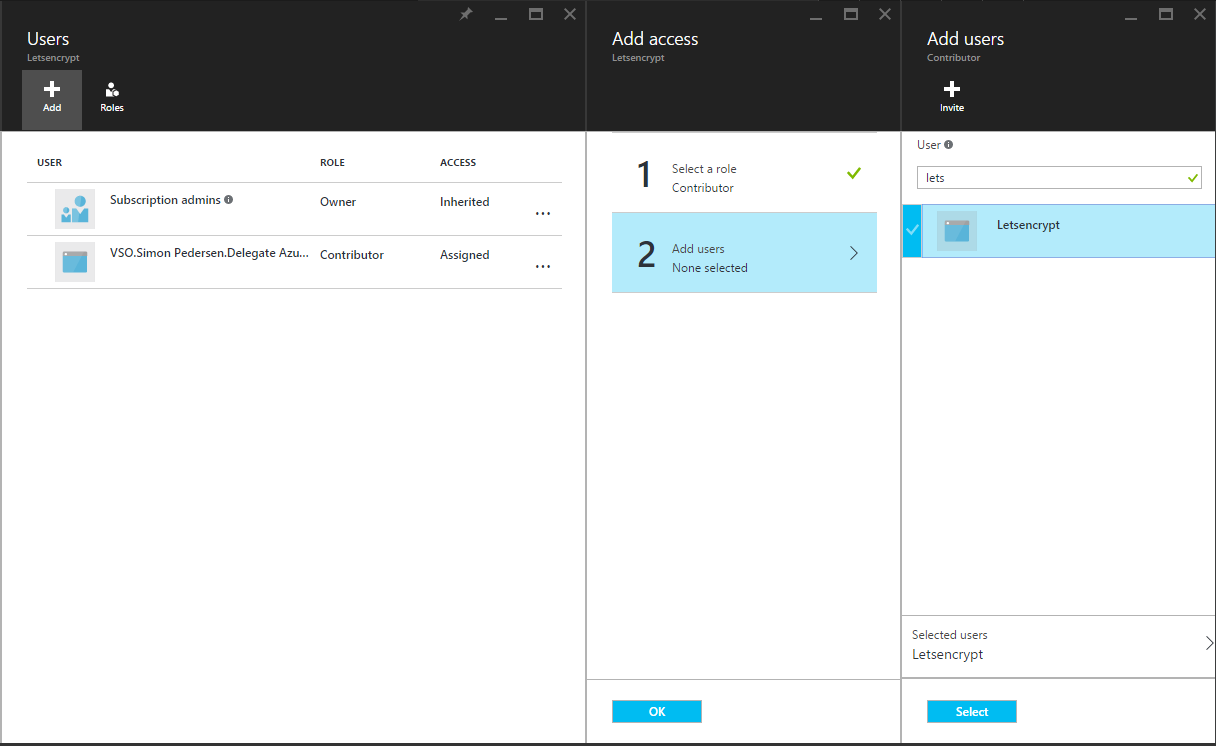
Now add the service principal user you created earlier to the role, you can find the service principal by searching for the Application Name you used in step 7 of creating the Service Principal.
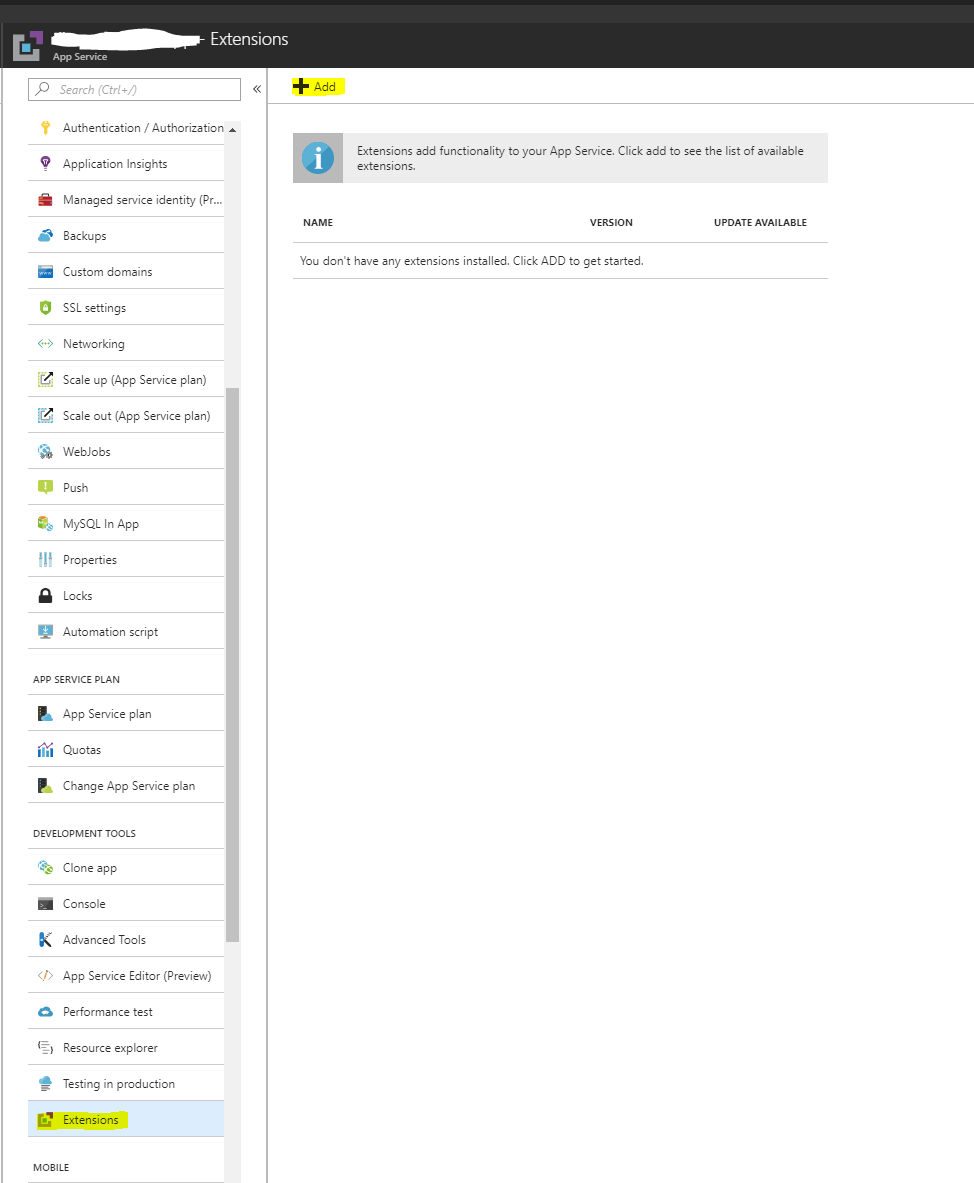
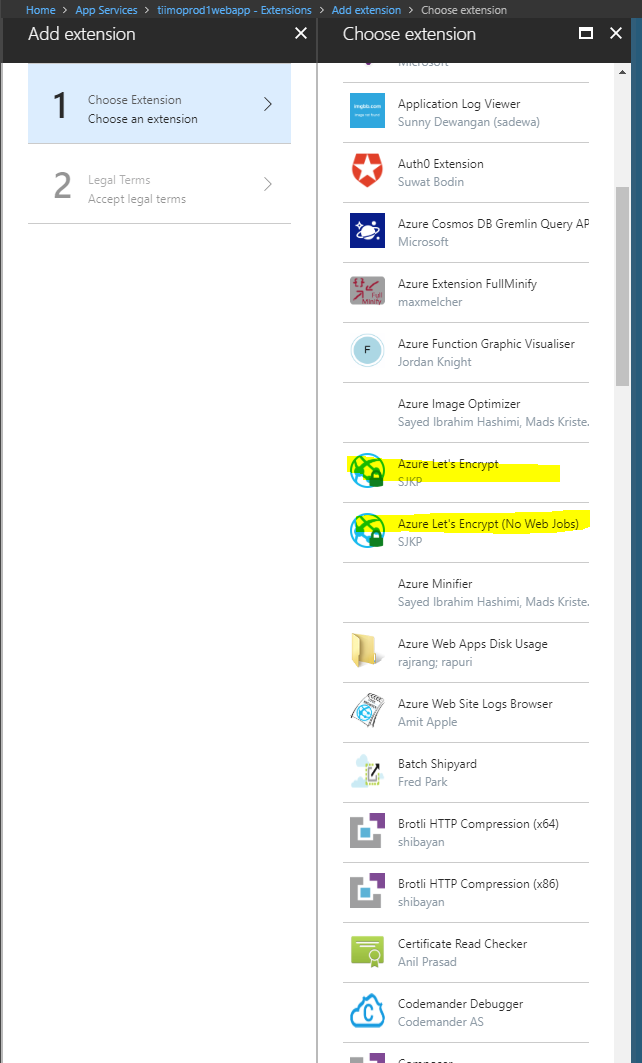
To install the site extension you have to use the portal.azure.com (as of May 2018, it is buggy if you try to install it from the KUDU site)
