Add this suggestion to a batch that can be applied as a single commit.
This suggestion is invalid because no changes were made to the code.
Suggestions cannot be applied while the pull request is closed.
Suggestions cannot be applied while viewing a subset of changes.
Only one suggestion per line can be applied in a batch.
Add this suggestion to a batch that can be applied as a single commit.
Applying suggestions on deleted lines is not supported.
You must change the existing code in this line in order to create a valid suggestion.
Outdated suggestions cannot be applied.
This suggestion has been applied or marked resolved.
Suggestions cannot be applied from pending reviews.
Suggestions cannot be applied on multi-line comments.
Suggestions cannot be applied while the pull request is queued to merge.
Suggestion cannot be applied right now. Please check back later.
Yolo目标追踪仿真文档
1. 建立仿真环境
参考GAAS全局目标追踪教程
2.制作数据集
2.1.启动仿真(以GAAS第六讲中的小车为例)
上述命令会启动仿真,生成一个小车,以及无人机。(在场景中多插入一些干扰物可以提高数据集的质量)

打开rviz确认小车出现在摄影机的视野中.
点击Add-选By topic-/gi/simulation/left/image_raw/Image
2.2.利用Rosbag录制照片
之前我们用rviz选择显示的 /gi/simulation/left/image_raw 就代表飞机左目摄像头的信息,我们可以利用Rosbag功能来记录这个topic
运行上述命令后相当于给飞机开了录像,接下来我们通过指令或者地面站控制飞机运动,对照着rviz里面显示的"取景器"拍摄**不同角度、不同尺寸(通过调节飞机高度)**的小车图片.拍摄完成后crtl+c退出.
之后利用脚本把.bag文件里头的图片提取出来.
(bag2image.py在/GAAS/demo/tutorial_2/2_Struction_from_Motion中)
2.3.对照片进行标注
通过"打开目录"和"更改保存目录"来设定输入图片和输出标签.xml文件的目录.
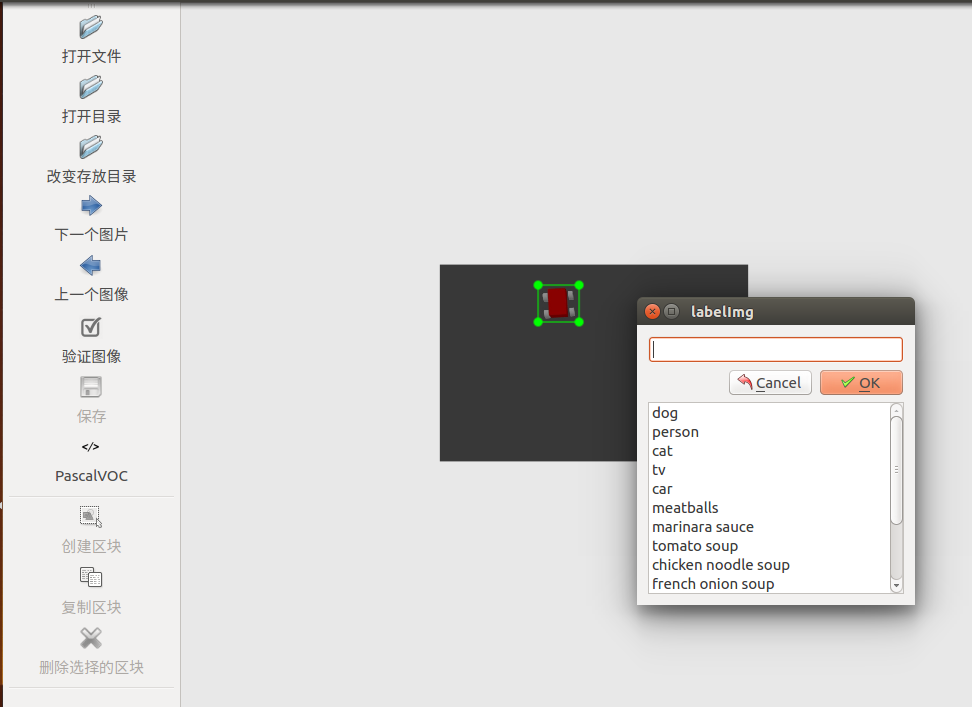
如下图选择创建区块后在目标处画一个框框,然后输入标签"car",之后点击保存,把标签文件保存成.xml文件

下一张,重复上述操作(由于rosbag采集图像帧率比较高,没必要所有图像都标注,可以挑着选角度不一样的照片标)
3.训练数据集
略
4.安装配置ROS版YOLO
4.1.安装
参考darknet_ros
4.2.配置
launch/px4_tracking.launch, config/yolov3-tiny.yaml, config/px4_tracking.yaml, yolo_network_config/cfg/car.cfg, yolo_network_config/weights/car.weights复制到对应目录下(如果你自己训练了网络,那么将你的网络配置文件和权重文件命名为car)
yolo_tracking.py复制到GAAS/demo/tutorial_6/6_object_tracking下5.启动追踪仿真
在2.1的基础上,启动darknet_ros
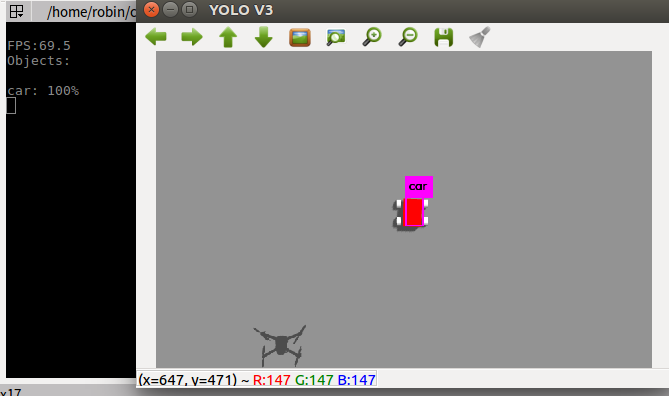
弹出一个框口,并看到terminal中显示FPS和识别的类及其准确率

然后启动追踪程序(该程序需放入对
应目录下)
最后用键盘控制小车运动,无人机便能一直追踪小车了
这个ros包的安装方式为