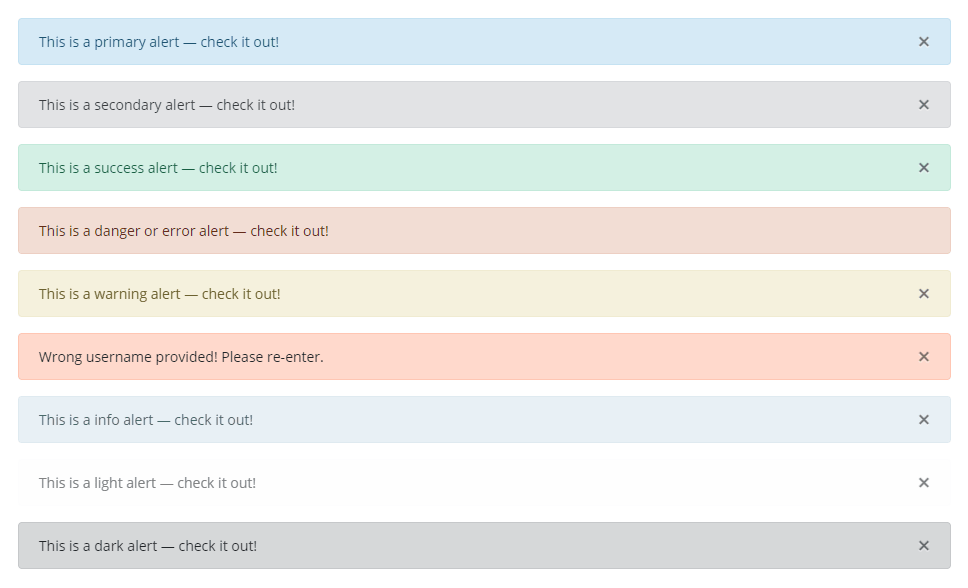
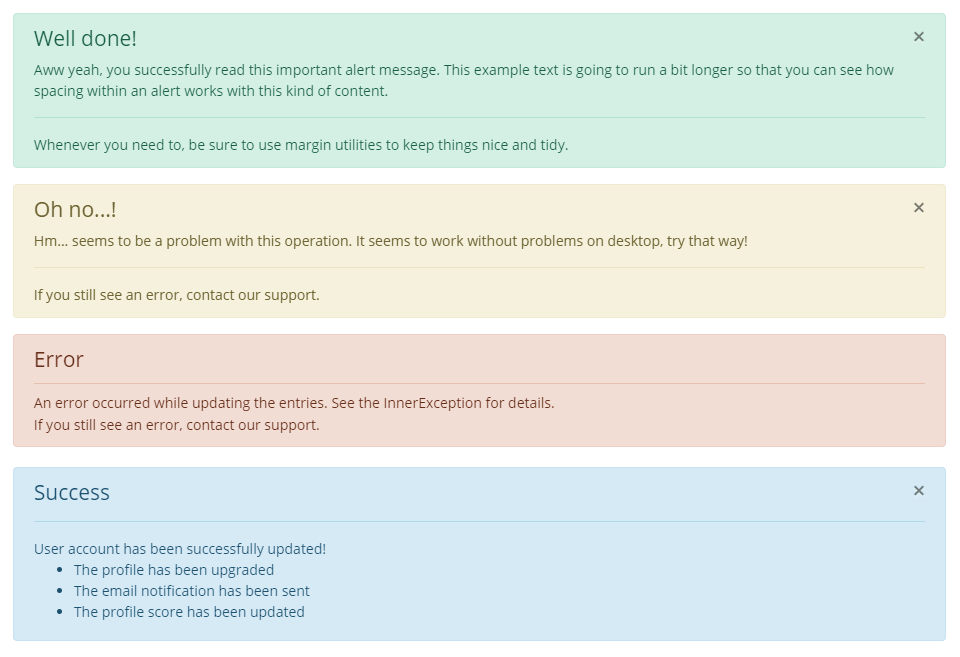
This package allows to use Bootstrap 3/4/5 flash messaging for Laravel 6+ framework applications.
- PHP >=7.1
- Laravel 6+
- Bootstrap 3+
This project is released under the MIT License.
Copyright © 2020 ApPHP.
Begin by pulling in the package through Composer.
composer require apphp/laravel-flashNext, make sure the default CSS classes for your flash message are optimized for Bootstrap. You may either pull in the Bootstrap's CSS within your HTML or layout file, or write your own CSS classes based on them. If you use Bootstrap 3, part of classes, like "primary" and "secondary" will not have styling.
<link rel="stylesheet" href="//getbootstrap.com/docs/4.0/dist/css/bootstrap.min.css">In your controllers, before you perform a redirect or render a view, make a call to the flash() function.
public function store()
{
    flash('Welcome Message!');

    return redirect()->route('home');
}
The general way to define a flash message is a following:
flash()->danger('The error message')->important();
flash()->info('The info message');
If you want to specify a title for alert, pass 2 arguments in the following way:
flash()->success(['Success', 'Operation has been successfully completed']);But you may use a shorter syntax:
flash(['Error', 'The error message'], 'error', true);
flash('The info message', true);
flash('The info message');
You may also define the following flash messages:
| Method | Description |
|---|---|
flash('your-message', 'primary') |
Set the flash type to "primary". |
flash('your-message', 'secondary') |
Set the flash type to "secondary". |
flash('your-message', 'success') |
Set the flash type to "success". |
flash('your-message', 'warning') |
Set the flash type to "warning". |
flash('your-message', 'validation') |
Set the flash type to "validation". |
flash('your-message', 'info') |
Set the flash type to "info". |
flash('your-message', 'danger') |
Set the flash type to "danger". |
flash('your-message', 'error') |
Set the flash type to "error" (alias to "danger") w/o a close button. |
flash('your-message', 'error', true) |
Set the flash type to "error" with a close button to the message. |
flash('your-message', 'light') |
Set the flash type to "light". |
flash('your-message', 'dark') |
Set the flash type to "dark". |
You may also define messages, by using Flash facade:
use Apphp\Flash\Flash;| Method | Description |
|---|---|
Flash::success('your-message') |
Set the success flash message. |
Flash::error('your-message') |
Set the flash type to "error" w/o a close button to the message. |
Flash::error('your-message', true) |
Set the flash type to "error" with a close button to the message. |
| etc. |
To show messages on view files, use the following:
@include('flash::message')If you need to modify the flash message, you can run:
php artisan vendor:publish --provider="Apphp\Flash\FlashServiceProvider"If you need to flash multiple flash messages, you may simply define them one after another.
flash('First Message', 'success');
flash('Second Message', 'warning', true);

return redirect('somewhere');
Take in account, that you'll not see flash messages if you don't perform redirect.
If you need to clear flash messages, you may do it in the following way:
// All previously defined messages will be removed
flash('First Message', 'error');
flash('Second Message', 'danger')->clear();

// All previously defined messages will be removed
flash('First Message', 'error');
flash('Second Message', 'danger');
Flash::success('Third Message');
flash()->clear();

Flash::success('First Message');
// Only current message will be removed
Flash::error('Second Message')->clear();

return redirect('somewhere');Generally you're expecting from the flash messages to be shown for a few seconds, and then they will be closed (if this message is not important).
To handle such behaviour, you may write a simple JavaScript code. For example, using jQuery, you might add the following snippet just before
the closing </body> tag.
<script>
    $('div.alert').not('.alert-important').delay(5000).fadeOut(250);
</script>
or with pure CSS
<style>
div.alert:not(.alert-important) {
    -webkit-animation: cssAnimation 5s forwards;
    animation: cssAnimation 5s forwards;
}
@keyframes cssAnimation {
    0%   {opacity: 1; height:auto; padding: 0.75rem 1.25rem; margin-bottom: 1rem;}
    90%  {opacity: 1; height:auto; padding: 0.75rem 1.25rem; margin-bottom: 1rem;}
    100% {opacity: 0; height:0; padding:0; margin:0;}
}
@-webkit-keyframes cssAnimation {
    0%   {opacity: 1; height:auto; padding: 0.75rem 1.25rem; margin-bottom: 1rem;}
    90%  {opacity: 1; height:auto; padding: 0.75rem 1.25rem; margin-bottom: 1rem;}
    100% {opacity: 0; height:0; padding:0; margin:0;}
}
</style>To change default messages and enable some extra features you can export the config file:
php artisan vendor:publish --tag=laravel-flash:configTo change HTML template of the message or use your own, publish view file and customize it to suit your needs.
$ php artisan vendor:publish --tag=laravel-flash:viewsNow you should have a flash.php file in the config folder of your application. If you need to force to re-publish the config file to use --force.
To rum unit testing simply do following:
./vendor/bin/phpunit vendor\\apphp\\laravel-flash\\tests\\TestFlashMessage.phpor your may add additional section to your composer.json file:
"scripts": {
    "tests": "phpunit --colors=always",
    "test": "phpunit --colors=always --filter",
}
and then rum unit following command:
composer tests vendor\\apphp\\laravel-flash\\tests\\TestFlashMessage.phpThis package doesn't includes Bootstrap or any other styling or frontend assets frameworks, so you need to import all the necessary stylesheets.
<!DOCTYPE html>
<html lang="en">
<head>
    <meta charset="UTF-8">
    <title>Document Title</title>
    <link rel="stylesheet" href="https://getbootstrap.com/docs/4.0/dist/css/bootstrap.min.css">
</head>
<body>

<div class="container">
    @include('flash::message')

    <p>Welcome to my website...</p>
</div>

<script src="https://code.jquery.com/jquery-3.3.1.slim.min.js"></script>
<script src="https://cdnjs.cloudflare.com/ajax/libs/popper.js/1.14.7/umd/popper.min.js"></script>

</body>
</html>


