This project was developed to adapt a Jetson Nano with Ubuntu 20.04. The idea is that with Jetson, the Turtlebot will have more capabilities to work with embedded software, thus reducing the dependency on always being connected to a computer. Therefore, most of the code will be run within Jetson.
This project is a adaptation @tiago369 project, and he supported and adviced me in this project, Thanks!
- Turtlebot3 Waffle Pi
- Jetson Nano
- Battery
- 64GB or larger SD card
- WiFi adapter
- USB keyboard and mouse
- Monitor with HDMI input
TurtleBot is a standard ROS platform robot. The inspiration for the name "Turtle" comes from a homonymous robot, which was driven by the educational programming language Logo in 1967. Additionally, the turtlesim node, which first appears in the basic ROS tutorial, is a program that simulates the command system of the Logo turtle program. It is also used to create the Turtle icon as a symbol of ROS. The nine points present in the ROS logo were derived from the turtle's hind shell. The TurtleBot, which originates from the Logo Turtle, was designed to facilitate teaching for those starting with ROS through the TurtleBot, as well as to teach programming language using Logo. Since then, the TurtleBot has become the standard ROS platform, the most popular among developers and students.
The TurtleBot 3 has 3 versions: Burger, Waffle, and Waffle Pi. We will be using the Waffle Pi version.
Jetson Nano is a board that functions as a pocket-sized computer capable of various applications, mainly involving neural networks and AI.
- GPU: NVIDIA Maxwell™ Architecture with 128 NVIDIA CUDA® cores
- CPU: Quad-core ARM® Cortex®-A57 MPCore processor
- Memory: 4 GB 64-bit LPDDR4
- Storage: 16 GB eMMC 5.1 Flash
- Video Encode: 4K @ 30 (H.264/H.265)
- Video Decode: 4K @ 60 (H.264/H.265)
- Camera: 12 lanes (3x4 or 4x2) MIPI CSI-2 DPHY 1.1 (18 Gbps)
- Connectivity: Gigabit Ethernet
- Display: HDMI 2.0 or DP1.2 | eDP 1.4 | 2 simultaneous DSI (1 x2)
- UPHY: 1 x1/2/4 PCIE, 1x USB 3.0, 3x USB 2.0
- I/O: 1x SDIO / 2x SPI / 4x I2C / 2x I2S / GPIOs -> I2C, I2S
- Dimensions: 69.6 mm x 45 mm
- Mechanical: 260-pin edge connector
The used battery is the NH2054 from Inspired Energy, a 14.4V battery with 6.2Ah capacity. This battery was chosen for extended usage without frequent recharging. However, to use this battery, a 5V regulator was required to power the Jetson.
I used a generic adapter model ka-t8188. It was quite challenging to find the driver for it to work on Ubuntu 20.04, but I managed to locate it on @kelebek333's GitHub. You can find the configuration details for this adapter in this GitHub repository.
A 64GB or larger SD card is important, as the system alone consumes 27GB of storage.
By default, Jetson only has access to Ubuntu 18.04. Thanks to Qengineering, who developed a new image for the Jetson, we have access to Ubuntu 20.04. Below is the link to their GitHub repository.
- Download the image from this link
- Flash the SD card using balenaEtcher
- Insert the SD card into the Jetson
- Connect a monitor to HDMI, and a USB keyboard and mouse
- Connect the Jetson to the Internet via cable or follow the steps to use the WiFi adapter
The following instructions are adapted from the Turtlebot3 setup guide available on the Robotis website. You can follow their guide if you prefer. However, the goal here is to run the code entirely onboard, so both the PC Setup and SBC Setup steps will be performed on the Jetson.
Since Ubuntu 20.04 only allows the installation of ROS2 Foxy, we will install it. I tried installing the version directly from the official ROS website, but I couldn't get it installed on the Jetson. Therefore, I installed the version from Robotis.
wget https://raw.githubusercontent.com/ROBOTIS-GIT/robotis_tools/master/install_ros2_foxy.sh
sudo chmod 755 ./install_ros2_foxy.sh
bash ./install_ros2_foxy.sh
sudo apt install ros-foxy-cartographer
sudo apt install ros-foxy-cartographer-ros
sudo apt install ros-foxy-navigation2
sudo apt install ros-foxy-nav2-bringup
sudo apt install ros-foxy-dynamixel-sdk
sudo apt install ros-foxy-turtlebot3-msgs
sudo apt install ros-foxy-turtlebot3
sudo apt install python3-argcomplete python3-colcon-common-extensions libboost-system-dev build-essential
sudo apt install ros-foxy-hls-lfcd-lds-driver
mkdir -p ~/turtlebot3_ws/src && cd ~/turtlebot3_ws/src
git clone -b foxy-devel https://github.com/ROBOTIS-GIT/turtlebot3.git
cd ~/turtlebot3_ws/
echo 'source /opt/ros/foxy/setup.bash' >> ~/.bashrc
source ~/.bashrc
colcon build --symlink-install --parallel-workers 1
echo 'source ~/turtlebot3_ws/install/setup.bash' >> ~/.bashrc
source ~/.bashrc
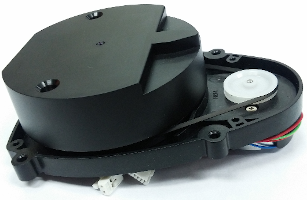
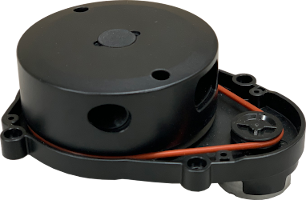
Existem duas versões de Sensor LDS para o Turlebot3, os modelos a partir do ano de 2022 vem com o modelo LDS-02, então veja se você está com o modelo LDS-01 ou o LDS-02
If you are using the LDS-01 you just need to export model type
echo 'export LDS_MODEL=LDS-02' >> ~/.bashrc
source ~/.bashrc
If you are using the LDS-02 you must install the drive
sudo apt update
sudo apt install libudev-dev
cd ~/turtlebot3_ws/src
git clone -b ros2-devel https://github.com/ROBOTIS-GIT/ld08_driver.git
cd ~/turtlebot3_ws/src/turtlebot3 && git pull
cd ~/turtlebot3_ws && colcon build --symlink-install
echo 'export ROS_DOMAIN_ID=30 #TURTLEBOT3' >> ~/.bashrc
source ~/.bashrc
Connect the OpenCR to the Rasbperry Pi using the micro USB cable
sudo cp `ros2 pkg prefix turtlebot3_bringup`/share/turtlebot3_bringup/script/99-turtlebot3-cdc.rules /etc/udev/rules.d/
sudo udevadm control --reload-rules
sudo udevadm trigger
Install packages to upload the firmware
sudo dpkg --add-architecture armhf
sudo apt update
sudo apt install libc6:armhf
Depending on the platform, use either burger or waffle for the OPENCR_MODEL name
export OPENCR_PORT=/dev/ttyACM0
export OPENCR_MODEL=burger
rm -rf ./opencr_update.tar.bz2
Download the firmware and loader, then extract the file
wget https://github.com/ROBOTIS-GIT/OpenCR-Binaries/raw/master/turtlebot3/ROS2/latest/opencr_update.tar.bz2
tar -xvf ./opencr_update.tar.bz2
Upload firmware to OpenCR
cd ~/opencr_update
./update.sh $OPENCR_PORT $OPENCR_MODEL.opencr
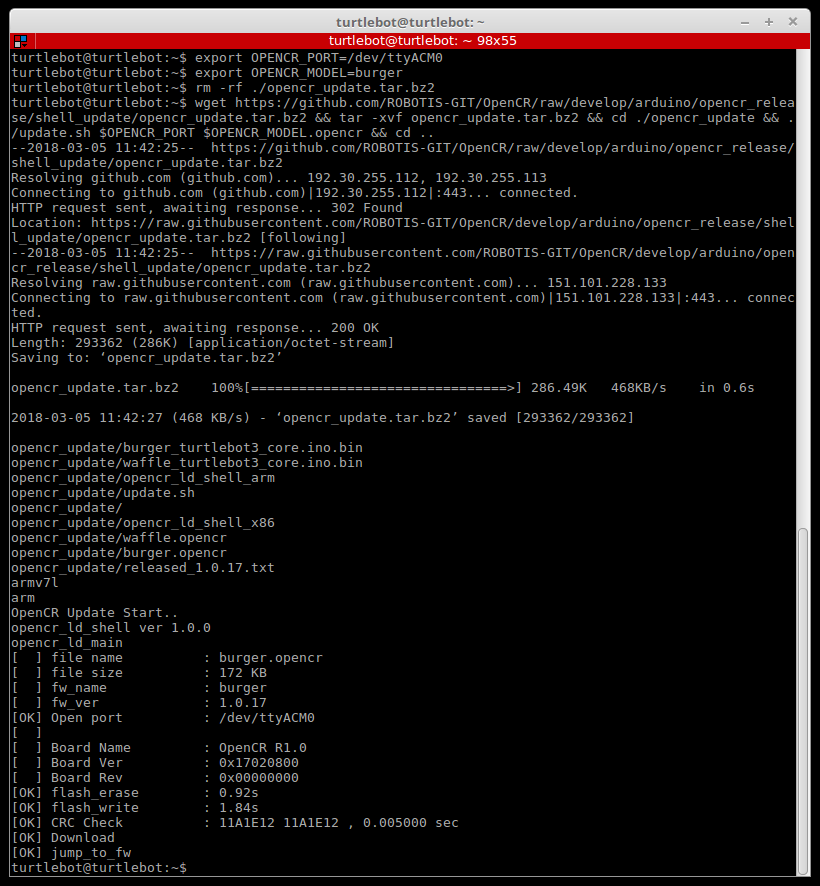
A successful firmware upload for TurtleBot3 Burger will look like below
To assemble, just follow the step-by-step instructions provided on the website Robotis


