-
Notifications
You must be signed in to change notification settings - Fork 9
GRASSLocation
Open GRASS GIS and load or create your project location. If you do not know how to configure a project in GRASS, take a look here. Here we show one way of creating a GRASS location.
A GRASS location is a project that keeps all maps and spatial data cohesive under the same Datum and Projection. To work with your own GIS data, you must create a location with an EPSG (a code that represent a combination of datum and projection) that is similar to your data's. For example, if your rasters are in UTM 23 South projection with a SIRGAS 2000 datum, your GRASS location should be exactly on this projection. Follow the next steps to create a projection and import a raster map, so you can run LSMetrics with your own data.
Click on New Location wizard as follows:

Browse the file containing the rasters of interest:

Choose a simple name for your Location (Here we keep as the default newLocation):
(Please avoid using spaces and special characters on the name of the location!!!)

Now it is time to select your working EPSG, which is basically the spatial reference system of your data. If you don't know which one is it, figure it out here.


You also can easily read the right spatial references system from a georeferenced file.

Just find the file in you computer and GRASS will get the EPSG code from it. Follow the steps:


Done! Now you created a GRASS GIS location!
After creating a GRASS project, you can readily import the raster used for selecting the EPSG to GRASS environment. If you click "No", then you can also import your rasters easily - see below.

First you can start your GRASS session by pressing the START GRASS button.

Now that you opened a grass session, see how GRASS-GIS looks like. Basically you have thee windows - a shell terminal, in which you can run GRASS procedures through command line; and two Graphical User Interface windows:

Let´s import your raster data using the function r.in.gdal, but clicking:

Where is your raster data? Browse to import:

And finally, click on "Import":

Follow the next session to visualize your imported map(s) in GRASS display with our example data.
If you want more information on importing maps into GRASS, have a look at this and this.
Observation: Make sure that your imported maps are in a projected coordinate reference system (CRS), in which distances are measured in meters, so that areas and distances are calculated in a meaningful way by LSMetrics.
To make your life easier, we make available a GRASS database with two raster images, for testing. Select the file grassdb_test and Start GRASS session as follows:

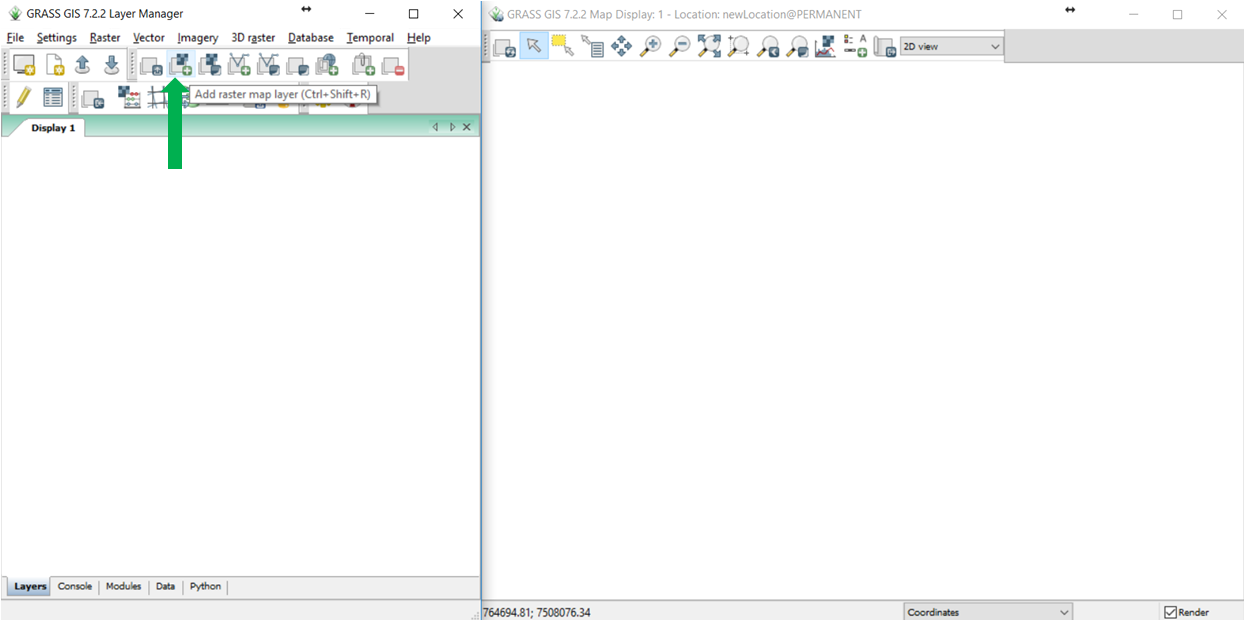
Note that you can display the maps either by coding or by clicking. If you choose clicking, then follow the steps to visualize out both example data:

Choose the São João raster map:

Choose the Rio Claro raster map:

Now see below how the example maps will appear in GRASS display:
São João, State of Rio de Janeiro:

Rio Claro land use map, State of São Paulo:

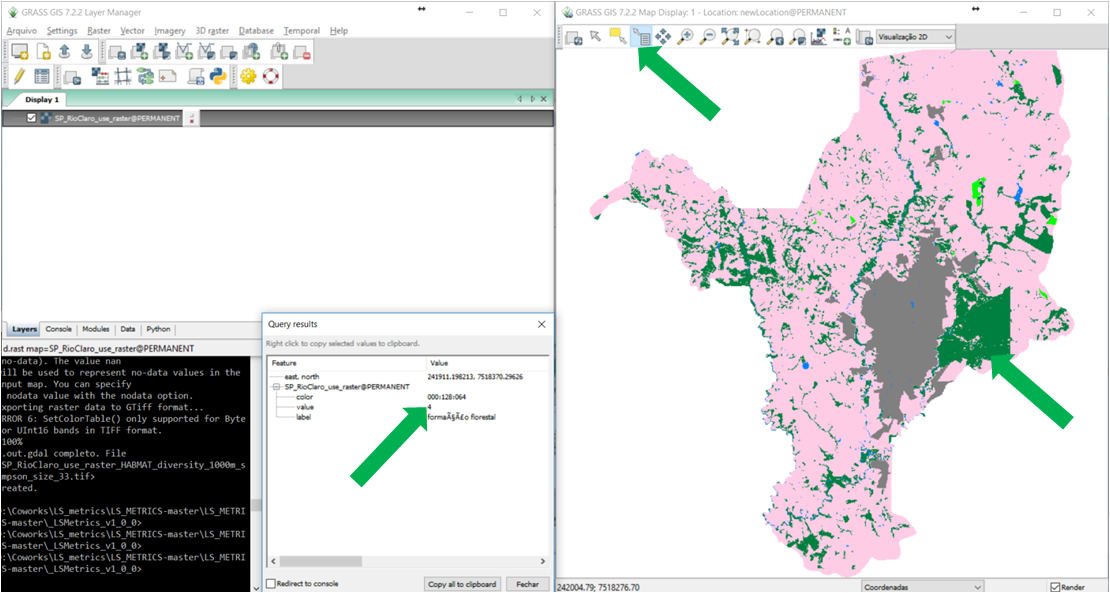
On GRASS GIS display, you can evaluate the pixel values using the Query results tool. Se below:

Now see the code for showing the already existent example data:
d.rast map=APA_Sao_Joao_RJ_cut_SIRGAS_UTM23S@PERMANENT
d.rast map=SP_RioClaro_use_raster@PERMANENT
