-
-
Notifications
You must be signed in to change notification settings - Fork 5
Setup Arduino IDE
Elias Ruemmler edited this page Feb 18, 2021
·
8 revisions
To program the WeMos D1 mini with the Arduino IDE, the following settings must be made once.
- Download der Arduino IDE
- Install the ESP8266 board manager
- Install the ESP8266 library
- Install the board
- Test
https://www.arduino.cc/en/Main/Software
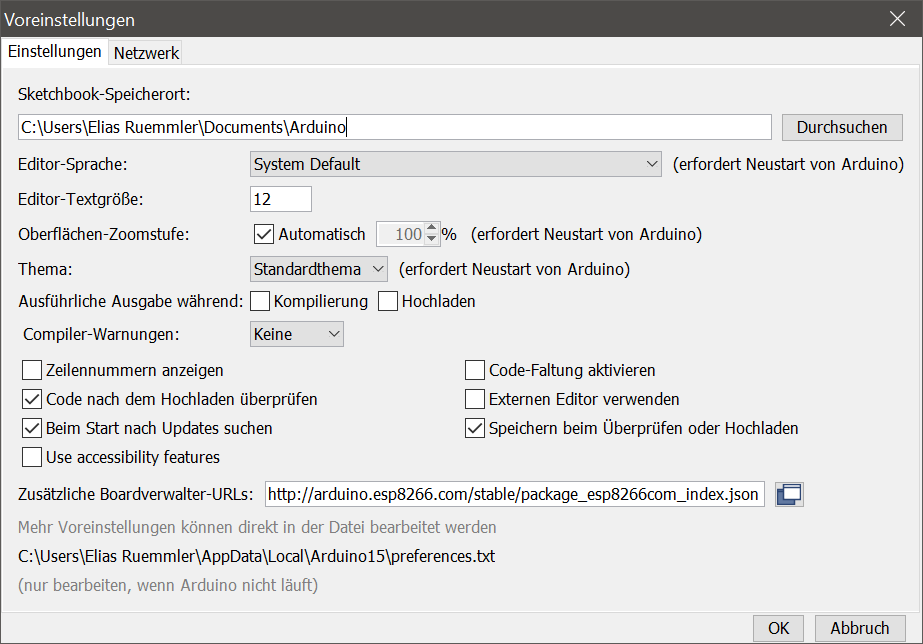
In the Arduino IDE, go to File > Preferences. Add the following URL to the filed Additional Boards Manager URLs.

https://arduino.esp8266.com/stable/package_esp8266com_index.json
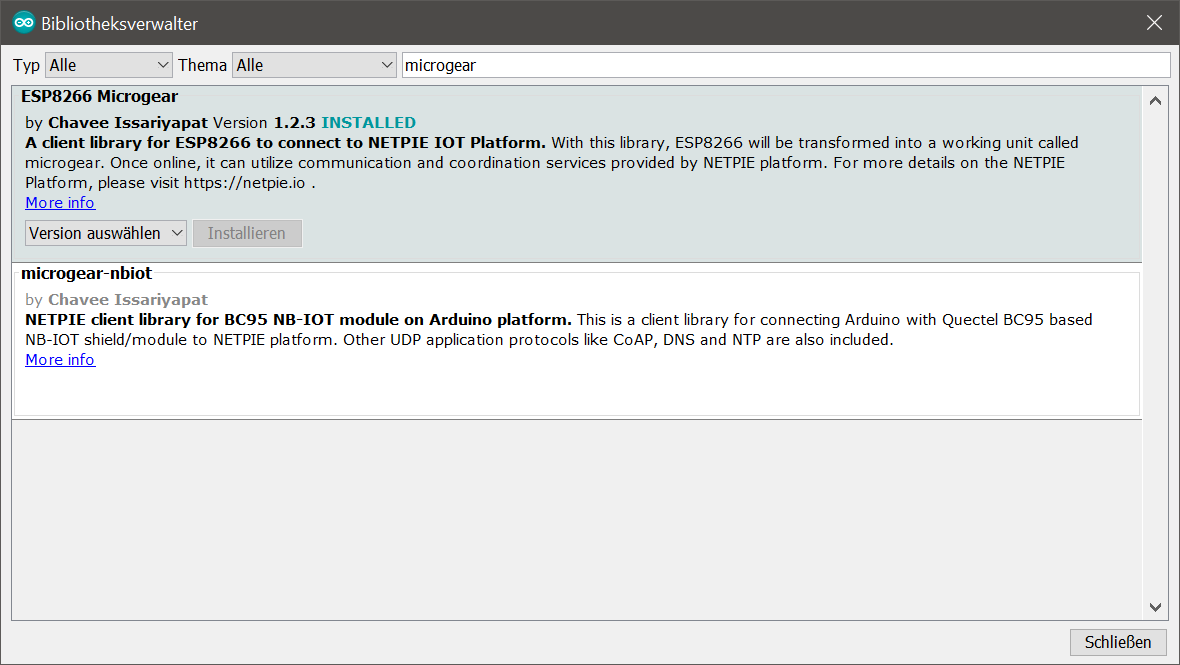
Go to Sketch > Include Library > Manage Libraries, then in the search box enter microgear.

Install the latest version of ESP8266 Microgear library.
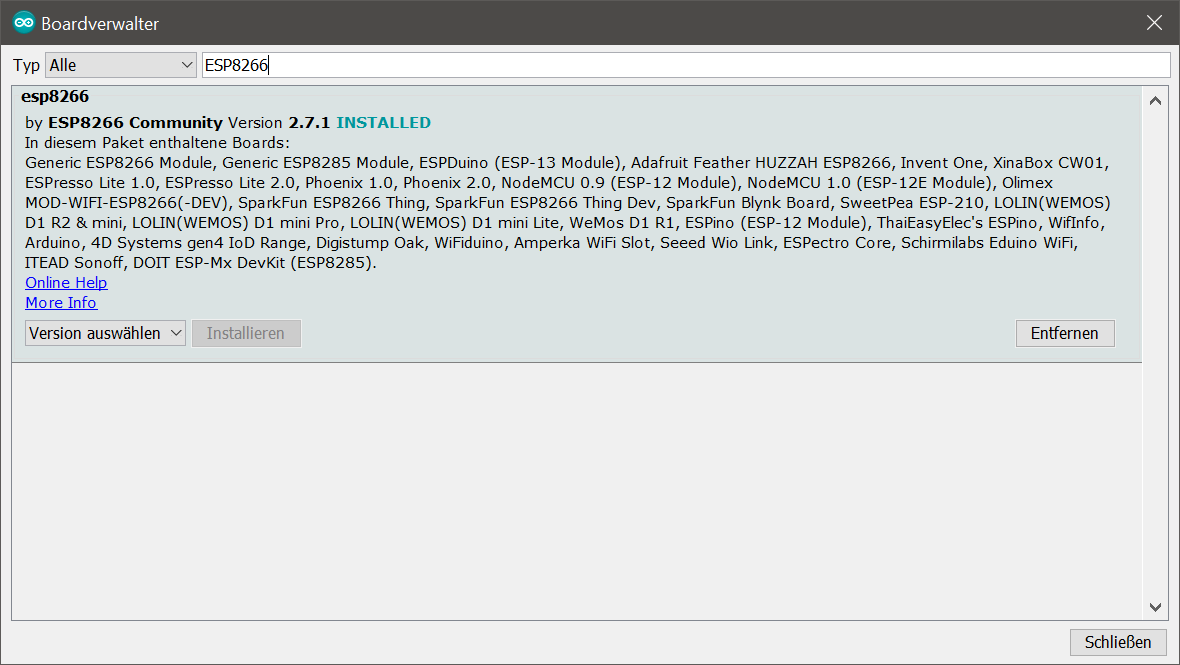
Go to Tools > Board > Boards Manager, then search for esp8266.

Install the latest version of esp8266 package from ESP8266 Community.
- Connect the WeMos D1 mini via USB to the PC
- Select Tools > Boards > LOLIN(WEMOS) D1 R2 & mini
- Select Tools > Port >
- Load the blink sketch by selecting File > Examples > ESP8266 > Blink
- Compile and uplaod the sketch, by pressing the buttons (✔️ and
▶️ ) in the left top corner - After uploading the led on your Di mini must blink