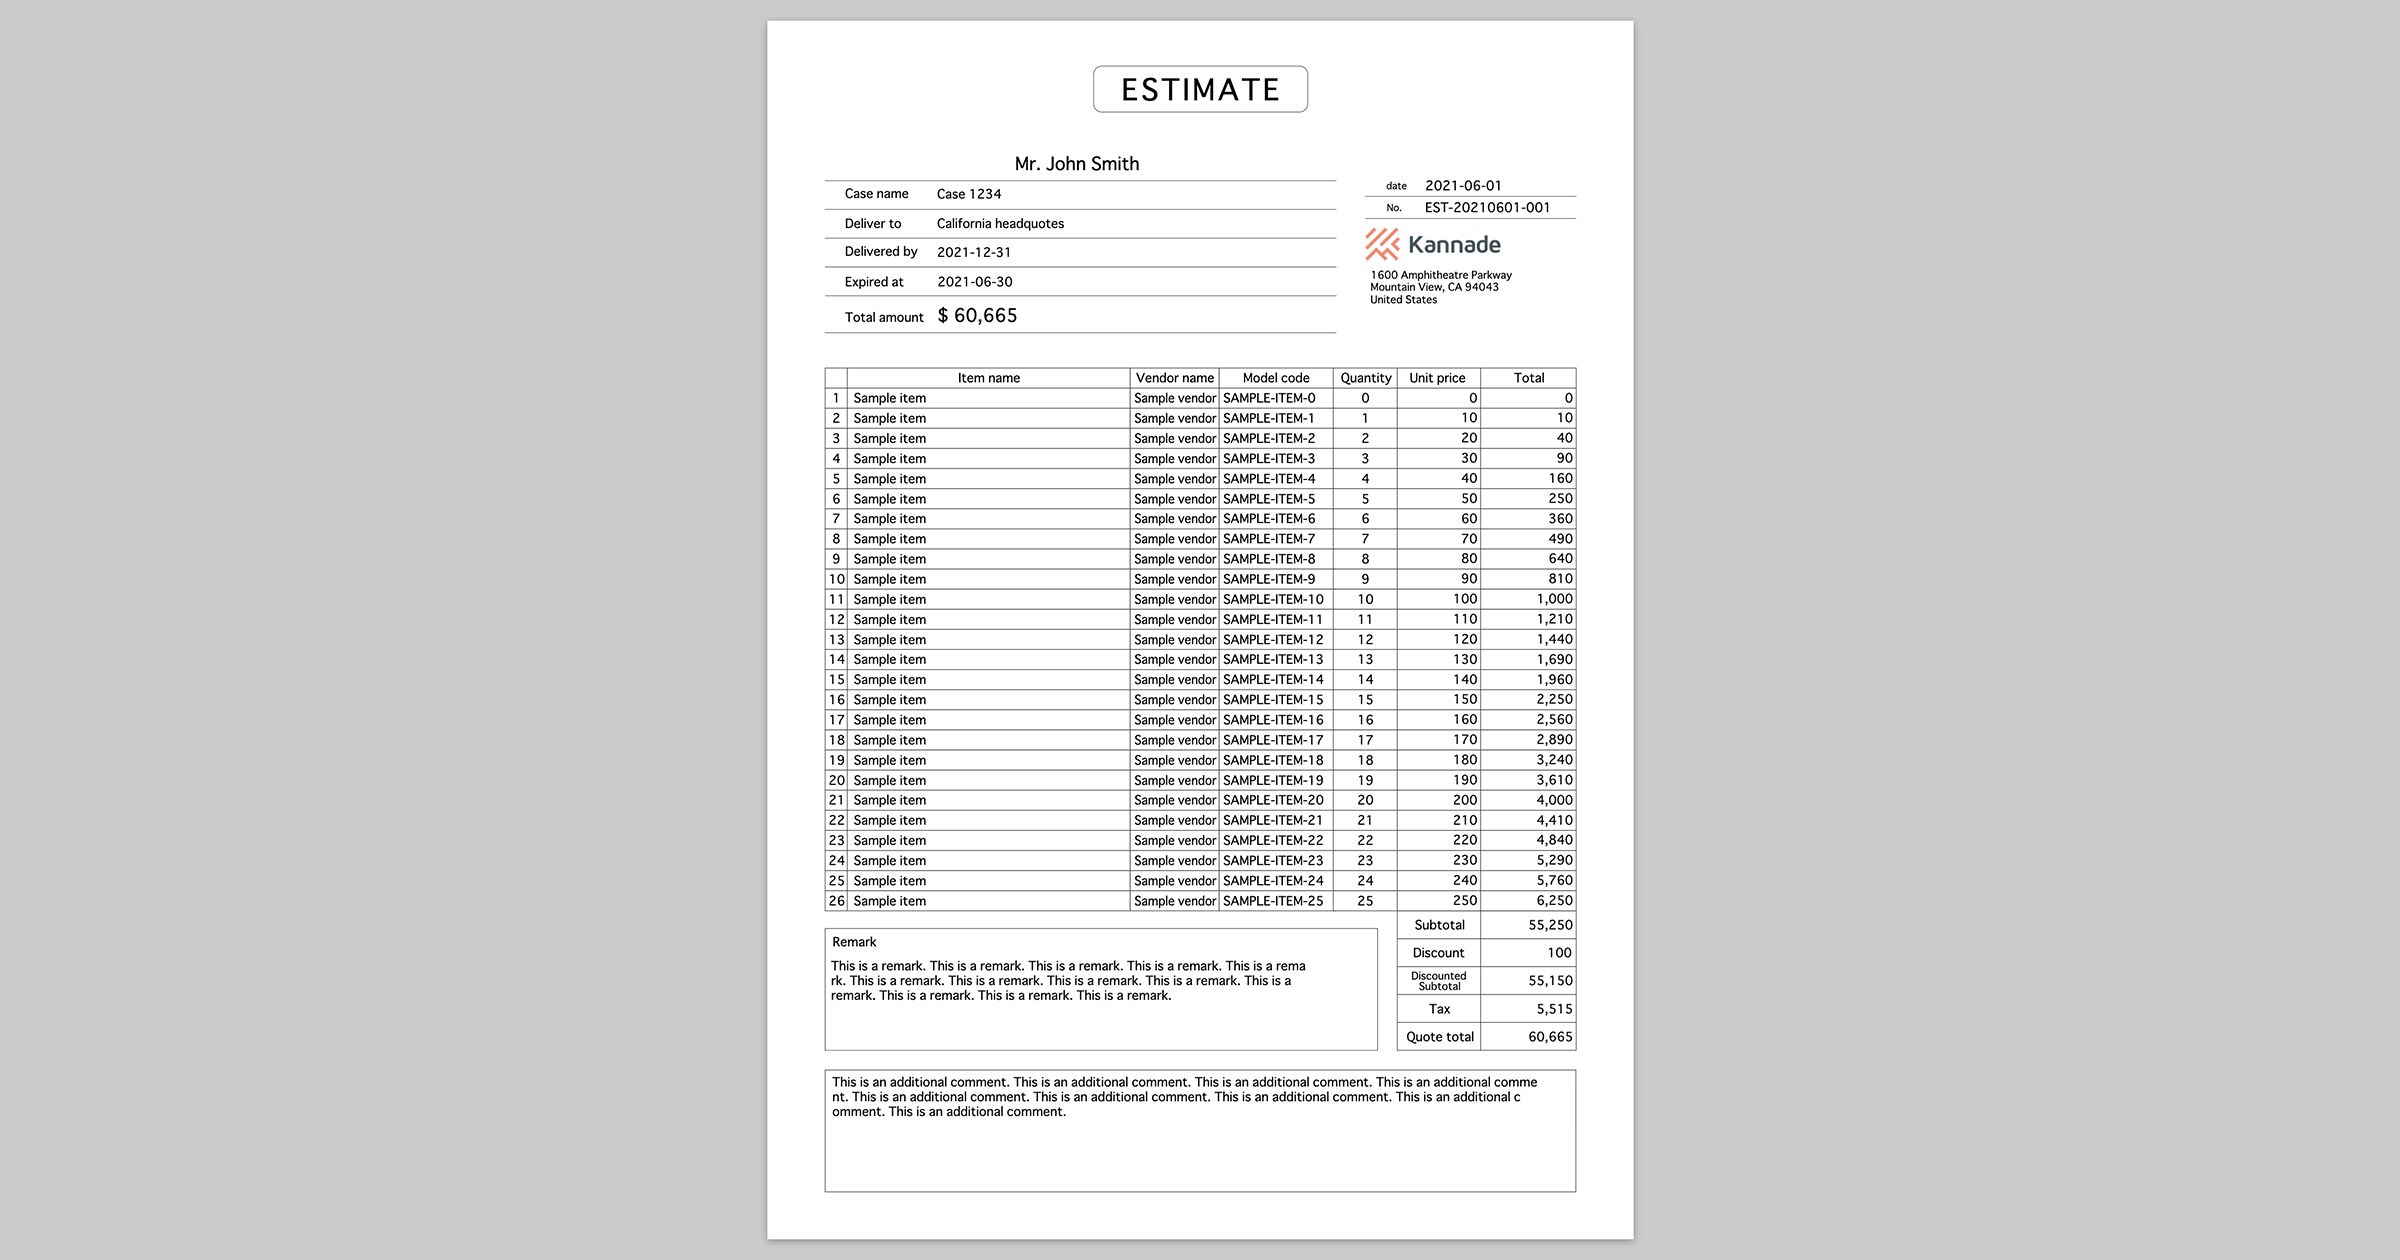
The world's most maintainable way to create paper-printable documents 🖨💘
You can print beautiful and maintainable paper documents by following steps.
- Design the document with Adobe XD, Figma, or something
- Export it as SVG
- Embed SVG into your HTML and fix it with svg-paper on client side
- That's it 💥
You can get the built assets from jsDelivr.
<link rel="stylesheet" href="https://cdn.jsdelivr.net/npm/svg-paper/dist/svg-paper.min.css"><script src="https://cdn.jsdelivr.net/npm/svg-paper/dist/svg-paper.min.js"></script>Of course you also can install via npm.
$ npm install svg-paperSee this doc 📝
First, just embed SVG content in .paper element like following.
<body>
  <div class="paper">
    <svg>...</svg>
  </div>
</body>
Next, load svg-paper[.min].js with <script> tag or import/require svg-pager[.min].js as a module.
<script src="svg-paper.min.js"></script>
<script>
  const paper = new SvgPaper()
  // ...
</script>
or
import SvgPaper from 'svg-paper'
// or
// const SvgPaper = require('svg-paper')

const paper = new SvgPaper()
Then you can replace or adjust SVG contents in DOM easily with svg-paper like following.
paper
  // replace placeholder to actual value
  .replace('%placeholder1%', 'Actual value 1')
  // ... and more

  // set max width to 1000
  // in the other words, if actual width of the content is bigger than 1000 it shrinks automatically
  .adjustText('#selector1', 1000)

  // set max width to 800 and brings the element #selector2 to the center of 800 width area
  .adjustText('#selector2', 800, 'middle')

  // of course you can bring it to the end
  .adjustText('#selector3', 800, 'end')

  // automatically wrap or shrink actual content so that it fits within the specified area (600 x 300)
  .adjustTetxarea('#selector4', 600, 300)

  // you can pass some additional args
  .adjustTextarea('#selector5',
    600,  // width
    300,  // height
    1.2,  // lineHeight : default is 1.2 times font-size
    0.5,  // paddingX   : default is 0.5 times font-size
    0.5,  // paddingY   : default is 0.5 times font-size
    false // nowrap     : default is false. if true, content will not be wrapped
  )

  // finally, apply all replacing and adjusting to DOM
.apply()To beautify preview screen, you should add only 3 lines to your HTML 👍
<head>
  ...
  <link rel="stylesheet" href="svg-paper.min.css"> <!-- here -->
  <style>@page { size: A4 }</style> <!-- here -->
</head>

<body>
  <div class="paper A4"> <!-- here -->
    <svg>...</svg>
  </div>
</body>
Just load svg-paper.min.css (or svg-paper.css), in <head> set @page size, and set the class of .paper element to specify page size.
Available page sizes are:
A3A3 landscapeA4A4 landscapeA5A5 landscapeletterletter landscapelegallegal landscape
svg-paper depends on DOM, so in most cases you have to pass variables to be replaced with placeholders in template from back-end to front-end.
The most easy ways is just passing replacements and text/textarea adjustment parameters to front-end as JSON string.
// Controller
public function paperAction($id)
{
    $model = $repository->findById($id);

    return $this->render('paper.html.twig', [
        'svg' => file_get_contents('/path/to/paper.svg'),
        'replacements' => [
            '%name%' => $model->name,
            // ... and more
        ],
    ]);
}
{# paper.html.twig #}
<!DOCTYPE html>
<html>
<head>
<link rel="stylesheet" href="svg-paper.min.css">
<style>@page { size: A4 }</style>
</head>
<body>
<div class="paper A4">
{{ svg|raw }}
</div>
<div data-replacements="{{ replacements|json_encode }}"></div>
<script src="svg-paper.min.js"></script>
<script src="your-script.js"></script>
</body>
</html>// your-script.js
const paper = new SvgPaper()
const replacements = $('[data-replacements]').data('replacements')
for (let [search, replacement] of Object.entries(replacements)) {
paper.replace(search, replacement)
}
paper.apply()svg-paper replaces placeholders and adjust text/textarea after DOM loaded, so the content before replaced and adjusted will be shown on the screen for a moment 🤔
This problem is very easy to solve just by adding some "blinder" layer on the content and disappear it after .apply() 👍
<body>
  <div id="blinder" style="width:100vw; height:100vh; background-color:#ccc"></div>
  <div class="paper">
    <svg>...</svg>
  </div>
</body>paper.apply()
document.querySelector('#blinder').style.display = 'none'You can easily print to PDF directly by using electron-pdf.
The basic usage of electron-pdf is following.
$ npm install --global electron-pdf
$ electron-pdf your-document.html your-document.pdf
But svg-paper modifies HTML content by JavaScript, so you have to wait it before printing by following.
$ electron-pdf your-document.html your-document.pdf -e # -e is the shorthand for --waitForJSEvent<!-- your document -->
<body>
...
<script>document.body.dispatchEvent(new Event('view-ready'))</script> <!-- 'view-ready' is the default event name for --waitForJSEvent -->
</body>To learn more see README of electron-pdf.
Enjoy! ✨


