 ← Choose language | Выберите язык
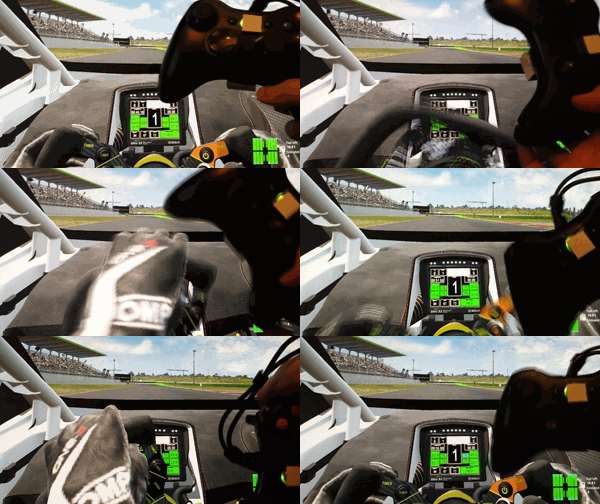
External Arduino gyroscope for any XInput compatible gamepads. With it, you can more accurately aim and steer. Buttons allow you to switch modes directly during the game. External pedals are supported, you can use them even without a gyroscope.
There are 3 modes of use:
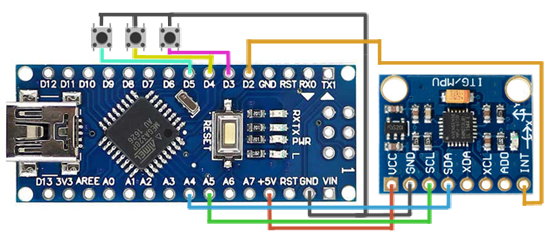
- Default - no use of a gyroscope (button 1 - digital pin 5)
- Steering wheel - emulation of the left stick with a gyroscope (button 2 - digital pin 4)
- FPS - mouse movement by tilting the gyroscope (button 3 - digital pin 3)
The centering of the axes occurs when you press the steering wheel button or FPS.
The first way is to use the "XInput Injector" program. It is located in the notification area and allows you to infiltrate the game process in a couple of clicks, and use a gyroscope.
Before use, you just need to run the "X360Advance Settings" program, enter the COM port number, change the sensitivity of mouse and steering wheel movement, the default settings are recommended. Further, the sensitivity of the mouse can be changed already in the games themselves.
For convenience, you can also add "XInput Injector" to startup.
In the "XInput Injector" program itself, it is enough to select the name of the process and click on it; after successful implementation, the sound of connecting new equipment will be reproduced.
The second way to use it is to copy the proxy dll to the folder of the game itself. The method has poor compatibility, works mainly with old games.
To configure, you need to change the COM port number in the "X360Advance.ini" file, the sensitivity of mouse and steering wheel movement, the default settings are recommended.
Next, you need to copy the files "xinput1_3.dll" (according to the bitness of the game, for a 32-bit game from the x86 folder, for a 64-bit game from the 64 folder) in the folder with the game and start the game.
It may be necessary for some games to rename "xinput1_3.dll" to one of the names: "xinput9_1_0.dll", "xinput1_1.dll", "xinput1_2.dll" or "xinput1_4.dll" (only Metro applications).
For games in which the XInput dll library does not work, you can also use the "X360AdvanceApp" application, which allows you to simply emulate a mouse for aiming.
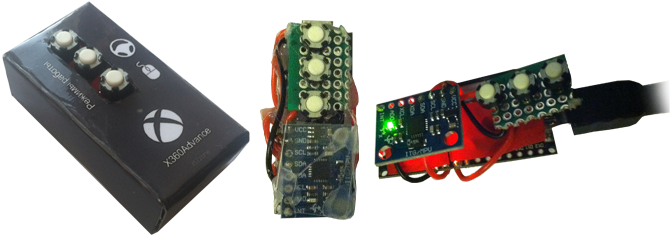
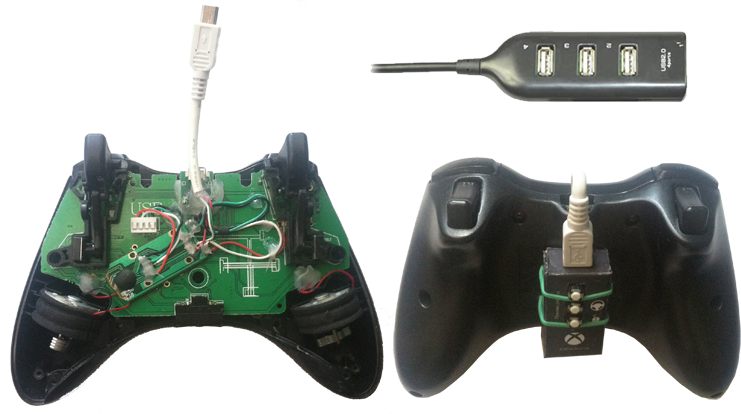
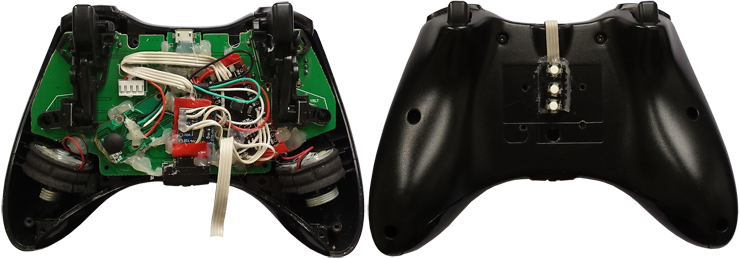
Need to buy Arduino Nano, rotation sensor MPU 6050 GY-521, 3 buttons, prototype board, cable 2m miniUSB or microUSB (depending on the arduino) and tape Velcro. Solder the board by scheme. Attach to the back of the case, for example, with rubber bands.
Also can make just one wire using a USB hub. The USB hub has a small board and can be placed inside the gamepad.
Also can pack everything in the controller case. To do this, remove the board support elements from the back of the inside.
Flash calibration sketch, put on a flat surface, get the data for calibration. Insert calibration data into the main sketch.
Firmware and libraries can be found at the link below.
Some games are incompatible with this method, since they are not designed to use a mouse and a gamepad at the same time. Some games can constantly change button icons (from keyboard to gamepad and vice versa).
- MinHook for the Windows hook library.
- Injector by @Nefarius for a handy DLL injector.
- Injectable Generic Camera System by Frans Bouma for examples of using MinHook to spoof XInput data.
Version for Windows 7, 8.1, 10.
r57zone[at]gmail.com

