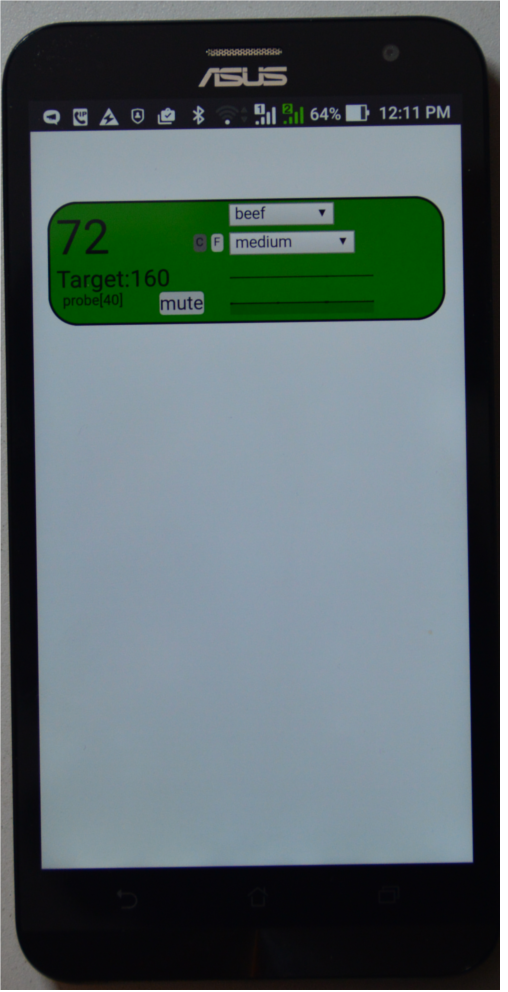
Node micro-app to display wireless meat thermometer data. It runs as a backend Node.js application with the UI accessed from a browser or phone as shown below.
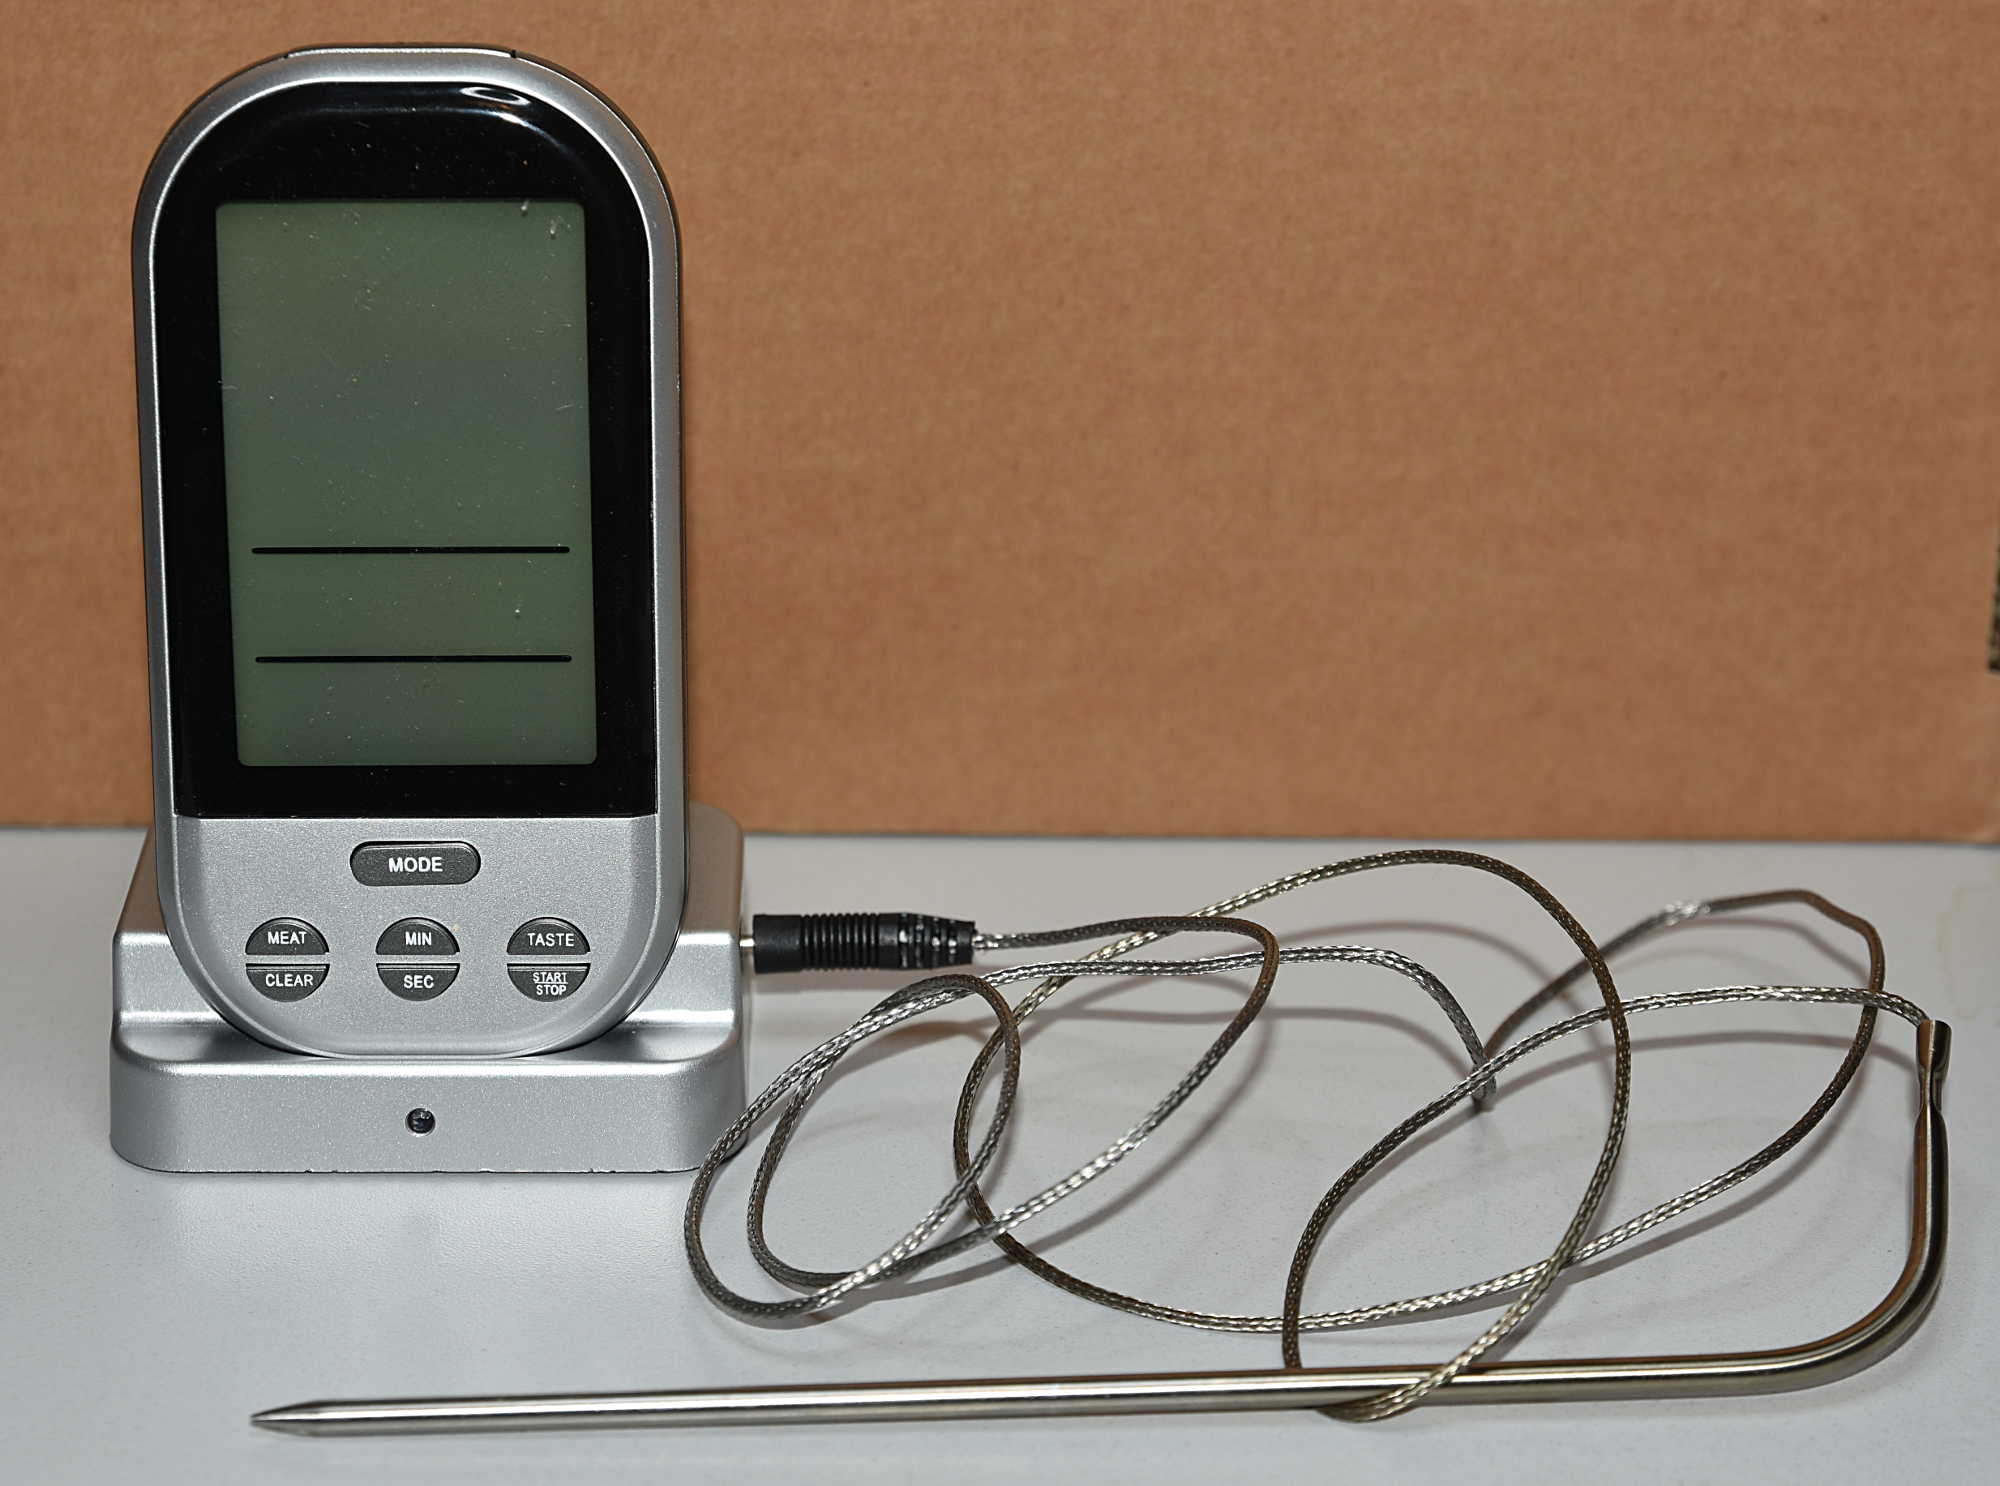
It currently works with the base from this meat thermometer:
using this project: PI433WirelessRecvManager or this less expensive project Mqtt433Bridge.
You can get these for around $15-20 from Amazon and ebay. I've tested ones that look like the picture (silver or black) from 4 different vendors and they all work so it seems like they all use the same electronics.
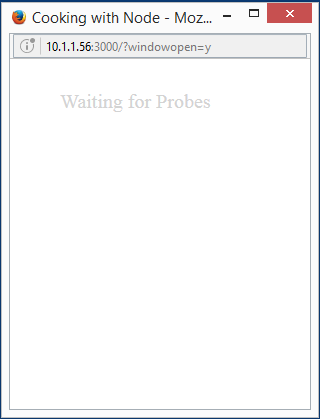
The micro-app starts with a blank page indicating that it is listening for probes:
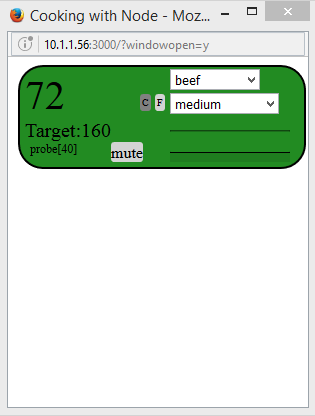
Once you turn on the probe it will show up in the display:
The micro-app supports multiple probes, so as you turn on addiitonal probes the display for each additional probe will show up under the previous probes. It is possible that the probe base will chose the same probe id an existing one, in which case you'll need to turn it off for 10-20 seconds and turn it back on. Most likely the base will pick another id. I've started up to 4 probes at the same time and yet to have a colision.
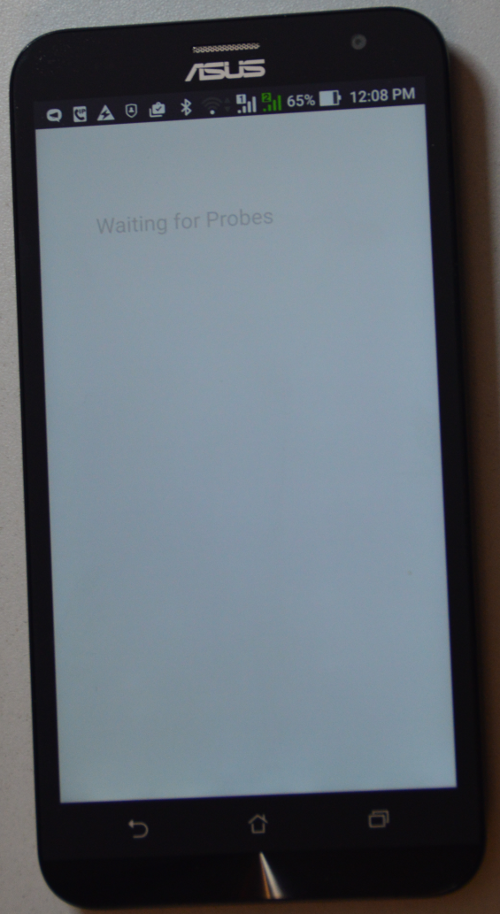
Using this project micro-app-cordova-launcher you can build a native application for your phone which displays nicely as well:
The UI allows you to select the meat that you are cooking as well as the target "doneness" depending on the meat.
NOTE: this application is to be used only as a convenience in addtion to the original display. Always validate that your meat has reached the required target temperature with the original meat thermometer display before serving.
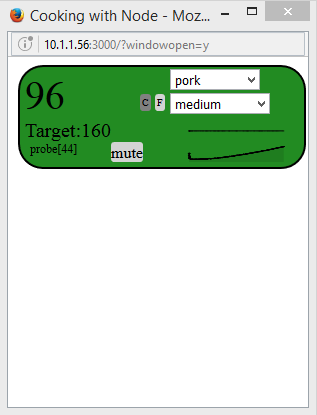
As the meat cooks the display will update, showing the current temperature as reported by the probe, as well as a graph of the cook so far.
For example, in this cook I selected pork, with a target of medium for "doneness" and probe 44 shows that the target temperature is 160 degress Farenheit. The current probe temperature is 96 degress Farenheit and you can see the graph of the cook progression in the lower right hand corner.
You can change between showing temperatures in Celcius and Farenheit by selecting the 'C' or 'F' buttons.
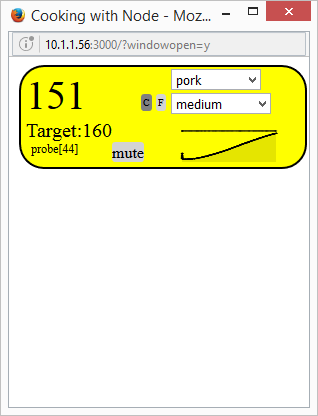
Once the cook progresses and is "warn" degrees (~10 degrees Farenheit by default) from the target temperature, the probe will change to the warning color, and if you have configured sms notificaitons an sms text will be sent to your phone.
In addition, the configured "warn" message wil start playing. You can silence the warning message by clicking the "mute" button.
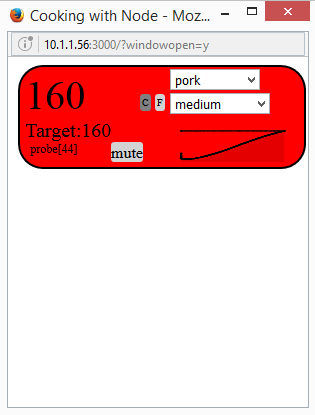
This process is repeated as the probe reaches the target temperature, with the probe changing to the target temperature coloar and another sms message being sent if so configured. In addition, the configured "target" message will start playing. You can silence the target message by clicking the "mute" button.
Once complete and you turn off the probe, the probe will drop off the display after a few minutes and if it was the last probe the display will go back to displaying the original waiting for probes messsage.
The server requires Node along with the modules defined in the package.json file to be installed.
It also requires:
- an mqtt server
- A meat thremometer pushlishing temps through mqtt (for example, using the PI433WirelessRecvManager described above)
- twillio account or voip.ms account if you want SMS notifications
Most configuration is done in the config.json file in the lib directory which supports the following options:
-
title - title used to name the page for the app.
-
serverPort - port on which micro-app is listening for connections.
-
windowSize - size of the UI for the micro-app.
-
mqtt - object with serverUrl, rootTopic.
-
cleanupInternval - number of seconds after the last mesage from a probe that we will decide the probe was turned off and drop it from the display.
-
scaleC - true for display to default to Celcius, false to default
to Farenheit. This is optional and the default is true. -
targetTemps - array with objects for each of the meat/target temperatures. See example below.
-
notify - element with the following sub-elemens:
- mqttSmsBridge - element with the following sub-elements:
- enabled - set to true if you want notifications to be sent using this provider.
- serverUrl - url for the mqtt server to which the bridge is connected.
- topic - topic on which the bridge listens for notification requests.
- certs - directory which contains the keys/certs
required to connect to the mqtt server if the
url is of type
mqtts.
- voipms - element with the following sub-elements:
- enabled - set to true if you want notifications to be sent using this provider.
- user - voip.ms API userid.
- password - voip.ms API password.
- did - voip.ms did(number) from which the SMS will be sent.
- dst - number to which the SMS will be sent.
- twilio - element with the following sub-elements:
- enabled - set to true if you want notifications to be sent using this provider.
- accountSID - twilio account ID.
- accountAuthToken - twilio auth token.
- toNumber - number to which the SMS will be sent.
- fromNumber - number from which the SMS will be sent.
- mqttSmsBridge - element with the following sub-elements:
-
warn - number of degrees Celcius before target temperature to send out warning. This is optional and the default is 5.6 degrees Celcius or about 10 degerees Farenheit.
-
warnSound - This is optional, full path to the mp3 played when the warning temperature is reached.
-
targetSound - This is optional, full path to the mp3 played when the target temperature is reached.
-
skin - This is optional, name of the css file for the UI. This file should be in the lib directory and can be used to modify the colors and/or layout of the probe display.
-
test - Note normally used but useful when customizing display. Adds 2 dummy probes at startup (they will only remain for cleanupInterval seconds).
As an example:
{
  "title": "Cooking with Node",
  "windowSize": { "x":350, "y":300 },
  "serverPort": 3000,
  "mqtt": { "serverUrl": "mqtt:10.1.1.186:1883",
            "mqttTopic": "house/meat/temp"
           },
  "cleanupInterval": 180,
  "scaleC": false,
  "targetTemps": [
                   { "name": "beef", "temps": [ { "well": 76 },
                             { "medium well": 73 },
                             { "medium": 71 },
                             { "medium rare+": 65.5 },
                             { "medium rare": 62 },
                             { "rare": 60 } ] },
                   { "name": "lamb", "temps": [ { "well": 76 },
                             { "medium well": 73 },
                             { "medium": 71 },
                             { "medium rare": 62 } ] },
                   { "name": "veal", "temps": [ { "well": 76 },
                             { "medium well": 71 } ,
                             { "medium": 62 },
                             { "medium rare": 60 } ] },
                   { "name": "hamburber", "temps": [ { "well": 76 } ] },
                   { "name": "pork", "temps": [ { "well": 79 },
                             { "medium well": 73 },
                             { "medium": 71 } ] },
                   { "name": "turkey", "temps": [ { "well": 79 } ] },
                   { "name": "chicken", "temps": [ { "well": 79 } ] },
                   { "name": "fish", "temps": [ { "well": 58 } ] }
                 ],
   "notify": {
     "mqttSmsBridge": { "enabled": true,
                        "serverUrl": "mqtt:10.1.1.186:1883",
                        "topic": "house/sms" }
   }
}
The easiest way to install is to run:
npm install cooking-with-node
or
npm install https://github.com/mhdawson/CookingWithNode.git
and then configure the default config.json file in the lib directory as described in the configuration section above.
Simply cd to the directory where the npm was installed and type:
npm start
