This project demonstrates an AWS-powered serverless build, test and deploy pipeline ft. multiple environments. The /src directory contains a React/TypeScript/Webpack-powered web app that is served from S3 with CloudFront as a CDN and Route 53 for DNS. The /infrastructure directory contains all infrastructure and deployment steps defined as code (Terraform and bash scripts). CodeBuild and CodePipeline take care of building, testing and deploying the project. All build logs are stored in CloudWatch. CodePipeline accesses GitHub using an access token.
When using CodeBuild to build, test and deploy each project, information about the build environment must be provided. A build environment represents a combination of operating system, programming language runtime, and tools that CodeBuild uses to build, test and deploy - A.K.A. a Docker image. I maintain build environments for the programming languages and tools I use frequently - e.g. docker-node-terraform-aws. The build commands and related settings must also be specified in a buildspec declaration (YAML format) stored at the root level of the project - e.g. buildspec-test.yml. Because a buildspec declaration must be valid YAML, the spacing in a buildspec declaration is important. If the number of spaces in a buildspec declaration is invalid, builds might fail immediately. A YAML validator can be used to test whether a buildspec declaration is valid YAML. See AWS CodeBuild Concepts and Build Phase Transitions for further information.
This project can be updated as needed to build many different types of project. If a project needs to build Docker images/interact with the Docker daemon the Privileged flag under advanced settings of the CodeBuild project in AWS console must be set to true. This can also be set to true using the privileged_mode variable of the build-pipeline module. The buildspec declaration must also start the Docker daemon and wait for it to become interactive:
- nohup /usr/local/bin/dockerd --host=unix:///var/run/docker.sock --host=tcp://0.0.0.0:2375 --storage-driver=overlay&
- timeout -t 15 sh -c "until docker info; do echo .; sleep 1; done"This project uses EC2 Systems Manager Parameter Store to store shared, CodeBuild and app/service secrets as encrypted strings (e.g. passwords, database strings, etc.).
Secrets can be encrypted and decrypted via AWS console/CLI/SDK:
aws ssm put-parameter --region REGION --name "/codebuild/PROJECT_NAME/SECRET_NAME" --value "VALUE" --type SecureString --key-id "KEY_ID"
aws ssm get-parameters --region REGION --name "/codebuild/PROJECT_NAME/SECRET_NAME" --with-decryption --query Parameters[0].Value --output text- Shared secrets: /shared/SECRET_NAME
- CodeBuild secrets: /codebuild/PROJECT_NAME/SECRET_NAME
- App/service secrets: /PROJECT_NAME/SECRET_NAME
See ./buildspec-test.yml as an example of decrypting a shared secret (GitHub OAuth token) via SSM Parameter Store in a buildspec declaration.
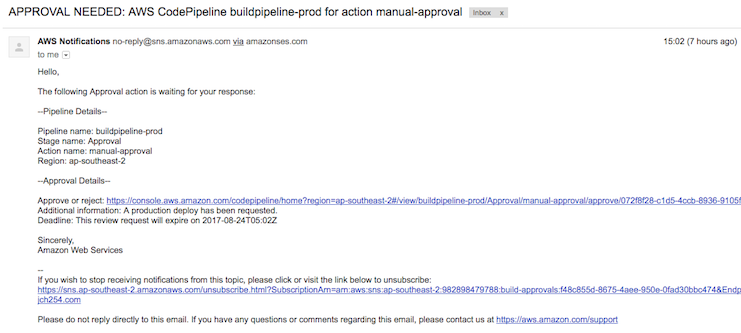
This project automatically deploys the master branch to the test environment. To deploy a new version to the production environment the master branch must be merged into a production branch. The production branch is deployed to the production environment only after it is explicitly confirmed by the required parties via a CodePipeline approval action. The approval action prevents accidental releases to production (e.g. someone merges master into production by accident). This is useful as the production deploy is tightly controlled - to avoid impacting users during peak hours, align releases with third parties etc. Each commit on the production branch reflects a production deploy with the commit time being the approximate time of deployment (providing the pipelines are fast enough). Approval notifications are sent out via SNS.
Different steps run in each environment by utilising separate buildspec declarations and Terraform state files per environment. Production doesn't need to build or run tests, it just needs to deploy infrastructure and artifacts.
TODO!
AWS provides instructions on setting up build notifications with CloudWatch Events and SNS to send build notifications to subscribers whenever builds succeed, fail, go from one build phase to another, or any combination of these events. For more detailed notifications a Lambda function can be used (e.g. including commit details, sending data to a webhook etc.).
If the cache_bucket Terraform variable is provided, CodeBuild will use a folder in the given bucket as a build cache. See ./buildspec-test.yml as an example of defining cache paths in a buildspec declaration.
This project defines Terraform modules within the /infrastructure directory. A good practice is to create a repository containing common infrastructure components which can be referenced and configured within other projects (e.g. web-app, rds-database, ecs-service etc.). Utilising Terraform modules to create 'building blocks' allows conventions to be enforced and standards defined for infrastructure (e.g. tags, security etc.). Modules are defined once then referenced and configured within projects using the repository URL/branch/tag/subfolder as the module source. This makes it easy for developers to define infrastructure as code within projects, achieve total ownership (provisioning and deploying as needed) and move fast. It also makes it easy to try out new concepts/ideas on isolated infrastructure. See Standardizing Application Deployments Using Amazon ECS and Terraform for a more detailed introduction and terraform-modules for an example.
--
- Run the following commands in the app's root directory then open http://localhost:3001
yarn install
yarn run dev- Run the following commands in the app's root directory then check the /dist folder
yarn install
yarn run build- Run the following commands in the app's root directory then open http://localhost:3001
yarn install
yarn run prodRefer to the /infrastructure directory.

