The Acala EVM Playground is useful to test various functionalities of Acala EVM. It’s a fork from parity canvas-ui.
To deploy your smart contract you can use our testnet or you can run your local dev node.
To run your own development network, you can follow the instructions on setting up your own development network in the official EVM+ documentation.
Once your development network is operational, you can connect your EVM wallet to it by using the following parameters:
| Key | Value | |
|---|---|---|
| Name | Mandala | |
| URL | http://127.0.0.1:8545 | |
| Chain ID | 595 | |
| WS endpoint URL | ws://127.0.0.1:9944 | |
| Symbol | ACA |
You can reference the instructions on how to connect MetaMask to the EVM+ and substitute the values from instructions with the values from above.
After your EVM wallet is connected to the Acala EVM+, you can continue to the EVM playground.
To deploy to our test network you need to have the polkadot{.js} wallet extension installed in your browser.
Once you have the extension installed, you can bind your accounts with an EVM address and get test network funds from the Discord faucet.
{% hint style="info" %} Note: For the remainder of this page we will assume you are using a local development network. If you are deploying to the test network. {% endhint %}
To deploy a smart contract using EVM playgrounds, you need to compile your smart contract in your preferred development framework so that you have the ABI bundle available to upload.
How to create an ExampleToken ABI bundle
In case you want to use the same smart contract as it is used in this example, you can follow these short instructions on how to create it.
First clone the Acala Hardhat tutorials example:
git clone git@github.com:AcalaNetwork/hardhat-tutorials.gitMove into the examples repository and into the token example:
cd hardhat-tutorials/tokenWithin the example directory, install all of the dependencies and compile the smart contracts:
yarn && yarn buildThis will compile the Token smart contract and create an ABI bundle to the directory artifacts/contracts/Token.sol/ the bundle file is called Token.json.
Upload ExampleToken ABI & bytecode file by navigating to https://evm.acala.network/.
Go to the Upload tab.
Assign the Name of your smart contract. You will be able to identify the smart contract in the Deploy tab with it, once it gets uploaded.
To upload the ABI bundle itself, you can either drag and drop it into the upload section, or click on the section and select the file.
Once you have selected the correct ABI bundle, the methods of the smart contract should be displayed. You can verify that the correct methods are listed and press Upload to upload the ABI bundle.
Smart contracts can be deployed under the Deploy tab of the EVM playgrounds.
The ABI bundles that you uploaded in the Upload tab can be seen here:
The methods available for an ABI bundle can be seen by expanding the ABI menu. This can be helpful if you have multiple bundles uploaded and you want to be sure that you will be interacting with the right one.
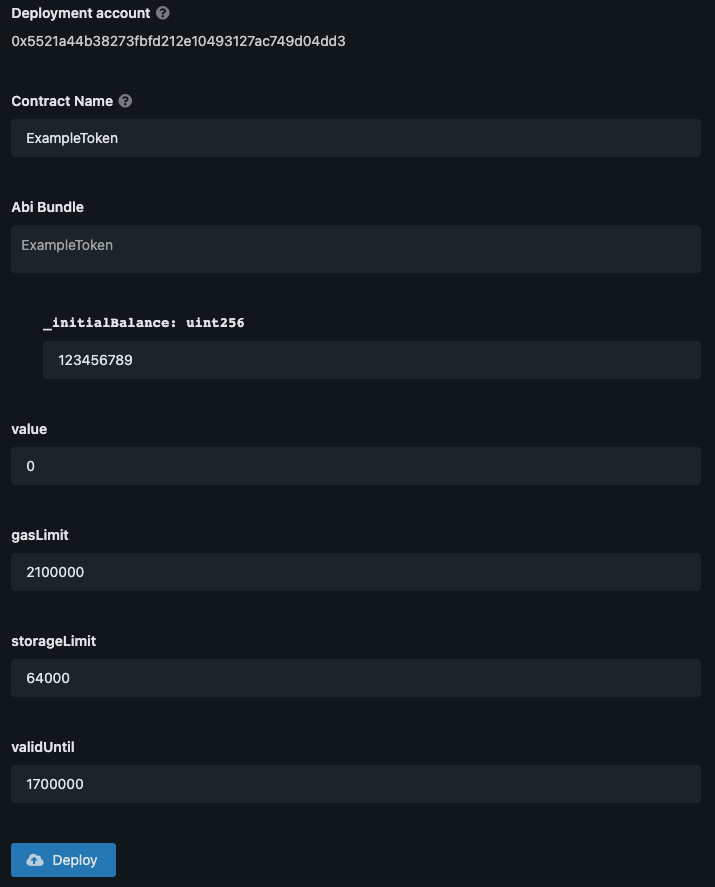
When you have verified that you are interacting with the ABI bundle that has the correct methods available, you can click Deploy, which should open a deployment interface:
The interface consists of the following components:
- Button to connect to your EVM wallet (this is why connecting MetaMask to the EVM+ is a prerequisite for this entry)
- Smart contract name, that can be changed, so you can deploy the same ABI bundle multiple times and easily differentiate between them
- ABI bundle identifications
- Fields to input the smart contract constructor parameters
- Value field to determine wether to send some of the native currency with the deploy transaction
- Fields to override the
gas parameters Deploybutton to deploy the smart contract once you are satisfied with the deployment parameters
Pressing the .png) button will prompt your EVM wallet to connect to the site. You can select the account that you want to use with the EVM playgrounds and connect it.
button will prompt your EVM wallet to connect to the site. You can select the account that you want to use with the EVM playgrounds and connect it.
The selected account should be displayed at the top of the page now:
Depending on the requirements, you can modify the deployment parameters of your smart contract. It is required to fill out the constructor parameters, but modifying other values is optional.\
Once the values are filled out and double checked, the smart contract is ready to be deployed.
{% hint style="warning" %}
The validUntil field value has to be higher than the current block number, or the deployment transaction will fail, due to the validator treating it as outdated. You can verify the current block number in a block explorer.
{% endhint %}
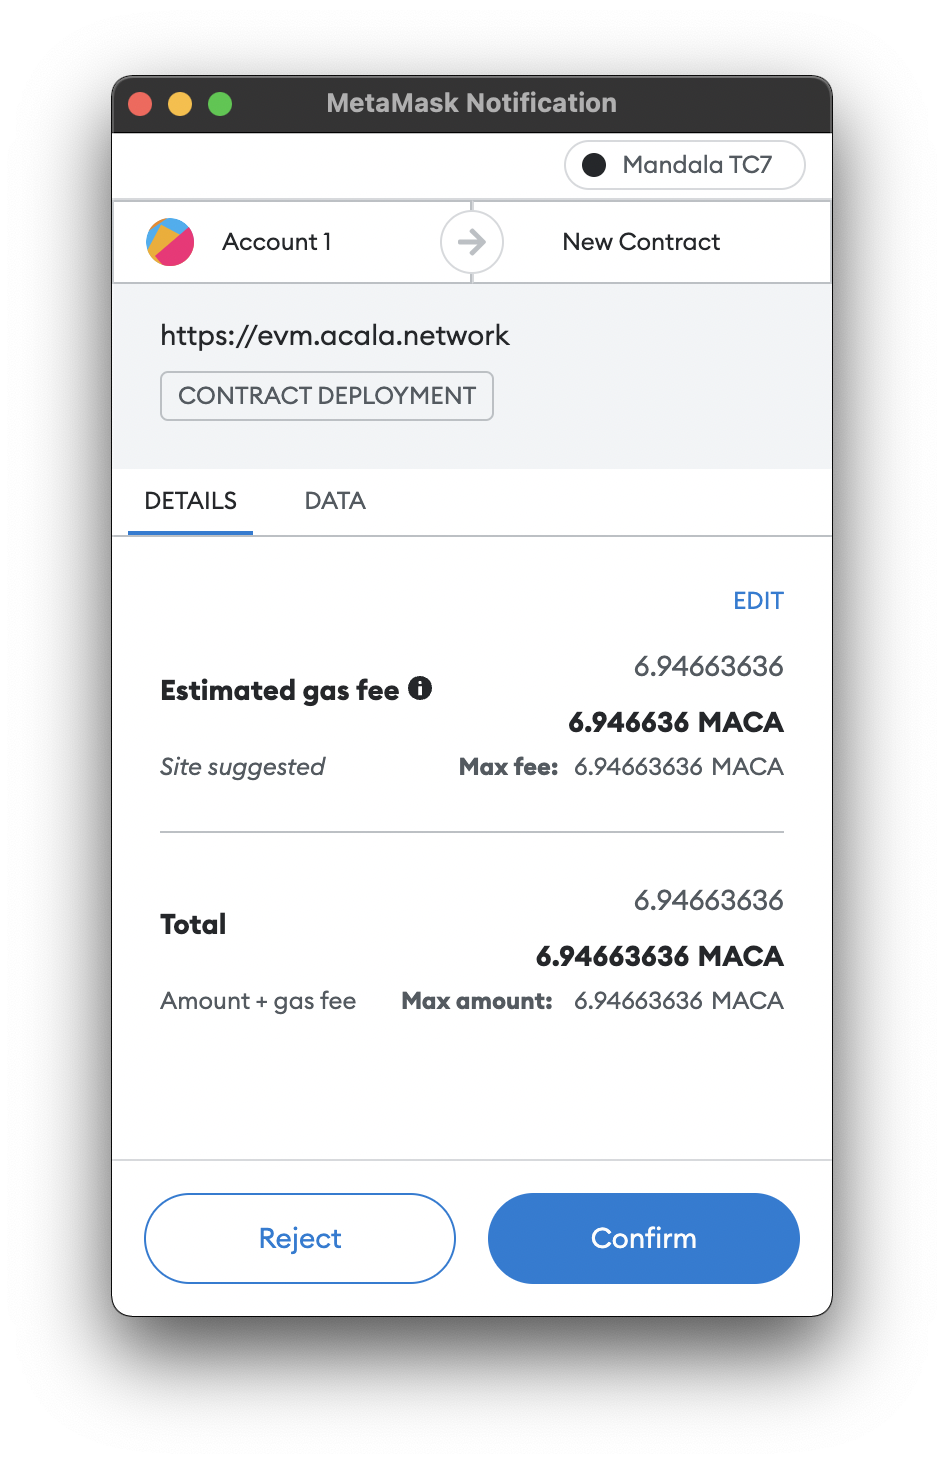
Once the parameters of deployment are ready, you can deploy the smart contract by pressing the Deploy button. This should prompt your EVM wallet to confirm your deployment transaction:\
Once the transaction is included in a block, the deployed smart contract can be found under Execute tab.
Navigate to the Execute tab. Find the deployed ExampleToken contract and Click the Execute button on the bottom of the "ExampleToken" box.
To perform a query on an account's balance, do the following steps:
- Make sure that the account you used to deploy the smart contract is connected to the
EVM playgrounds. - Pick
balanceOffrom theMessage to Senddropdown. - Copy and paste the address of the account that you used to deploy the smart contract to the
account: addressinput.
{% hint style="info" %}
Note: Solidity smart contracts have two types of methods: views and executable methods.
{% endhint %}
Viewsare used to query information from the blockchain without writing data to it.Viewstransactions are free. The Playground uses theCallbutton to indicate this.Executablemethods can write data onto the blockchain, and these transactions aren’t free. Click theExecutebutton to execute it.
Finally, click Call at the bottom, and Call results should show the ExampleToken balance of 123456789.
Now let's try transferring ExampleTokens to another account.
- Make sure that the deployer account is connected to the EVM playgrounds.
- Select
transferfrom theMessage to Senddropdown. - Fill out the
recipient addressinput box with another EVM address to which to send the tokens. - Enter transfer amount in the
amount: unit256argument box, note the token has a standard 18 decimals. - Click
Execute.
A notification will pop-up to confirm that the transaction is successfully executed.
Now you can check the balances of both of the accounts, and confirm that they have changed. deployer's account:
Other account:
.png)
.png)
.png)
.png)
.png)
.png)
.png)
.png)


.png)
.png)
.png)
.png)
.png)