-
Notifications
You must be signed in to change notification settings - Fork 0
Installation
You MUST use Unity's New Input System!
Unity has come up with a more modern way to handle user inputs and created com.unity.inputsystem
to replace the legacy Input class.
You will have to perform extra steps if you are not using the New Input System.
[NOTE] It may require much effort to migrate to this plugin if you already have your input detection solution already.
Write the following in your manifest.json:
{
  "dependencies": {
    "com.clpsplug.input-manager": "https://github.com/clpsplug/inputmanager.git?path=Packages/com.clpsplug.input-manager/#base"
  }
}If your project does not use the New Input System,
you will be prompted to restart Unity as soon as you add the package and focus your Unity Editor.
Restart Unity Editor as told.
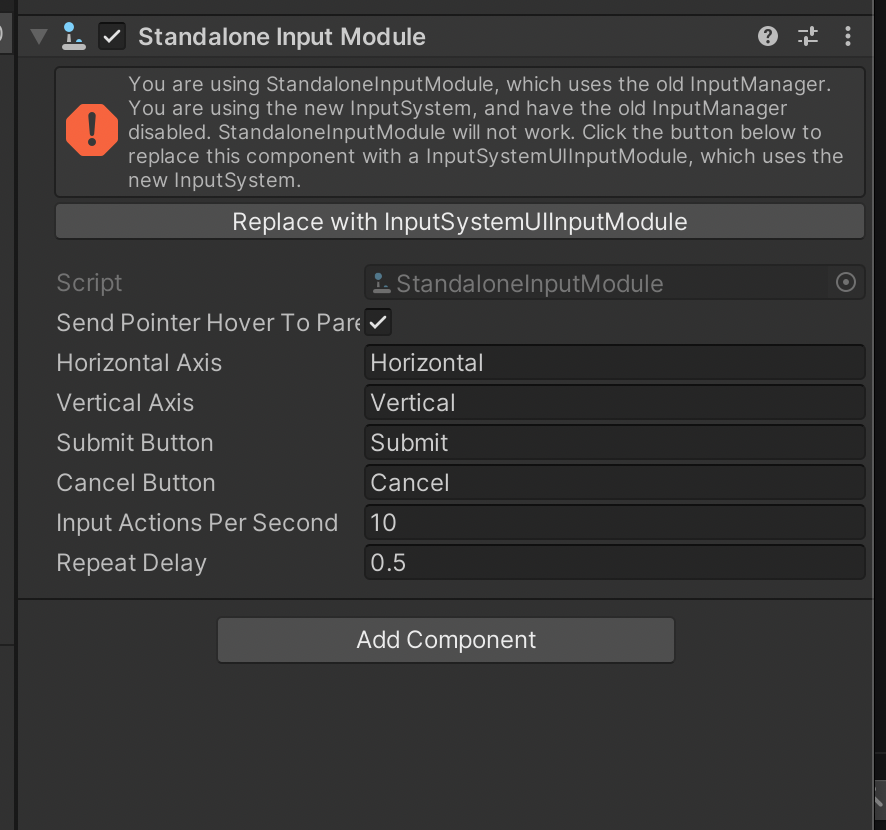
After that, you will notice that your script is not compiling anymore or your EventSystem GameObjects are throwing an
exception up.
Opening EventSystem GameObject in the inspector should reveal this component shown in the figure below.
Click the "Replace with InputSystemUIInputModule" buttons as told, and save the scene.
You must repeat this step for each scene you have an EventSystem GameObject.
First, you must create your enum to distinguish the keys within the code.
Each member of the enum will represent one action (= one key) within the game.
One enum should be used like a group of actions, e.g., there would be a SystemKeys enum, and
its members are Confirm, Back, Up, Down, Right, and Left.
If you have used New Input System in the past, the enum corresponds to an Action Map,
and its members to Actions for that map.
public enum SampleKeys
{
    Action,
    Rebind
}Now, you will create a class that extends KeySetting<T>.
KeySetting<T> is a Scriptable Object, so you will also need to create an asset menu for that.
Replace T with the enum you have created.
using InputManager.Domain;
using UnityEngine;

// This part creates an asset menu for you.
[CreateAssetMenu(fileName = "sample_key_settings", menuName = "Input Manager/Sample Key Settings Asset")]
// This is your Scriptable Object.
public class SampleKeySettings : KeySetting<SampleKeys>
{ }The default keybindings are stored as New Input System's asset.
If you haven't done so, go to Edit > Project Settings… > Input System Package and click Create settings asset.
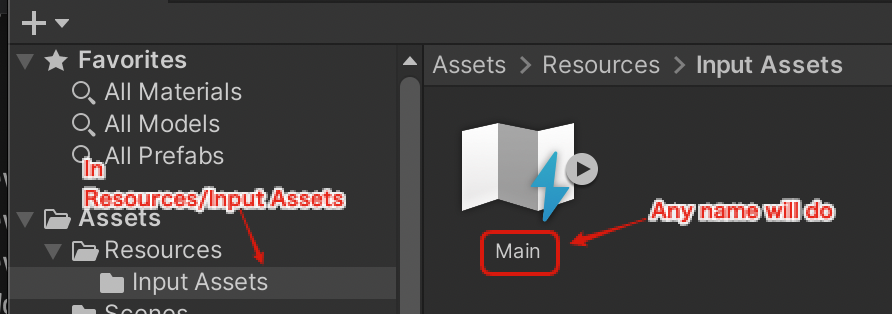
After that, create an Input Action Asset by (Right Click on Project Pane) > Create > Input Action.
You can name however you like, but it must exist in Resources/Input Assets folder.
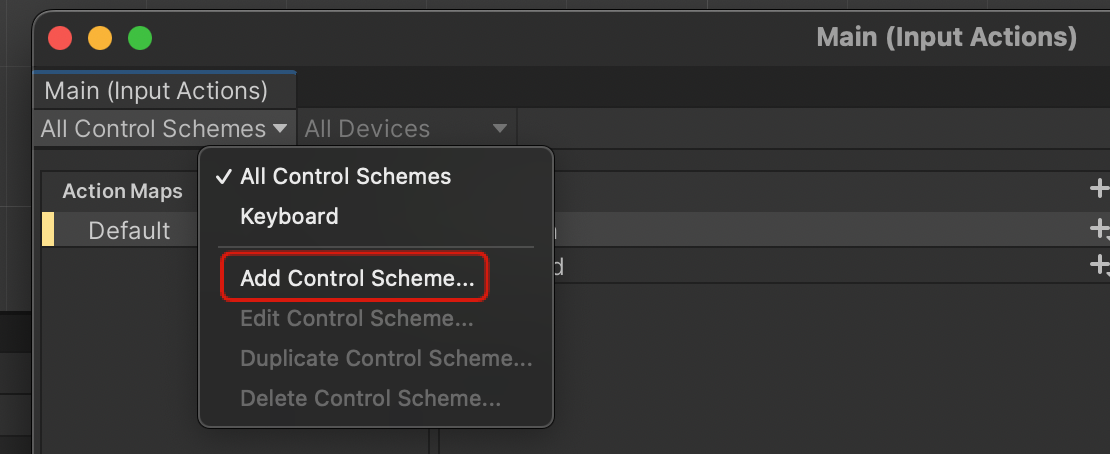
(Optional but recommended) Next, open this asset and create a control scheme.
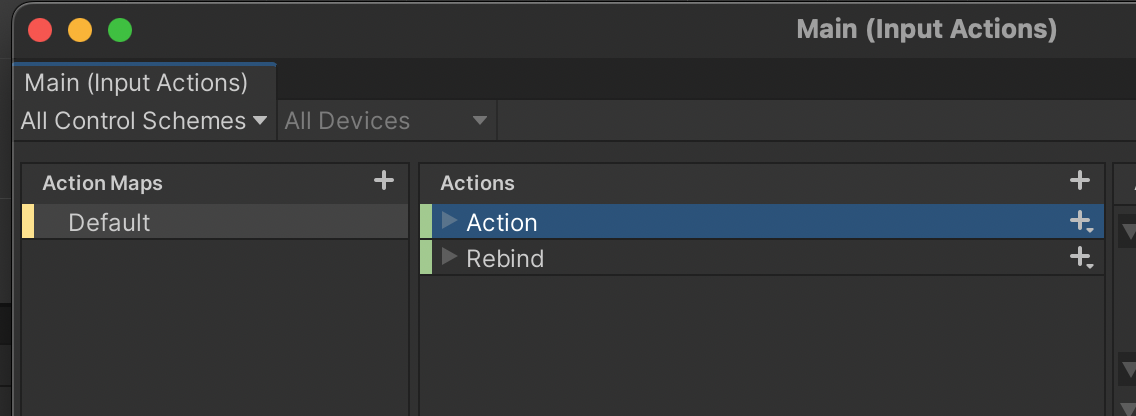
Now create an Action Map and assign Actions to it.
One Action Map is needed for one enum you have created
and same number of Actions as enum's members is needed.
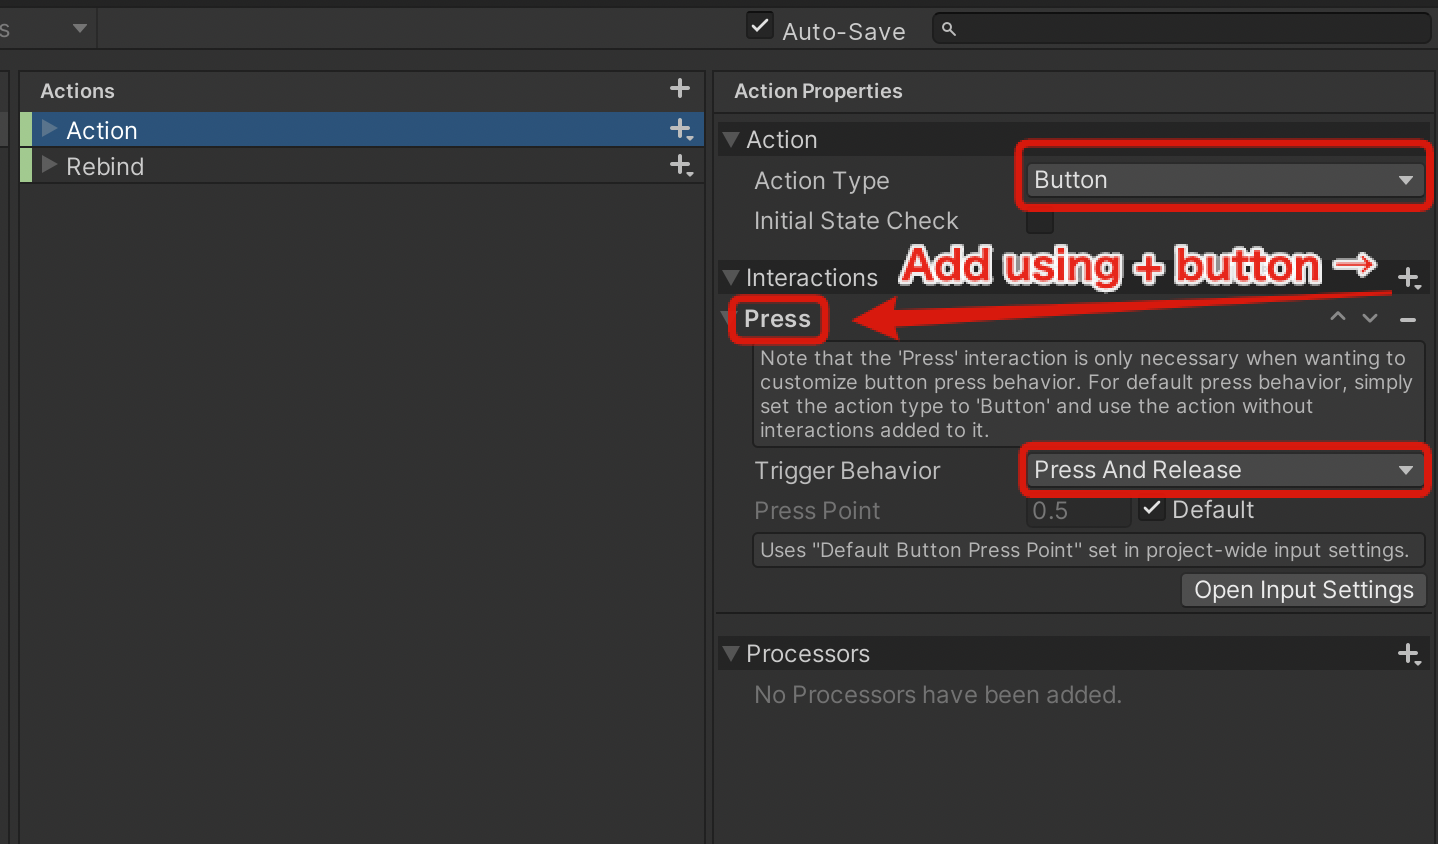
Next, for each action you made, you need to set the Action Type as Button and add Press interaction.
Its trigger behaviour must be Press And Release.
[NOTE] Failing to set these properties may lead to your keybinds not picked up correctly!
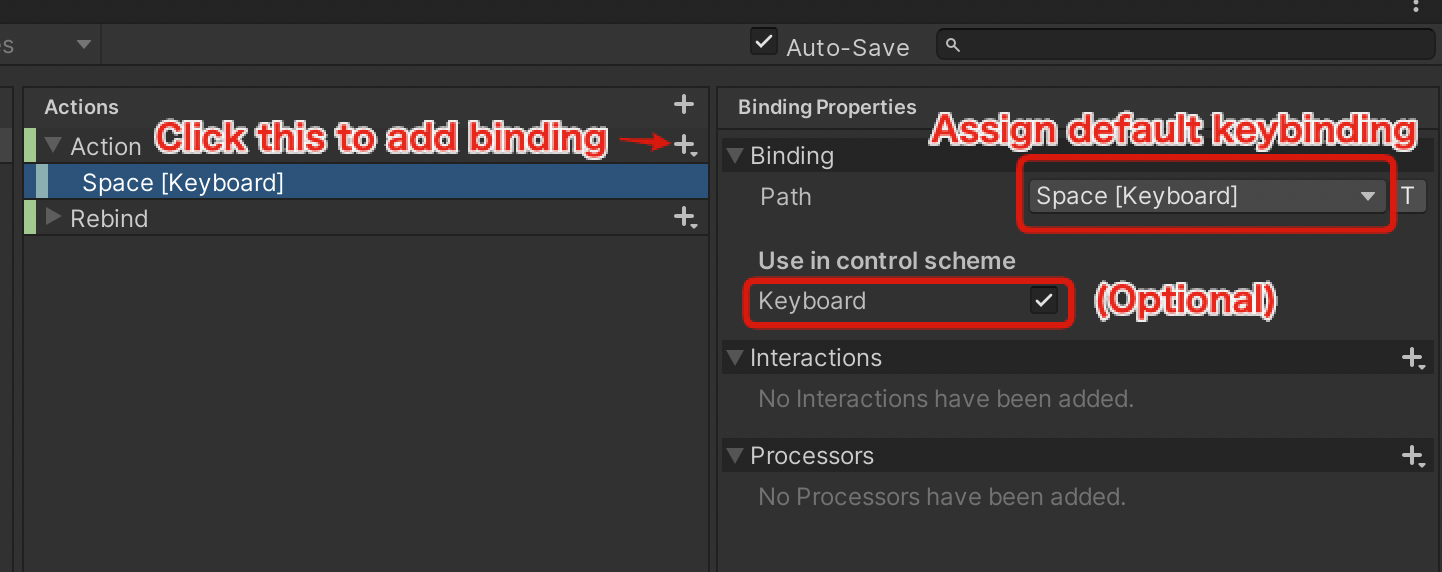
Finally, for each Action, add a binding. This is your default keybindings.
If you have added control schemes, assign the keys to the schemes as needed.
Back when you made your own KeySettings class, you have also created an asset menu.
Right-click the project pane, and go to Create > Input Manager > (Key Settings name here).
The final two part of the menu is governed by the menuName property of the KeySettings,
so you may encounter different menu structures.
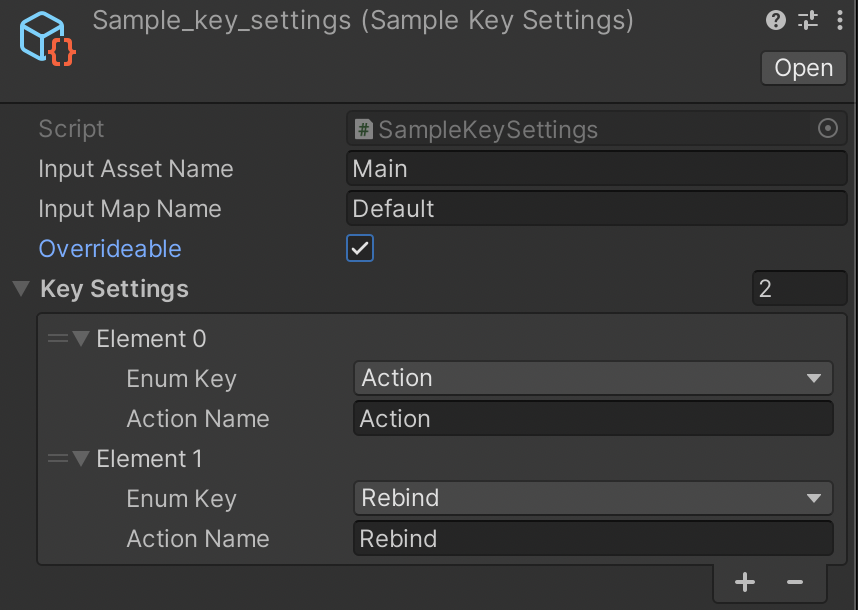
Opening the new asset with the inspector reveals this component:
| Property Name | What it is |
|---|---|
| Input Asset Name | The name of Action Input asset you made (Resource/Input Assets/<This part>.) |
| Input Map Name | The name of Action Map. |
| Overridable | If you want to make this key settings overridable (=rebindable,) set this to true. |
| Key Settings | Set the relation between an enum key and an Action. Action Name must match one in the Input Action Asset. |
Now you are ready to code! Here, we code a MonoBehaviour that can detect keydown events.
using InputManager.Domain;
using UnityEngine;

public class YourMB: MonoBehaviour {
    // Your InputManager should be put into the interface (IInputManager<T>)
    // where T is the enum you have created.
    private IInputManager<SampleKeys> _inputManager;

    // Put your key settings asset through Unity Editor.
    public SampleKeySettings keySettings;

    private void Start() [
        // Put your input manager instance with the key setting asset.
        _inputManager = new InputManager<SampleKeys>(keySettings);
        // Your keydown event listener must take your enum (in this case, SampleKeys. See OnKeyDown below.)
        _inputManager.AddOnKeyDownDelegate(OnKeyDown);
    }

    private void Update() {
        // THIS IS IMPORTANT! Without this, your input manager won't work!!
        _inputManager.CheckKey();
    }

    // This is your key down event listener. As stated before, it must take your enum.
    private void OnKeyDown(SampleKeys k) {
        switch (k) {
            case SampleKeys.Action:
                Debug.Log("Action key pressed!");
                break;
            case SampleKeys.Rebind:
                Debug.Log("Rebind key pressed!");
                break;
        }
    }
}
