-
Notifications
You must be signed in to change notification settings - Fork 3
Step 3. Prepare Kubernetes cluster for Amplify Central Service Mesh Agents
These steps are based on having a Linux client available and the required tools to manage an AWS EC2 instance.
This is required for secure communication between Amplify Central and the Service Mesh.
There are two Amplify Central Mesh Agents: the Service Discovery Agent (SDA) and the Config Synchronization Agent (CSA) which need to communicate with Amplify Central.
Also, In the next step, we will be deploying Istio and a Gateway where the API proxying will occur, the protocol used for the gateway can be HTTP or HTTPS if your intent is to create an HTTPS Gateway, follow the steps to create the Gateway certificate.
When the Amplify Central Mesh governance will be deployed on your kubernetes cluster, A Gateway will be deployed, used to provide access the services deployed within the Kubernetes cluster, to configure this Gateway, a DNS name is needed.
There are few options to create a DNS name (Pick one):
- Use a free Dynamic DNS like noip.com (it will be used in this tutorial)
- Buy or reuse a DNS name from a DNS provider like Godaddy, OVH ...etc.
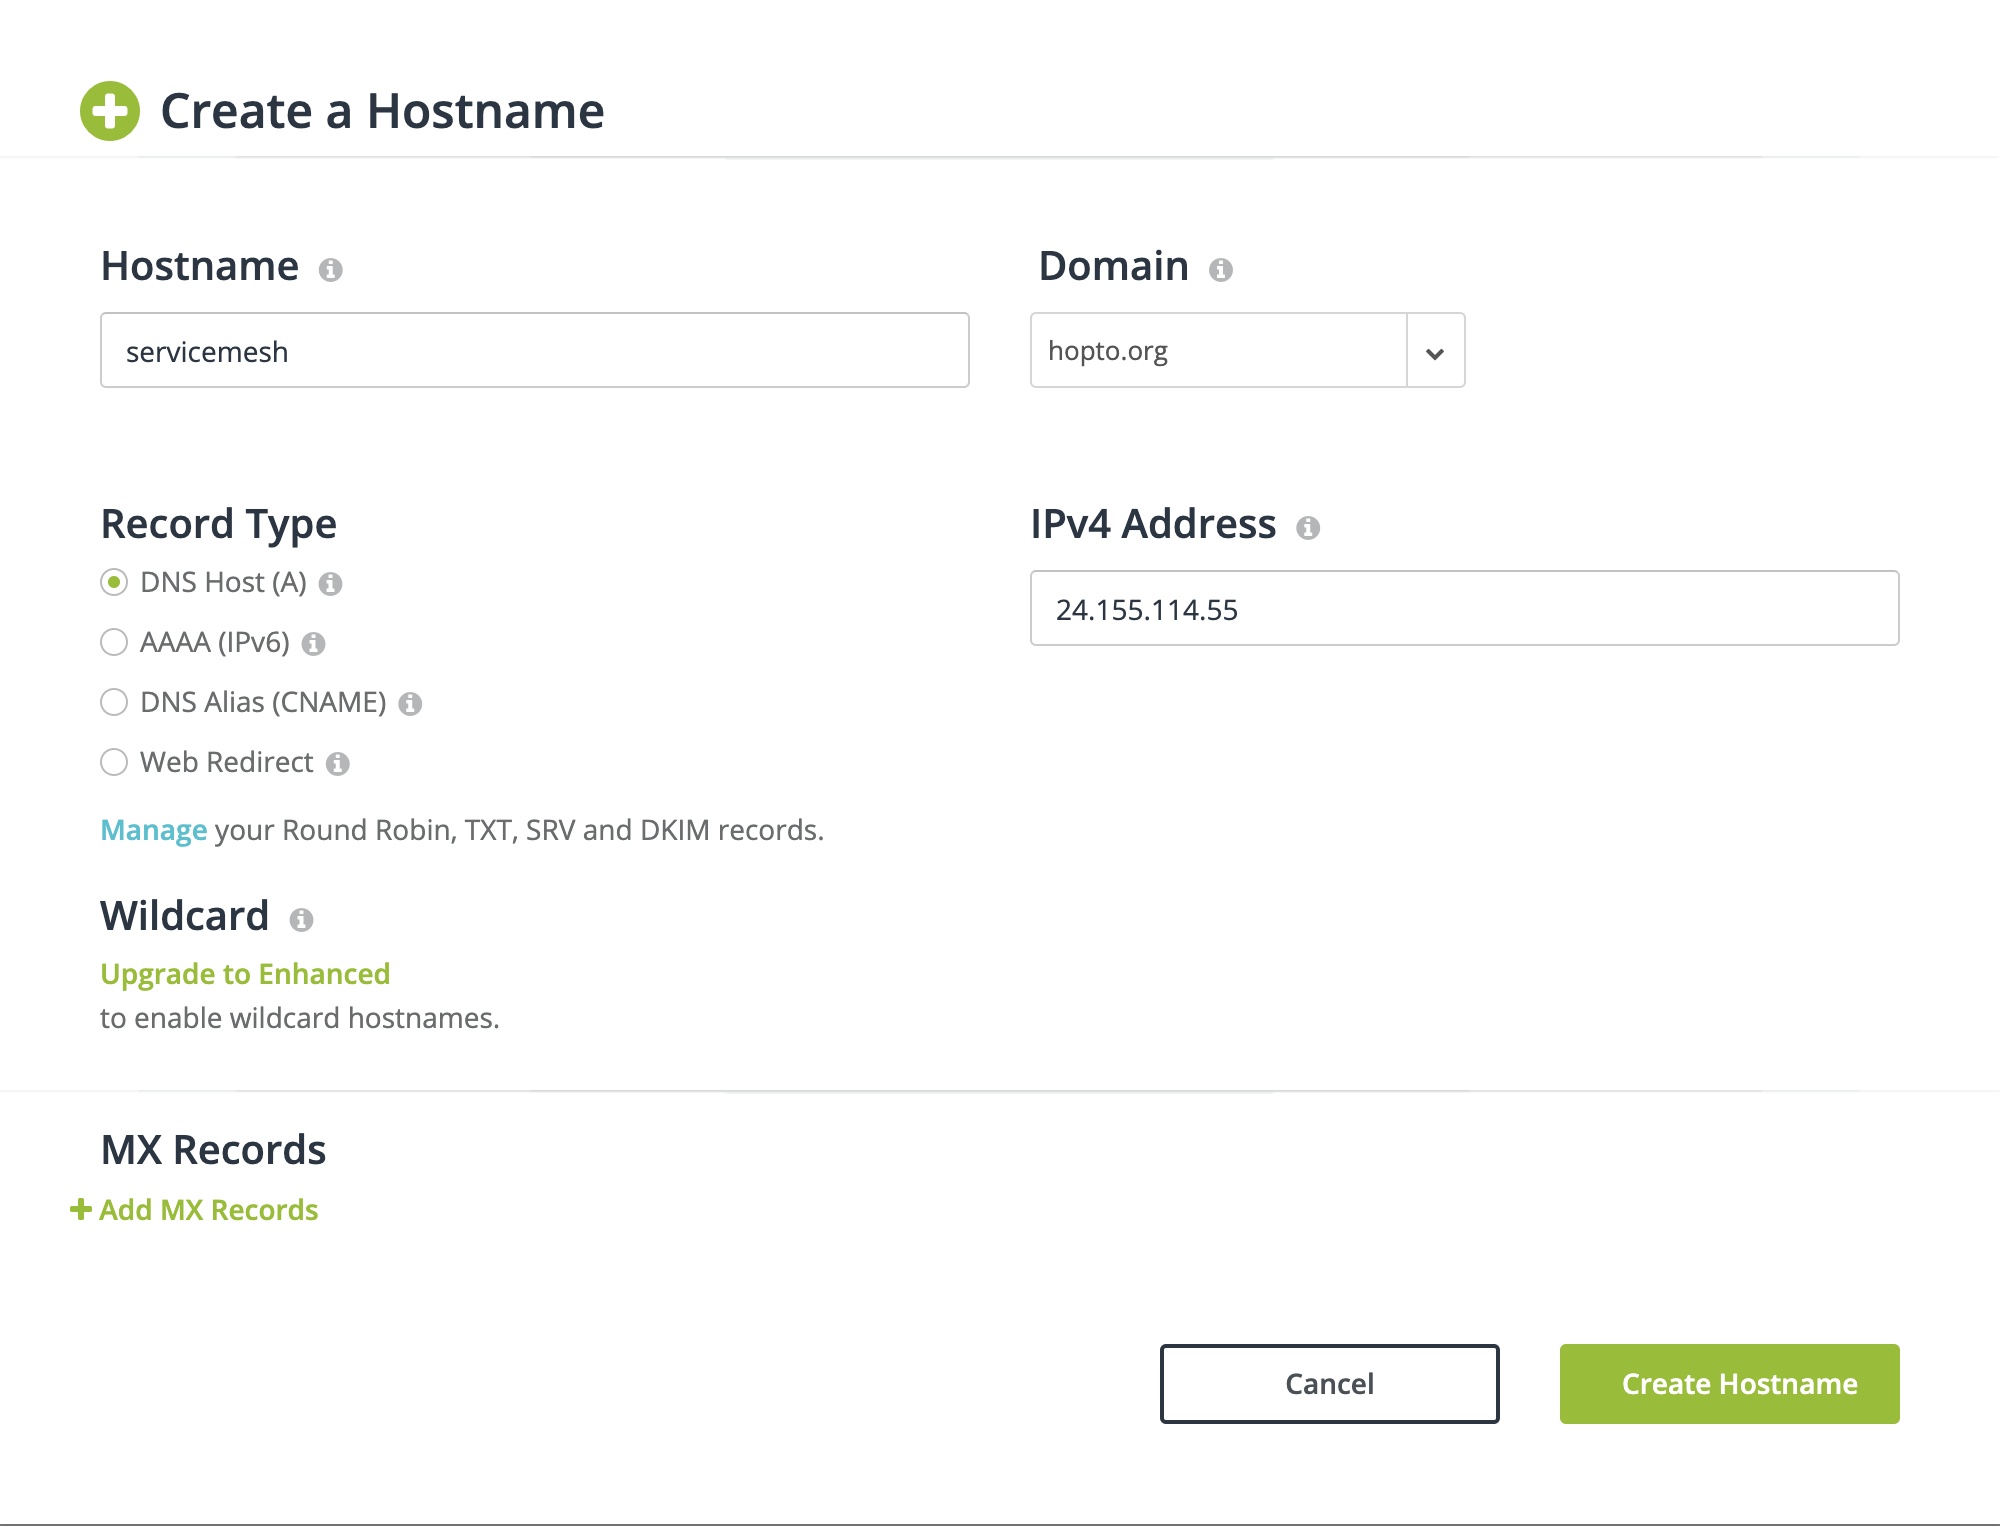
In the screenshot below, a free DNS entry was created at www.noip.com. For instructions on how to create a CNAME entry, refer to the Host Name Guide
Go to hostname -> Create Hostname Set the fields as shown in the image below. If you have access to a real domain, a sub-domain (CNAME) entry could be created using it instead.

Remember this DNS name as it will be needed later in this tutorial.
Note: If you expose an HTTP Ingress Gateway endpoint for your kubernetes cluster, you will not be able to directly "TryIt" from the AMPLIFY Central UI later. Most modern browsers will fail the HTTPS to HTTP call with a CORS error, and not give any option to override or ignore it. You will still be able to directly curl to your endpoint (as we point out in the step 4 details).
Istio Gateway will be deployed as an Ingress Gateway in istio-system namespace by default, therefore the Ingress Gateway secret containing the Gateway CA certificate needs to be deployed in the same namespace, Let's create a namespace called istio-system:
kubectl create namespace istio-system #if not existingFor securing the Gateway we will need a CA certificate for it, there are few ways to do that (Pick one):
-
Buy a CA certificate from the DNS providers; if you bought a DNS name from a DNS provider like godaddy.com or similar, they may offer an option to buy a CA for that host (Ingress Gateway).
-
You can generate a Self Sign certificate, this has some limitations, browsers may throw a security issue when the target host (Ingress Gateway) is secured using a self-sign certificate.
To create a self-sign certificate for your Ingress Gateway, you can use the provided tooling by skipping to the step 3.3 Preparation to store the Certificates and Private Key Pairs
or you can use this command and follow the manual steps:
In this tutorial we replace <PUT_YOUR_GATEWAY_HOST> by servicemesh.hopto.org created using noip.com in the command below
openssl req -x509 -nodes -days 365 -newkey rsa:2048 -keyout ca-selfsigned.key -out ca-selfsigned.crt -subj "/C=US/ST=Phoenix/L=Phoenix/O=Global Security/OU=Axway RD/CN=<PUT_YOUR_GATEWAY_HOST>"
Important, you will have to create a secret with a specific name, the rule is the following: first two parts of your gateway host attached with a '-' and ends with'-certs', examples:
- for a host example.com, the cert name will be example-com-certs
- for a host foo.example.com, the cert name will be foo-example-certs
- for a servicemesh.hopto.org, the cert name will be servicemesh-hopto-certs
Run the following command to persist the Ingress Gateway CA cert as a kubernetes secret.
In this tutorial we replace <PUT_YOUR_SECRET_NAME> with servicemesh-hopto-certs
kubectl create secret -n istio-system tls <PUT_YOUR_SECRET_NAME> --cert /path/to/your/CA/file --key /path/to/your/CA/private/key -o yaml
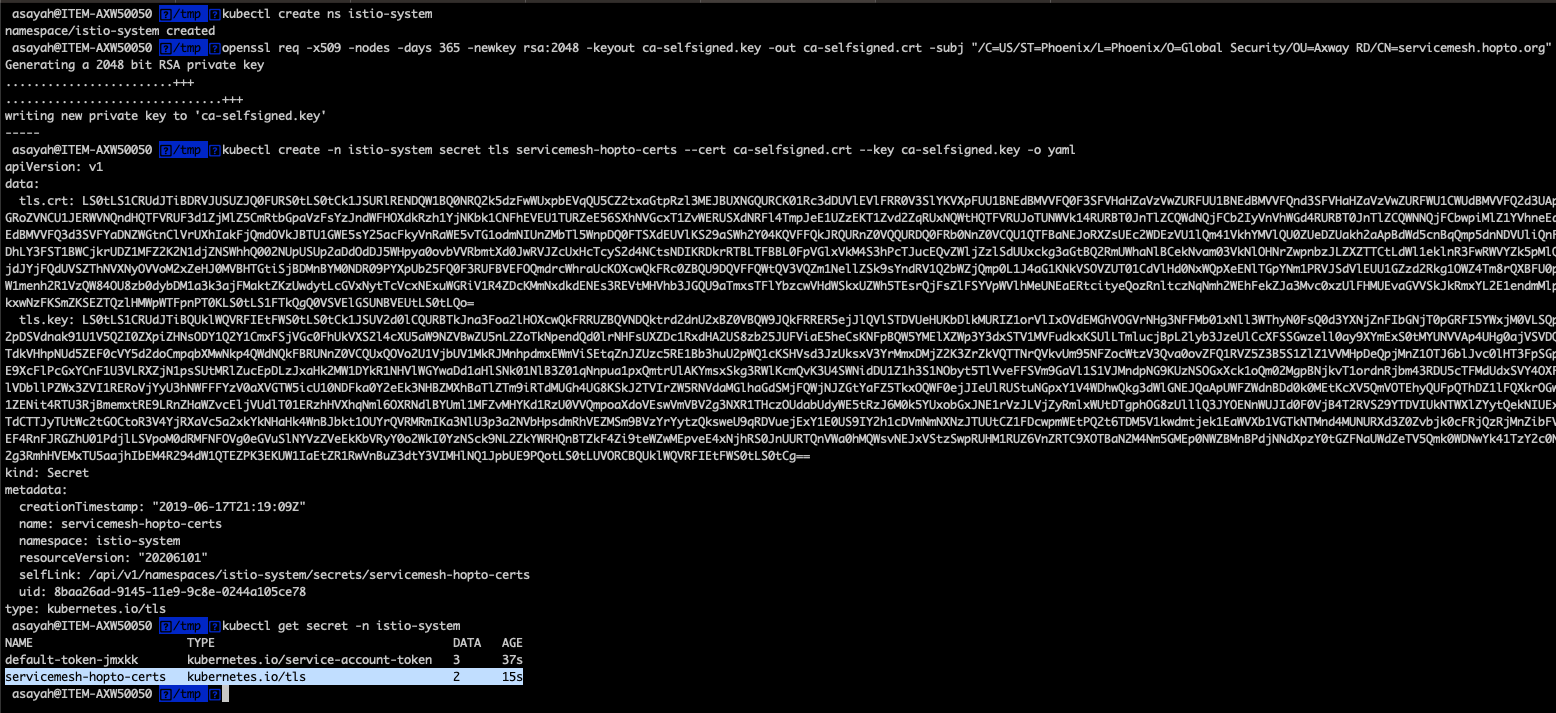
if created successfully, the command line should look as follows:

Istio Gateway will be deployed as an Ingress Gateway in istio-system namespace by default, therefore the Ingress Gateway secret containing the Gateway CA certificate needs to be deployed in the same namespace, Let's create a namespace called istio-system:
kubectl create namespace istio-system #if not existingThe secret will be persisted in the namespace where the APIC agents will be deployed, by default apic-control. Let's create a cluster namespace for Amplify Central called apic-control using this command:
kubectl create namespace apic-control #if not existingThis tutorial provides two way to create the needed certificates for the mesh agents, using APIC Init helm chart or using the manual steps (Pick one). If you intent is to use the manual steps, go to the next section 3.3.2 Manual Steps
The following helm chart allows you to create the requested Private Key Pairs for the mesh agents and optionally create a CA self-sign certificate for the Ingress Gateway if needed:
If you specify '--set gatewayHost=' (Optional), a self-signed certificate will be created for your gateway Host
helm install https://github.com/Axway/Axway-Amplify-Mesh-Init/releases/download/1.1/Axway-Amplify-Mesh-Init-1.1.tar.gz --set gatewayHost=servicemesh.hopto.orgif successful, the expected output will be:

Congratulations on completing the creation of the SDA and CSA public certificates and private key pairs.
Here is a link to Step 4
If successful the command line output will look as follows:
The files names of the Certificates and the Private keys are identical so it is suggested that we create sub-directories named csa and sda as part of the preparation work. From the terminal of a Linux client (e.g Ubuntu Linux), please type the following Linux commands:
mkdir csa sda
Lets switch to the SDA sub-directory and create the Private Key with the following commands
cd sda
openssl genpkey -algorithm RSA -out private_key.pem -pkeyopt rsa_keygen_bits:2048
If created successfully, the command line should look as follows:
Lets create the SDA Public Key certificate with the following command
openssl rsa -pubout -in private_key.pem -out public_key.der -outform der && base64 public_key.der > public_key
If created successfully, the command line should look as follows:
Lets create the SDA Kubernetes Secret with the following command. Note that the Kubernetes secret needs to be named sda-secrets.
kubectl create --namespace apic-control secret generic sda-secrets --from-file=publicKey=public_key --from-file=privateKey=private_key.pem --from-literal=password="" -o yaml
If created successfully, the command line should look as follows:
Lets switch to the CSA sub-directory and create the Private Key with the following command
cd ../csa
openssl genpkey -algorithm RSA -out private_key.pem -pkeyopt rsa_keygen_bits:2048
If created successfully, the command line should look as follows:
Lets create the CSA Public Key certificate with the following command
openssl rsa -pubout -in private_key.pem -out public_key.der -outform der && base64 public_key.der > public_key
If created successfully, the command line should look as follows:
Lets create the CSA Kubernetes Secret with the following command. Note that the Kubernetes secret needs to be named csa-secrets.
kubectl create --namespace apic-control secret generic csa-secrets --from-file=publicKey=public_key --from-file=privateKey=private_key.pem --from-literal=password="" -o yaml
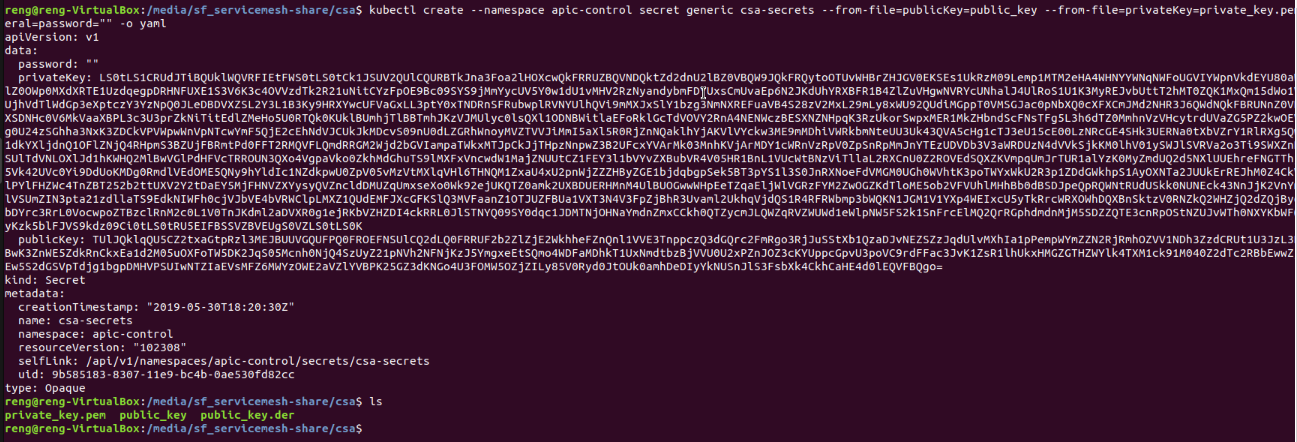
If created successfully, the command line should look as follows:
Congratulations on completing the creation of the SDA and CSA public certificates and private key pairs.
Here is a link to Step 4


